
In my previous blog post, I tried to edit an item journal using Edit in Excel. In this blog post, I will try to edit Physical Inventory Journal in Edit in Excel. To conclude, we can use it only under specific conditions.
More specifically, only the first batch name is available by sorting the batch names in ascending order. This behavior seems to be common to all journal pages that do NOT have an Edit in Excel button.
Hey come on! how are we supposed to use the Edit in Excel feature if there is no Edit in Excel button? Don’t worry, you can do it if you follow the steps below. In this post, I’ll explain how to do it and the restrictions (strange behavior).
1. how to user Edit in Excel on a page without Edit in Excel
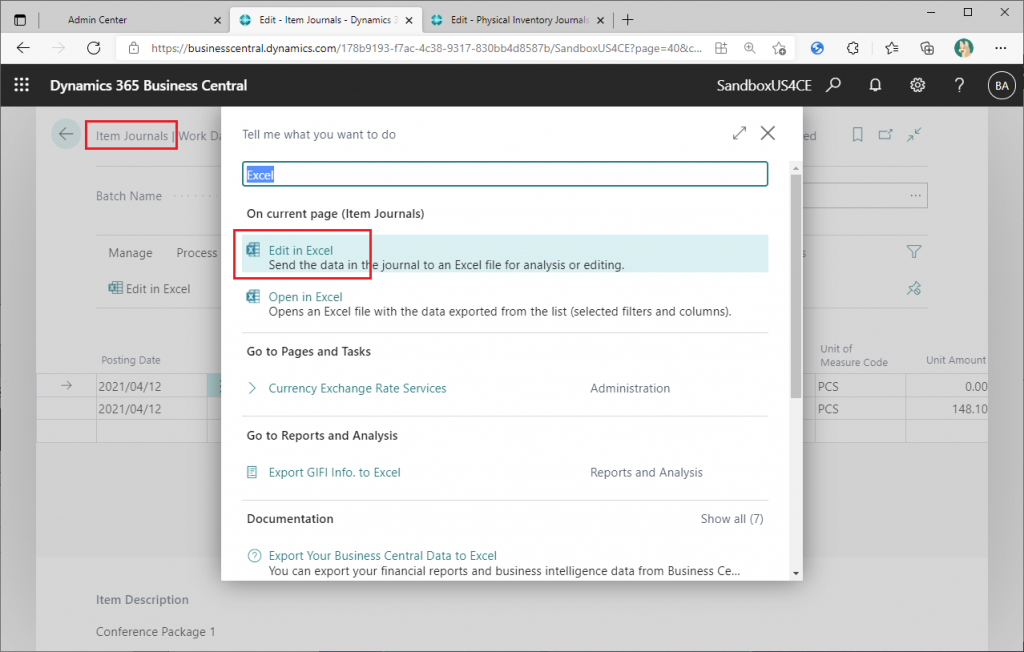
The Item Journal has an Edit in Excel button, which can be found on the Item Journal page, or by searching for ‘Excel’ using search icon, ‘Edit in Excel’ will be displayed.
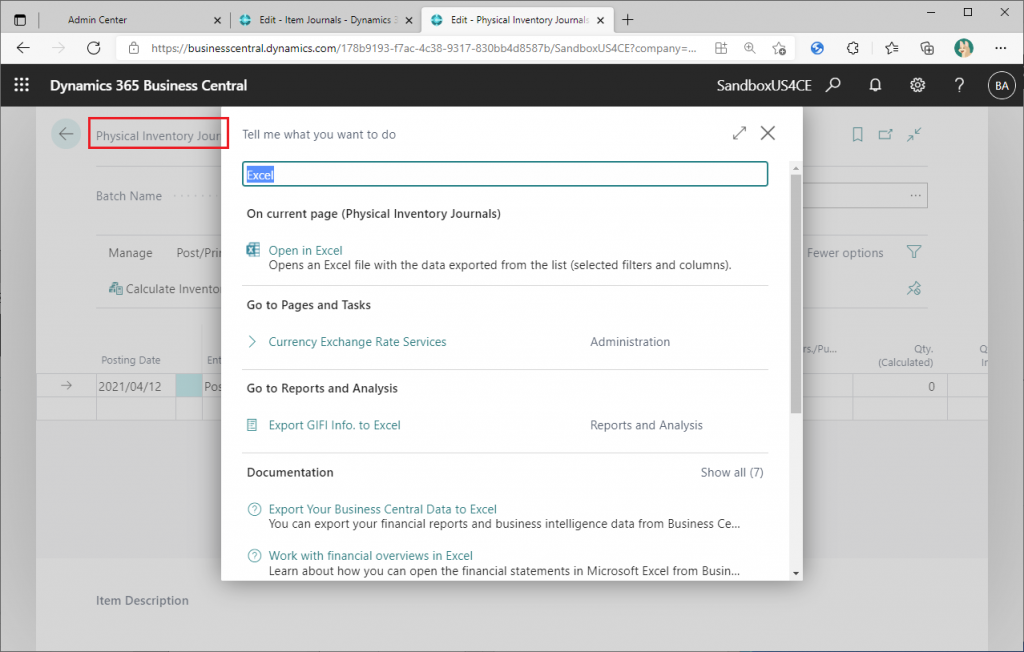
On the other hand, the Physical Inventory Journal does not have an Edit in Excel button. It is not displayed even if you search for it with key word ‘Excel’.
To use Edit in Excel with an inventory journal without an Edit in Excel button, follow the steps below to create an Excel file.
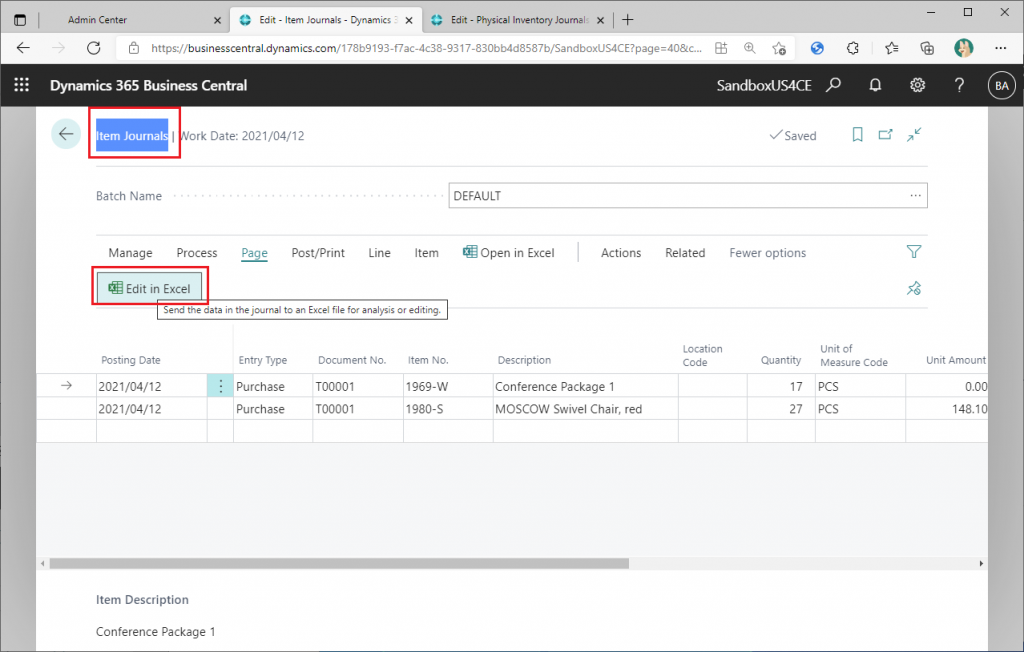
First, on the page with Edit in Excel existing, click the Edit in Excel button to download Excel. In this case, I’m using the Item Journal, but theoretically, other pages, such as the Customer List page, should be fine.
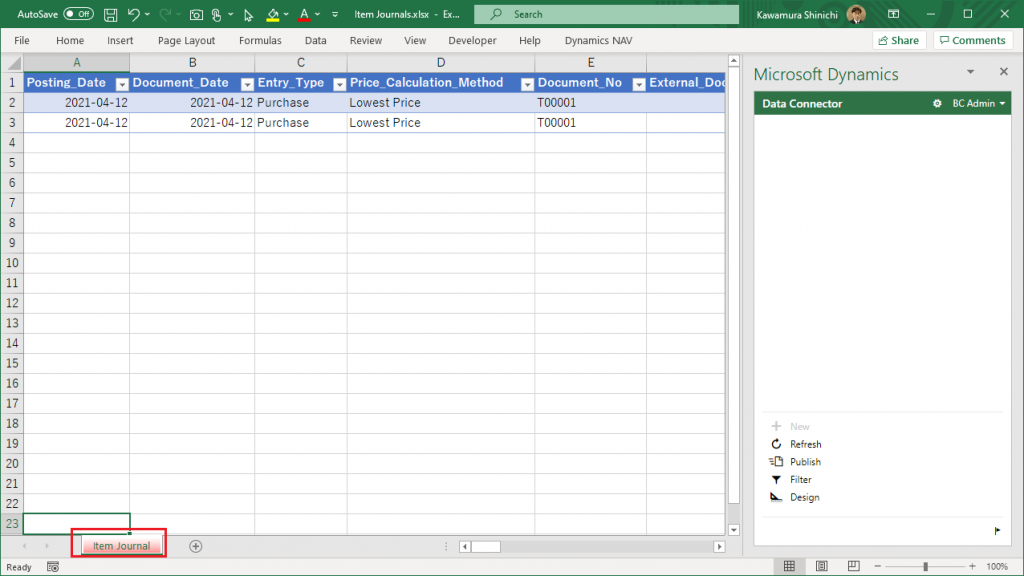
Open the downloaded Excel file.
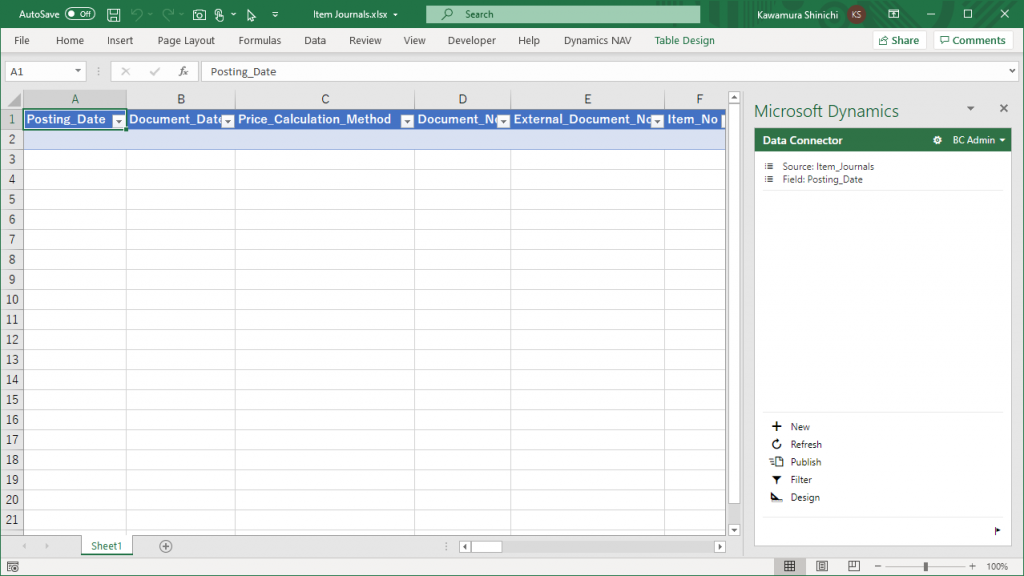
The data on the Item Journal is displayed. This sheet is not used, so we will rename it. (I also changed the color, but you don’t need to.)
I will enable you to edit the data in the Physical Inventory Journal in this Excel book. In preparation, go to Web Service function.
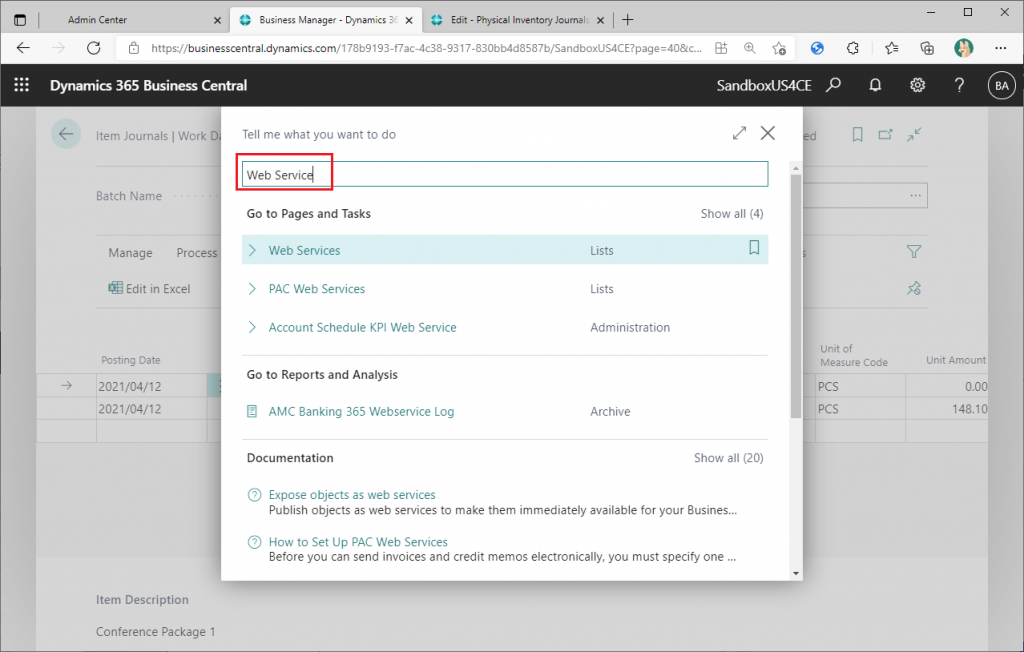
Click on the ‘+New’ button to create a new Web Service.
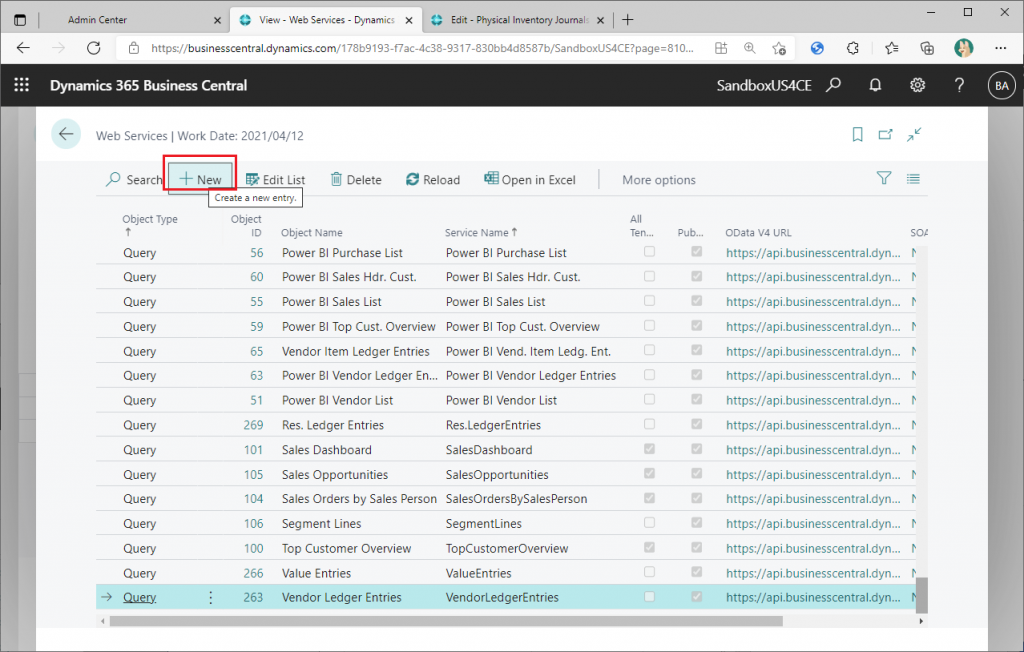
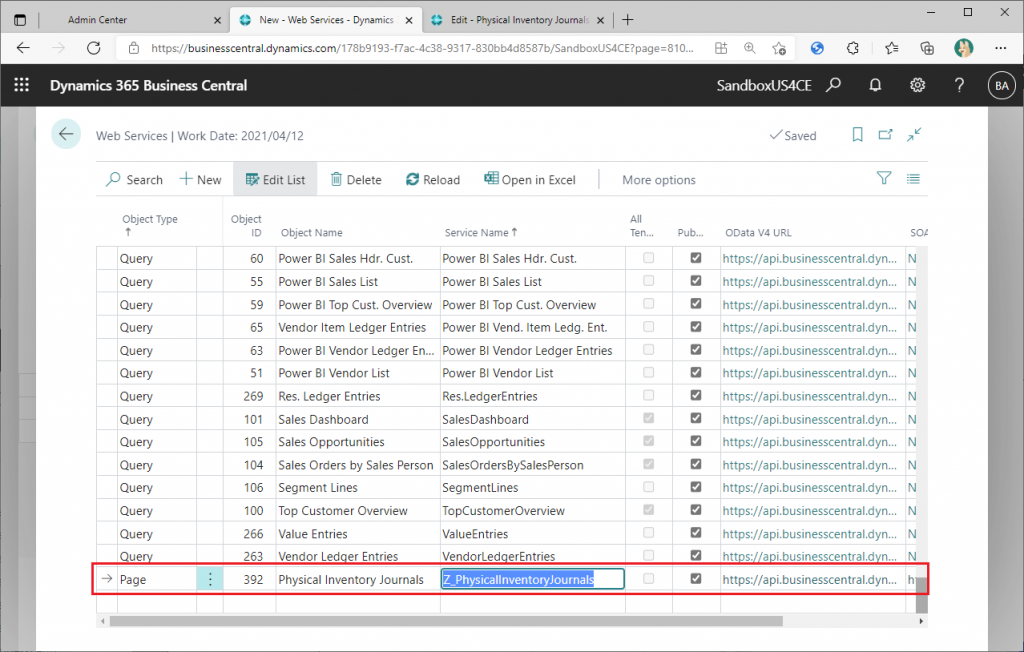
Add a new web service of PageID:392(Physical Inventory Journals) to the list. I added ‘Z_’ as a prefix to the service name like ‘Z_PhysicalInventoryJournals’, so that it is easy to search later.
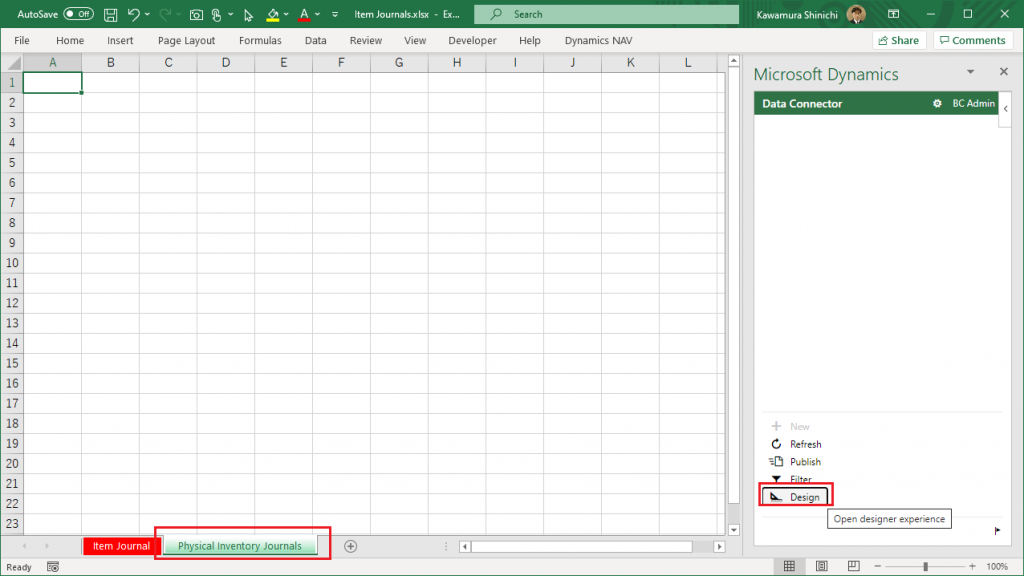
Go back to the Excel. Add a new sheet and change the sheet name to ‘Physical Inventory Journals’. Then click the Design button.
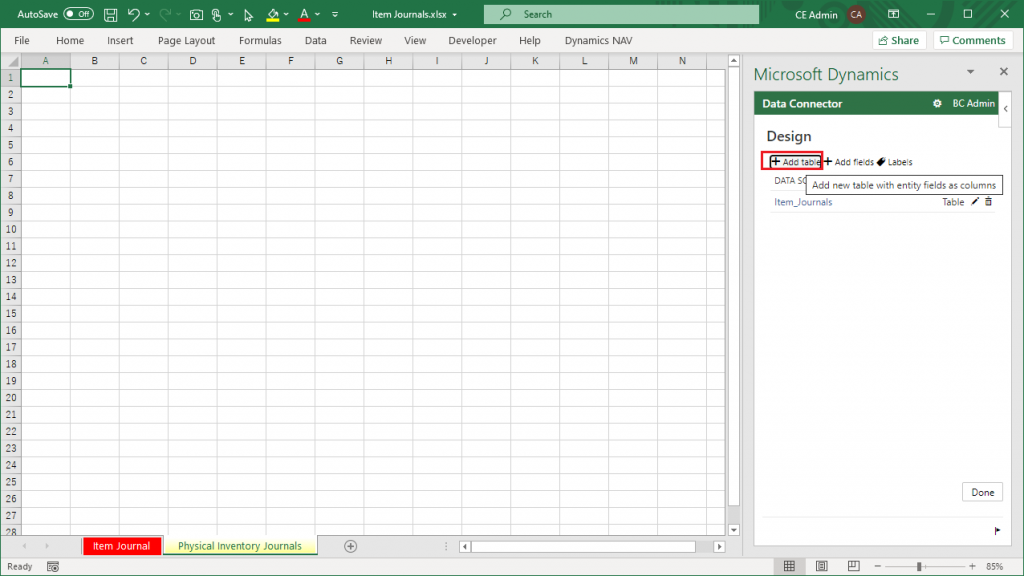
Click on the ‘+Add Table’ button.
Specify the Web Service ‘Z_PhysicalInventoryJournals’ that you just added as the Data Source.

Click ‘Next’ button.

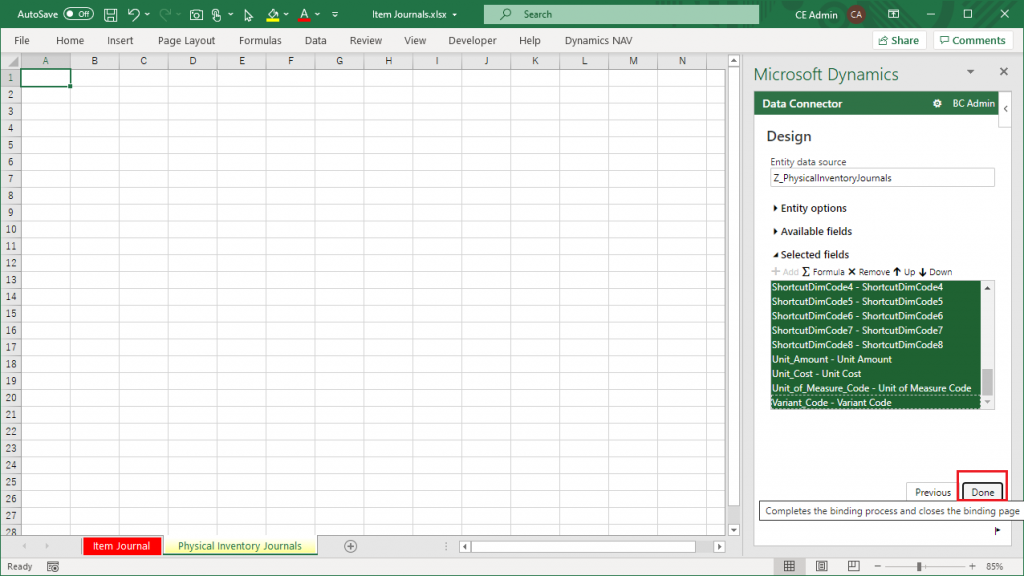
Now that the data source has been specified, the next step is to specify the fields to be output. For now, select all fields and click the ‘+Add’ button.
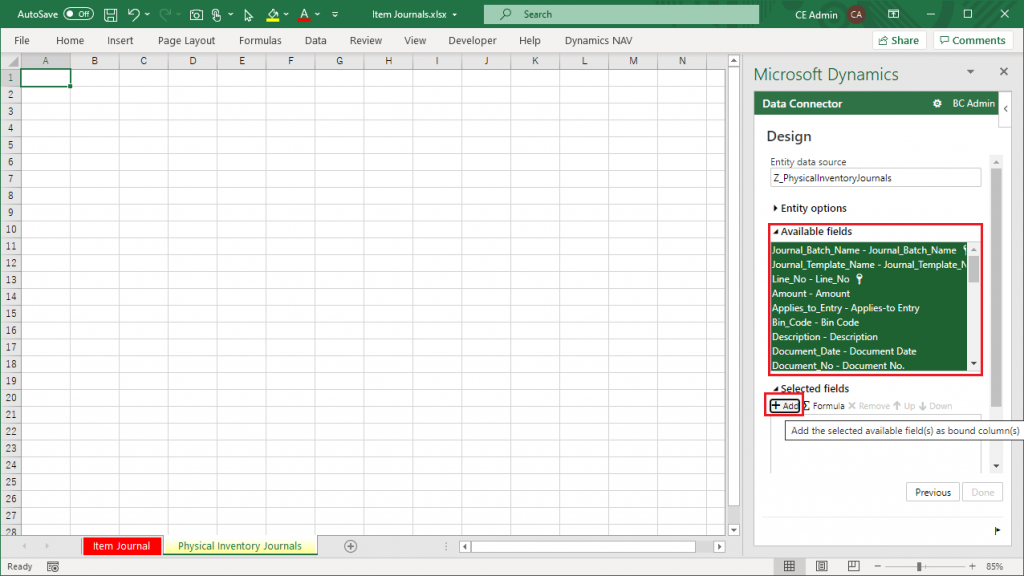
All items are now selected. Click ‘Done’ button.
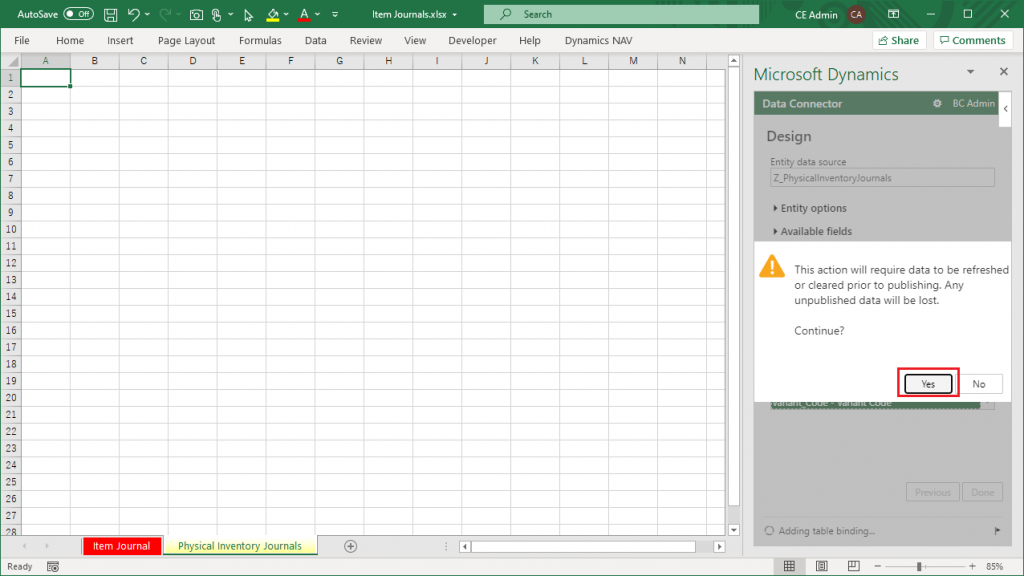
You will get a warning that the data in the current sheet may disappear as you fetch the data and update the Excel sheet. Since there is no data on the sheet and it doesn’t matter if it disappears, select Yes.
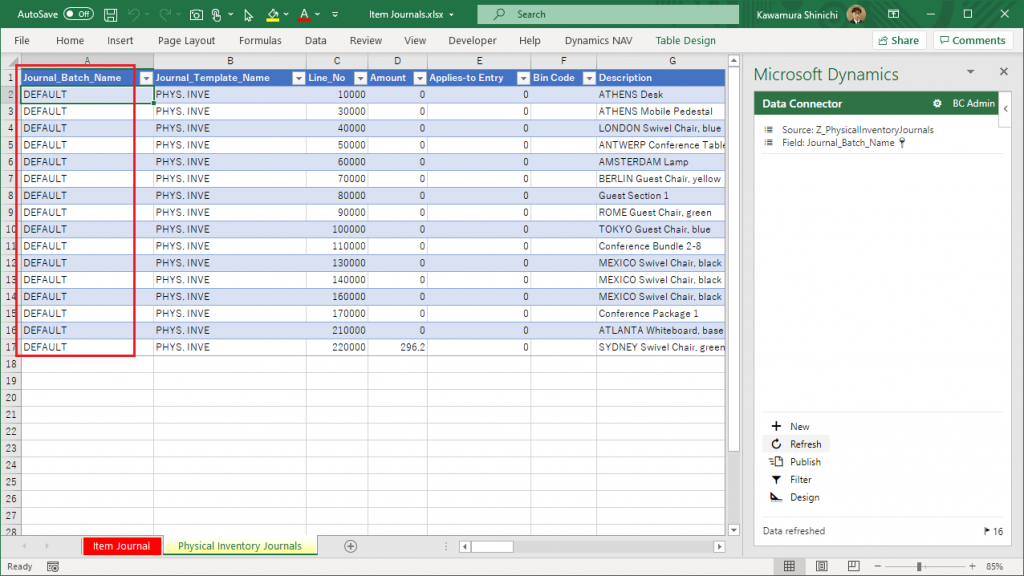
The sheet is now refreshed as shown. The Physical Inventory Journals’ fields are set on the first line.
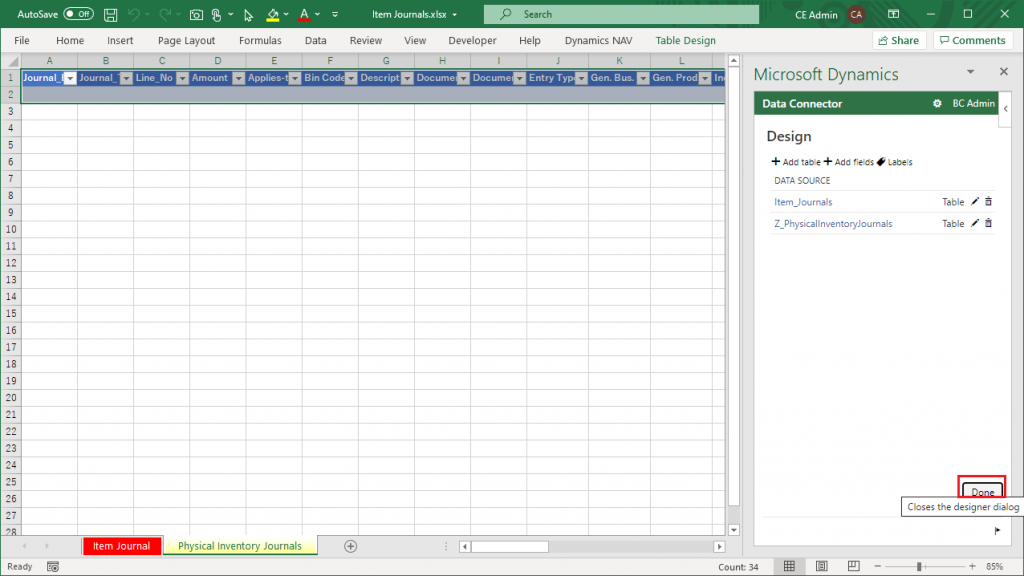
You have now completed the Edit in Excel sheet for the Physical Inventory Journal page.
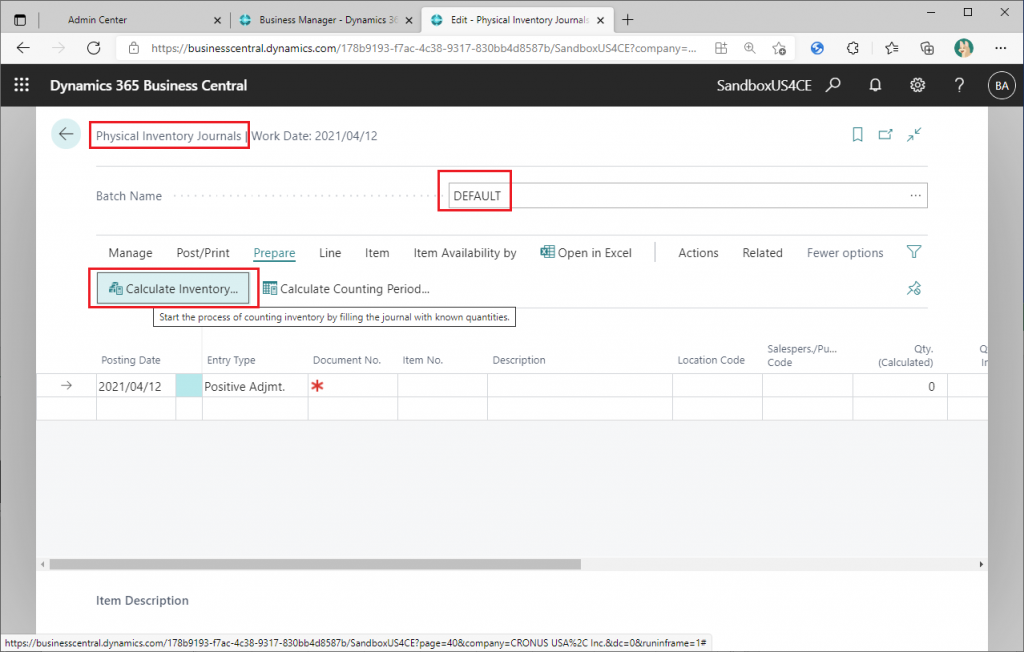
Let’s try to see if we can update the data. Go back to the Physical Inventory Journals and select the batch name ‘Default’. (By default, Cronus will only have the DEFAULT batch, so delete it if you have other batches because that might not work well.)
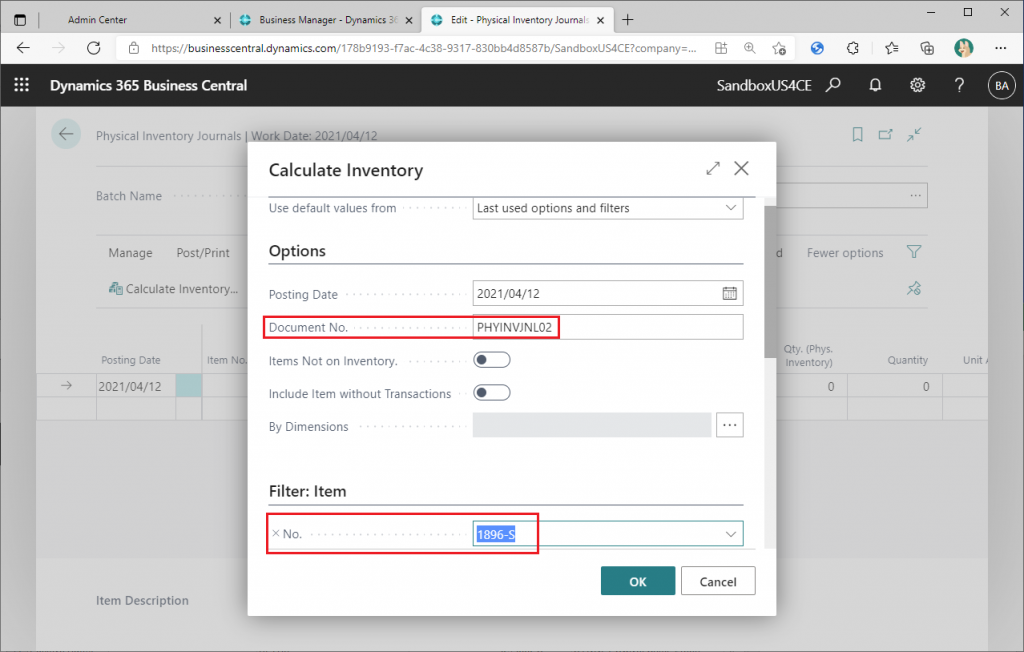
Then click on the ‘Calculate Inventory’ button to create lines. This is a function that calculates the logical inventory based on the Item Ledger Entries and creates lines in Physical Inventory Journals.
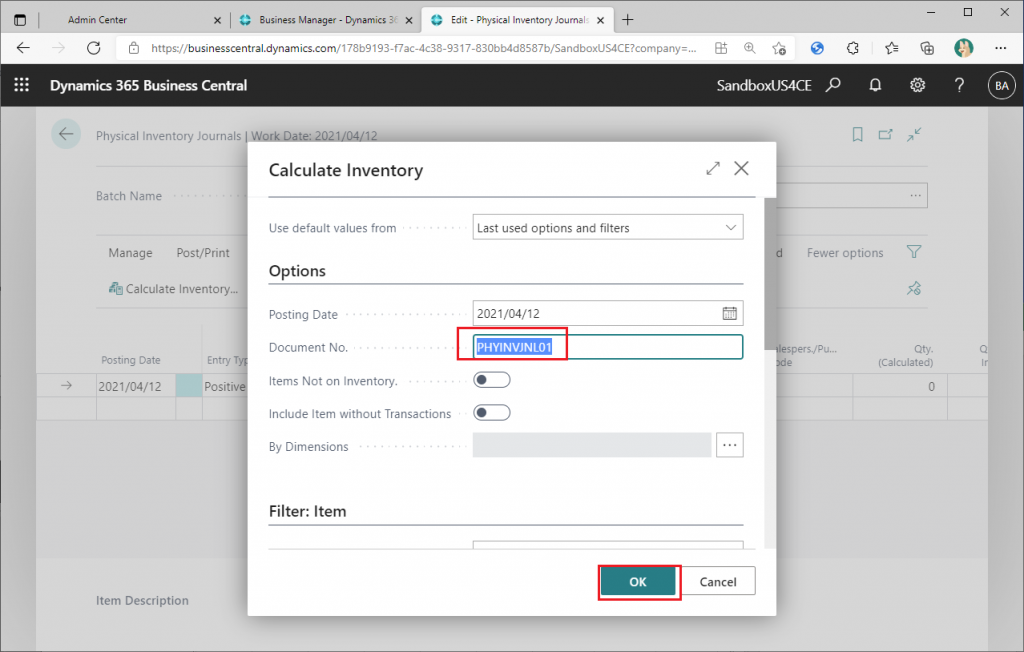
Specify some document number and click OK.
In the initial data of Cronus, journal lines should be created as shown below. Note that there are many more lines, which can be seen by scrolling up.

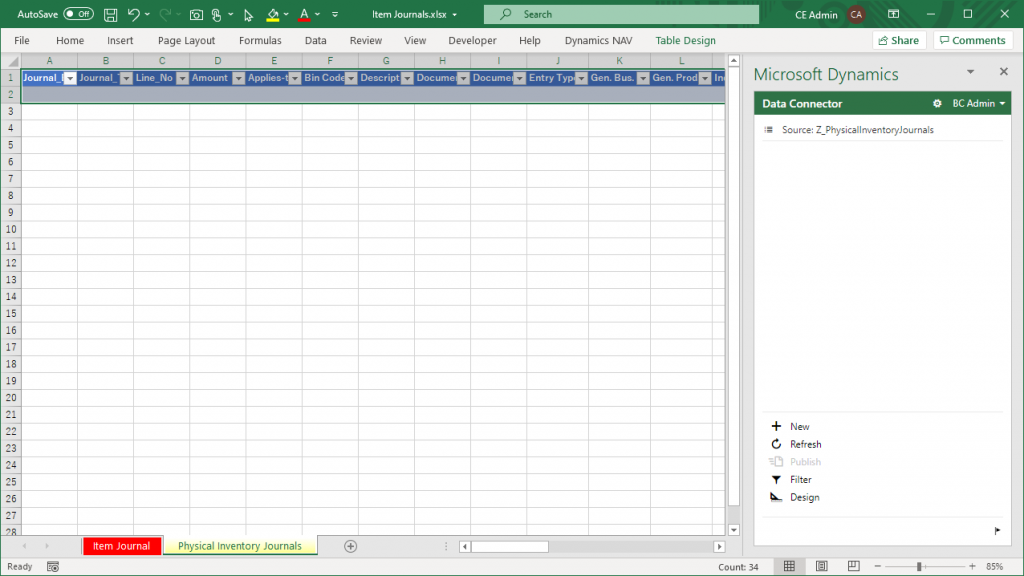
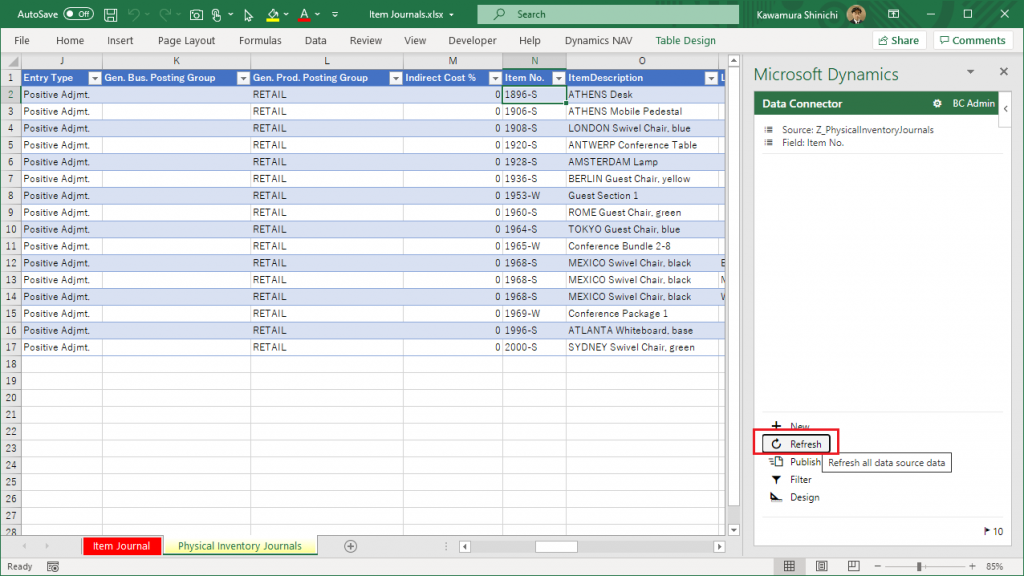
Go back to the Edit in Excel sheet of the Physical Inventory Journals and click the Refresh button.
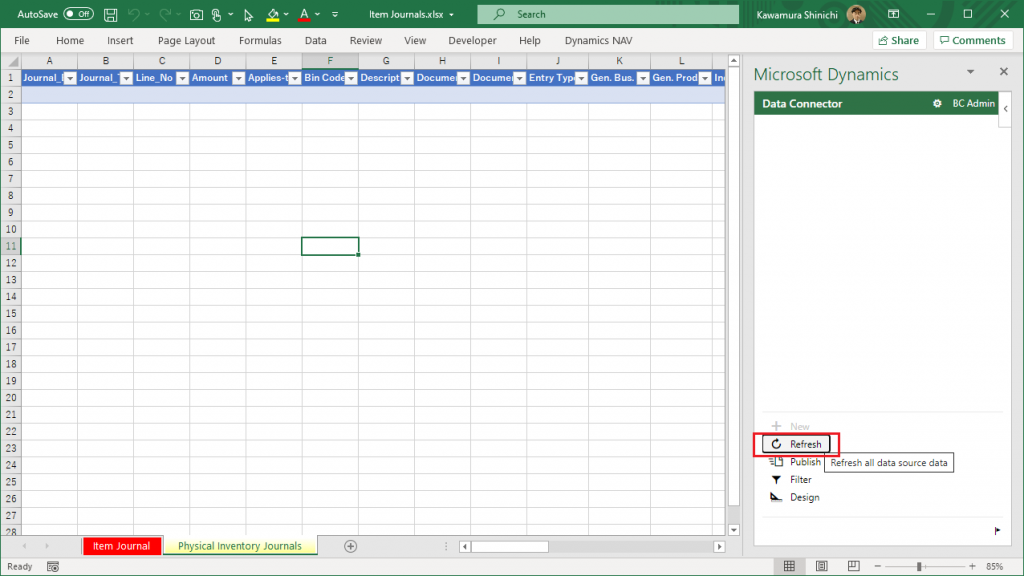
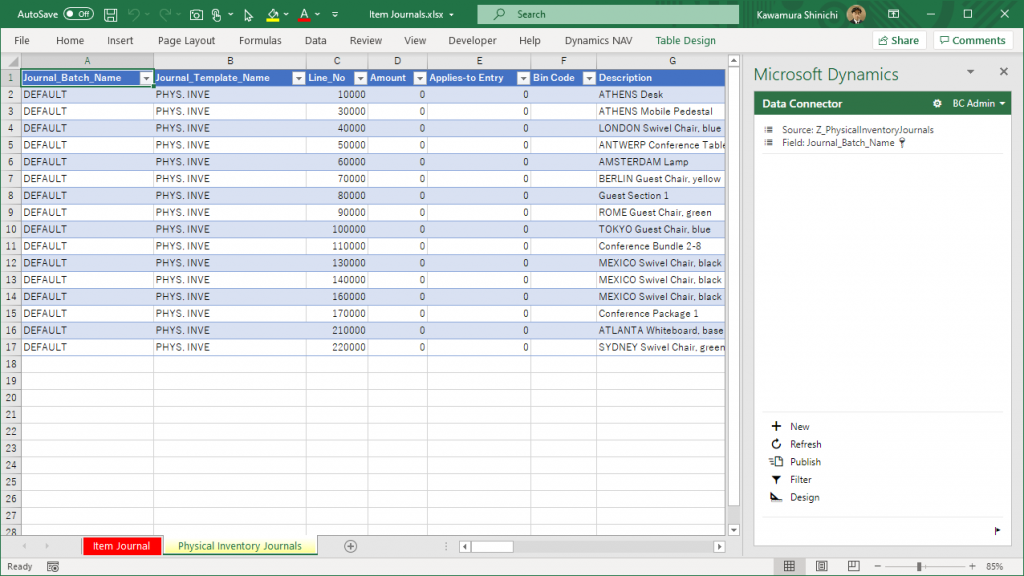
Then, the data that were created in the Physical Inventory Journal will be loaded.
Change the quantity to try it out and click the Publish button.
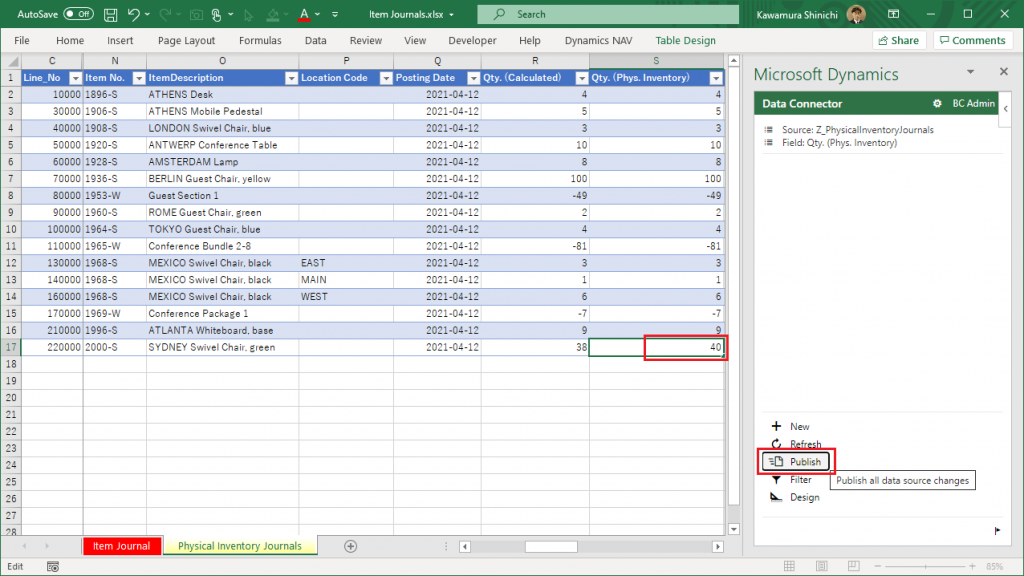
When you return to the Physical Inventory Journal, you will see that the quantity has been changed.

As you can see, even if a page does not have Edit in Excel button, you can use Edit in Excel by adding the page number in Web Service and adding Excel sheet with data source defined on web service list page. You can look up the page ID by pressing Ctrl+Alt+F1 on the target page.
2. Restrictions on using Edit in Excel feature on a page without Edit in Excel button
There is a “restriction” when using Edit in Excel on a journal page that does not have an Edit in Excel button. (I think it’s not a limitation, but bu….. a strange behavior…).
The restriction is that if there are multiple batch names, only the first batch name can be processed by sorting in ascending order.
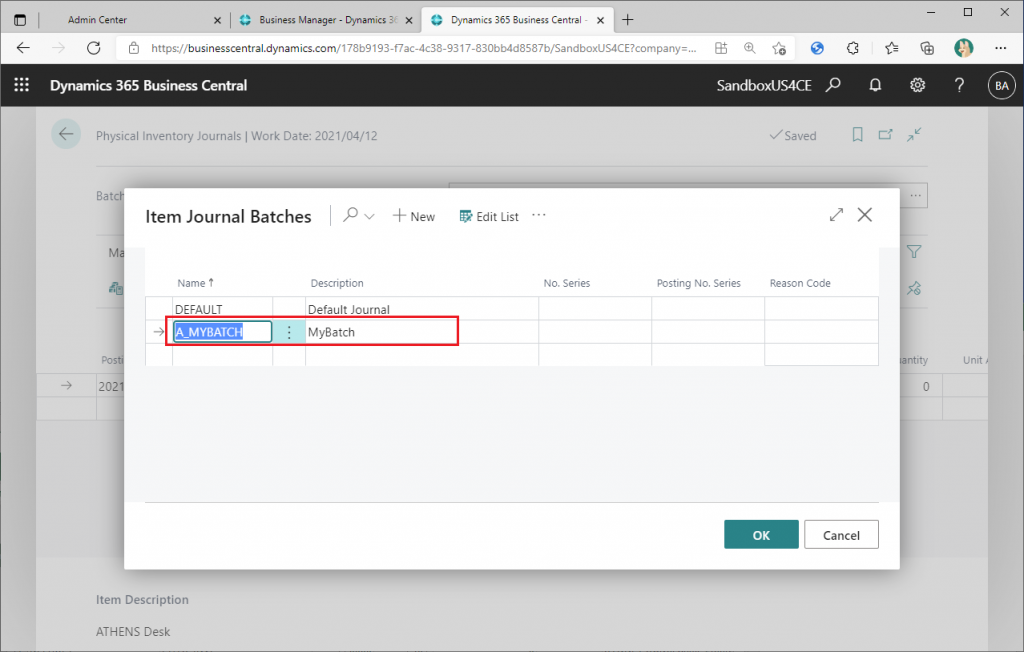
Let’s give it a try. Add a batch in the item journal (Physical Inventory Journals).
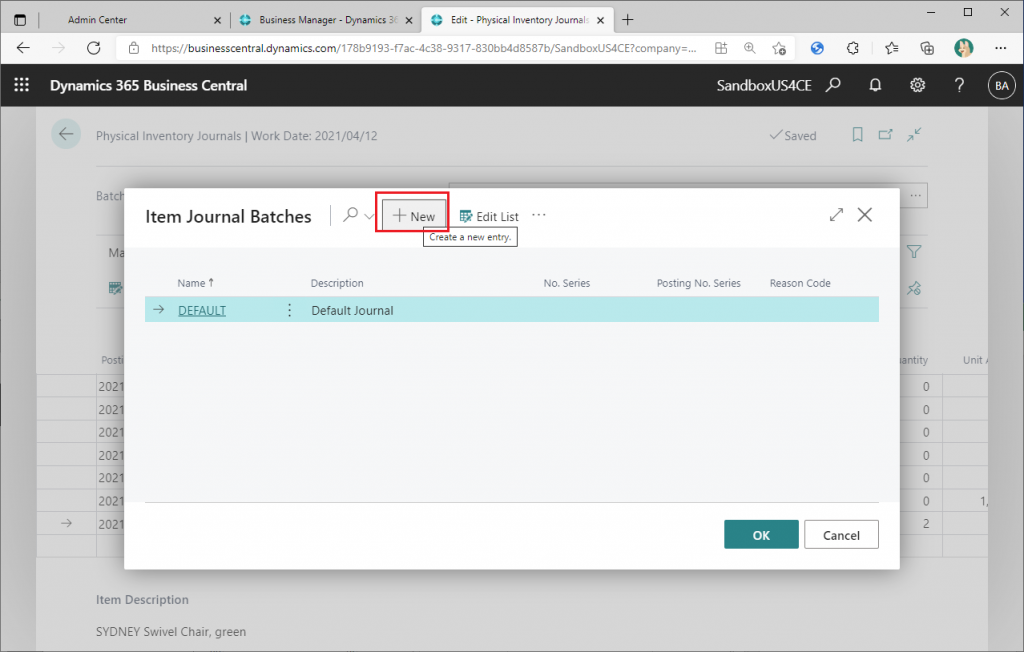
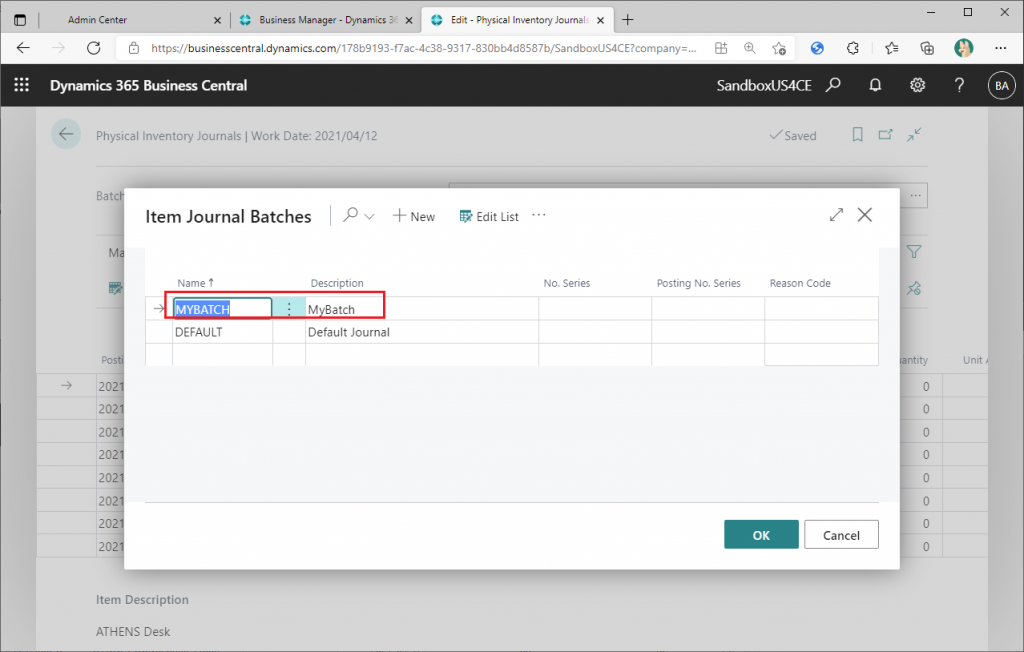
Add a batch name ‘MYBATCH’. The point is that ‘DEFAULT'<‘MYBATCH’ when sorted in ascending order.
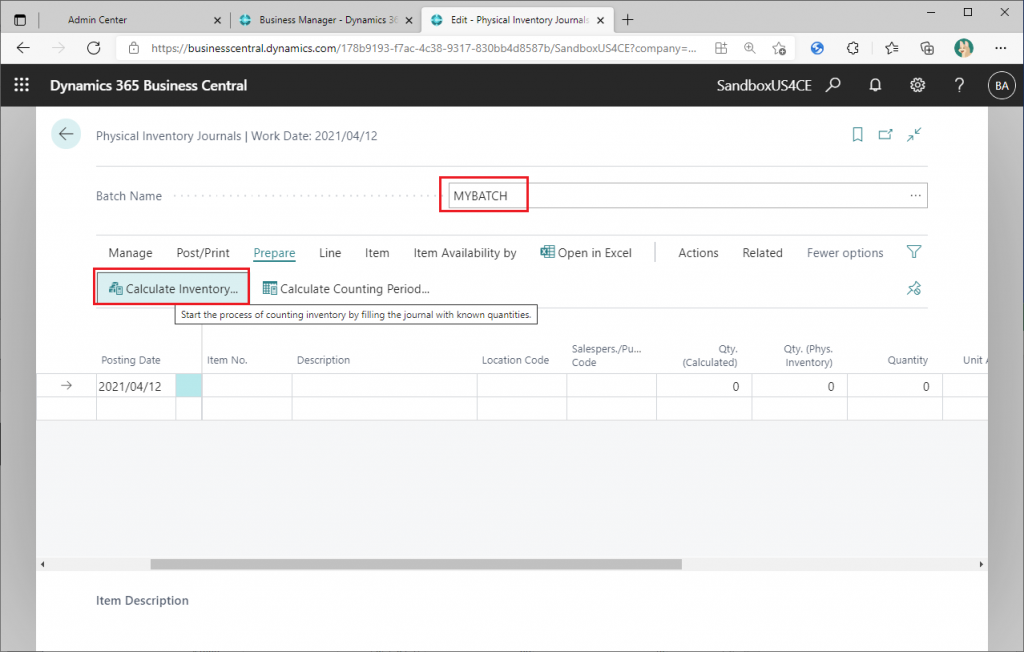
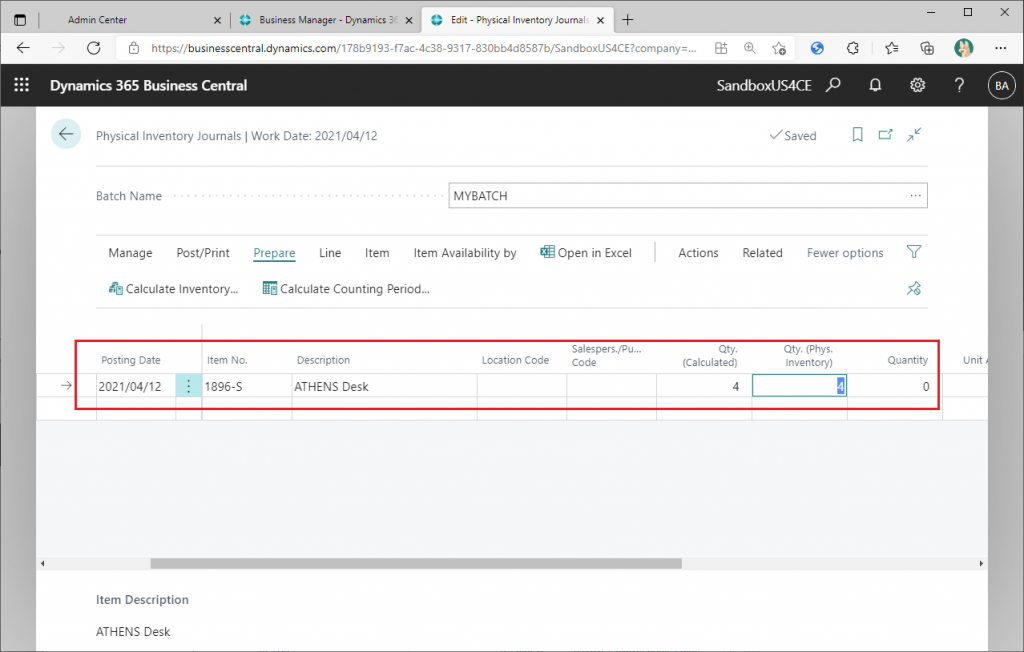
Select the batch name ‘MYBATCH’ and click the Calculate Inventory button.
In order to make the data different from the data in the DEFAULT batch, filter the data by setting a condition on the item number.
This is how the data will be created.
Return to the Edit in Excel sheet of the Physical Inventory Journals and click the Refresh button.
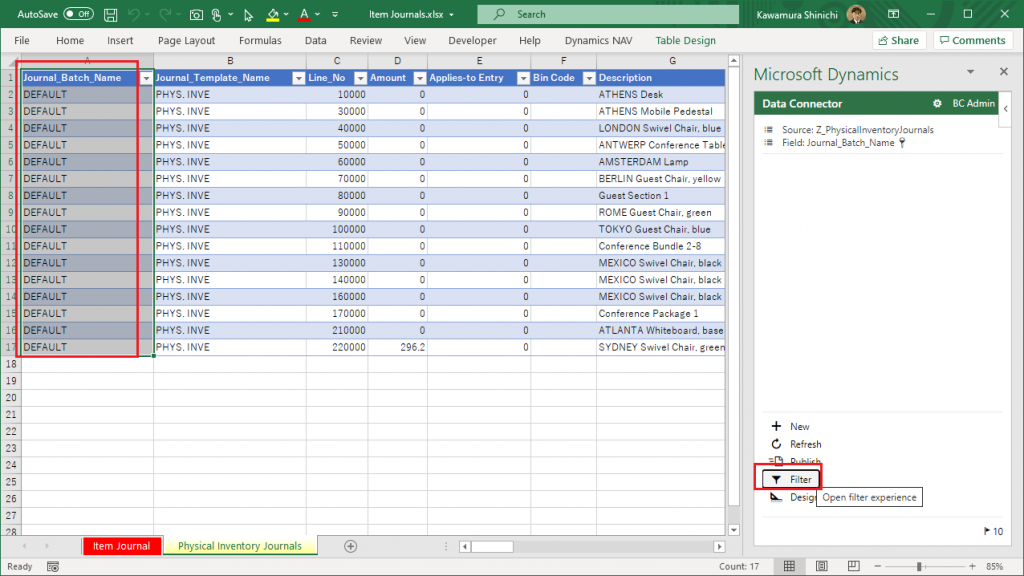
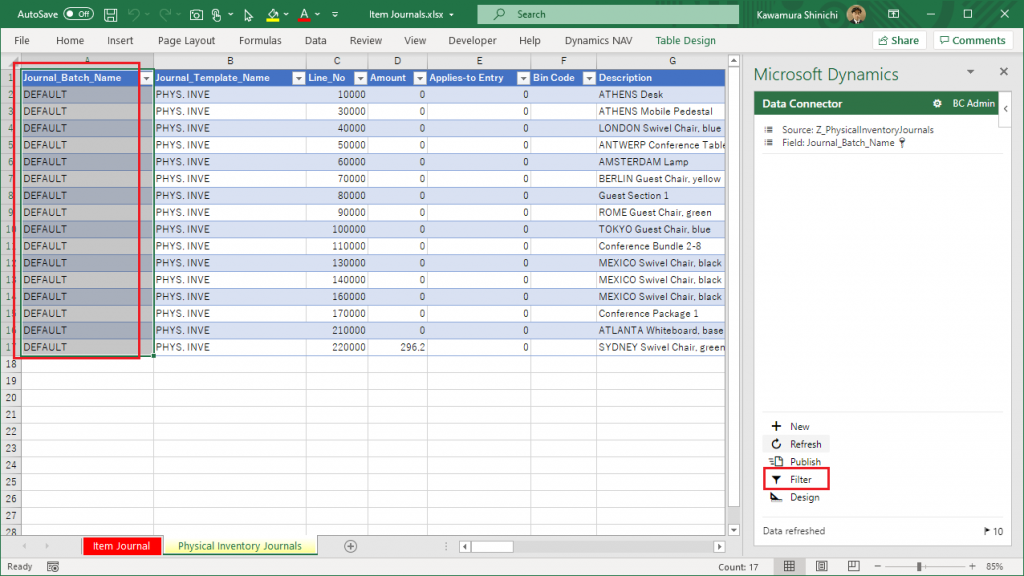
The data neither increases nor decreases. However, it is possible that the implicit filter described in the previous article on the item journal is causing this. We will remove the filter just in case. Click Filter button.
Switch the data source.
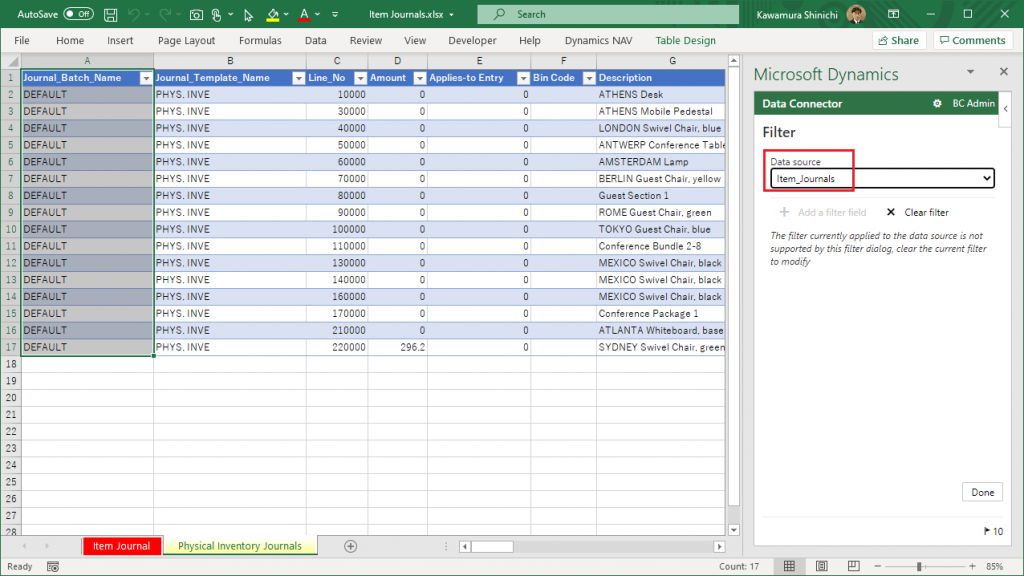
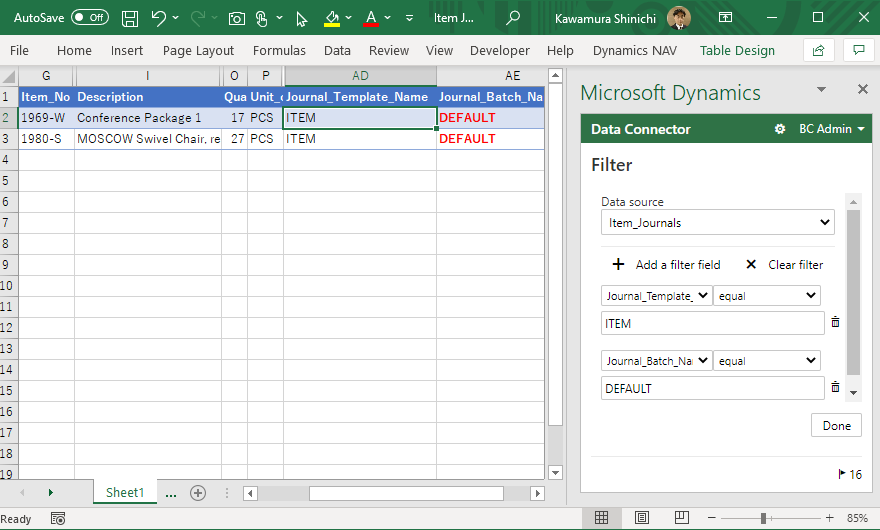
Switch the data source to ‘Z_PhysicalInventoryJournals’ and click ‘x Clear Filter’.
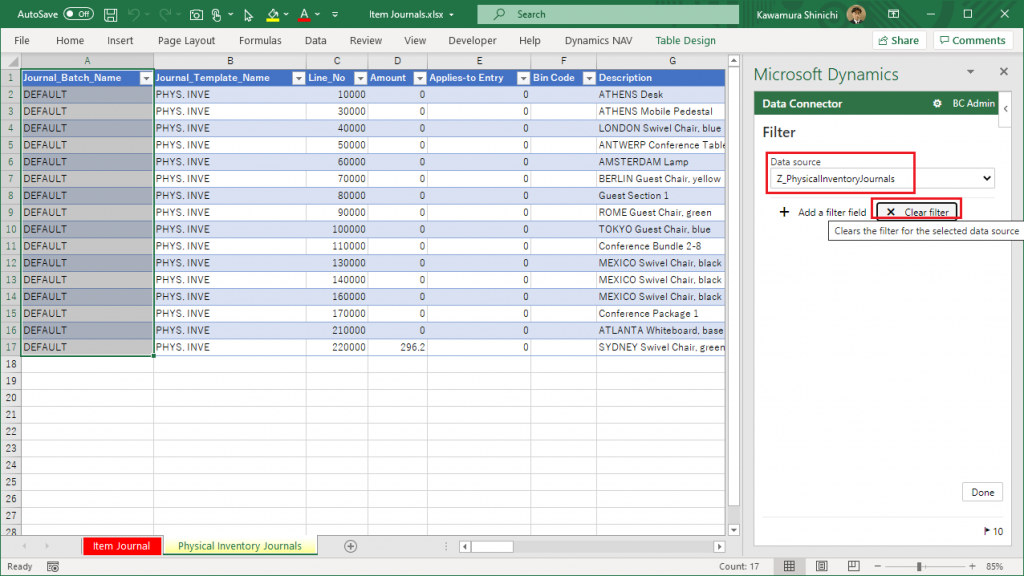
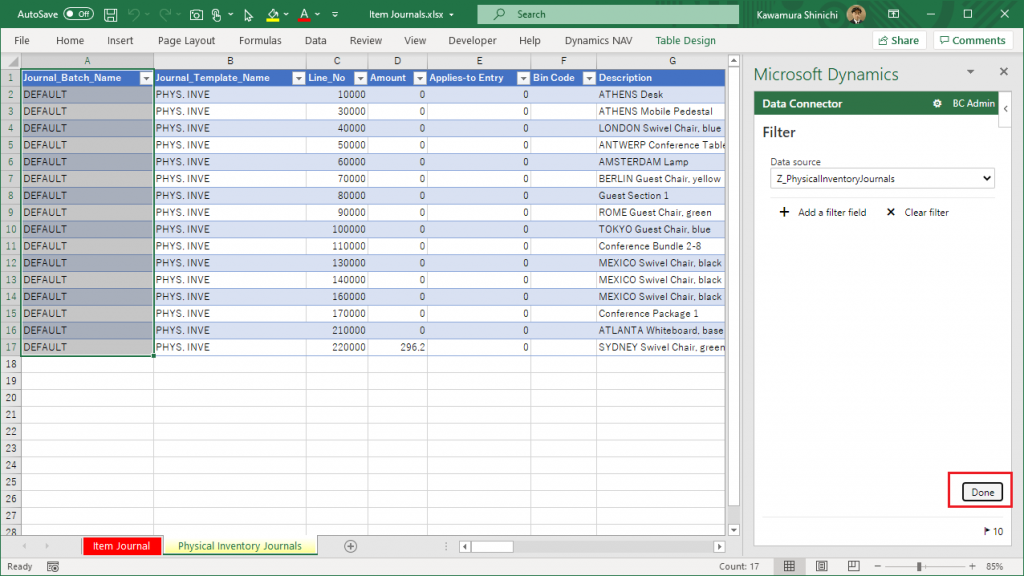
Now the implicit filter should be removed, click Done.
Click Refresh.
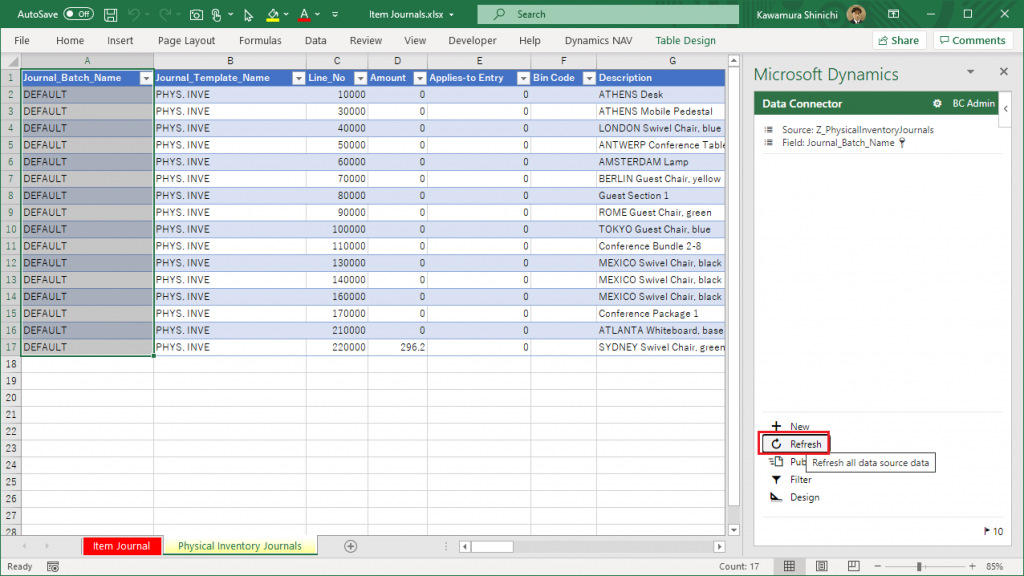
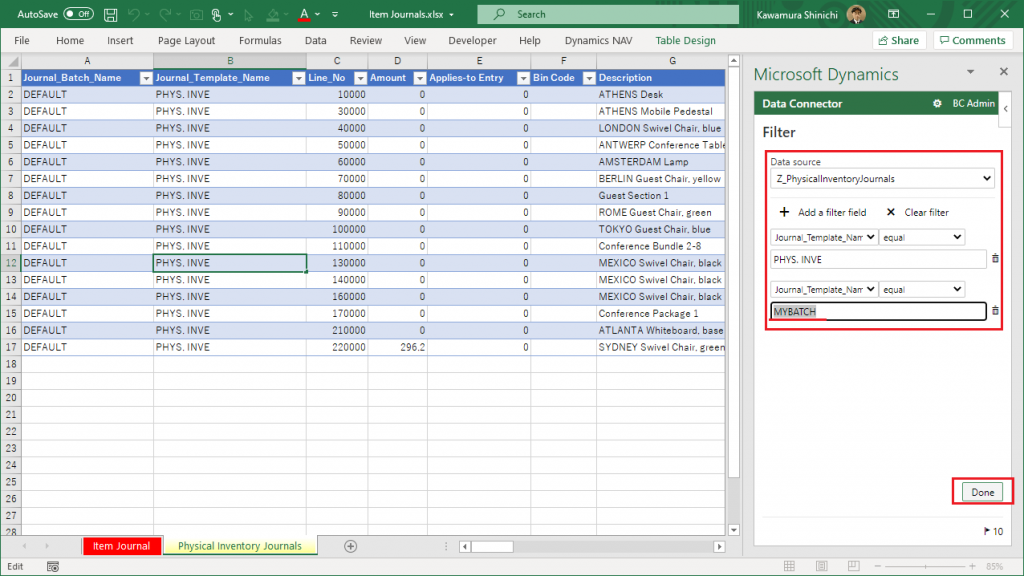
Once again, the data neither increases nor decreases. Let’s explicitly specify the batch name ‘MYBATCH’.
Specify the data source and filter as shown below. Then click Done.
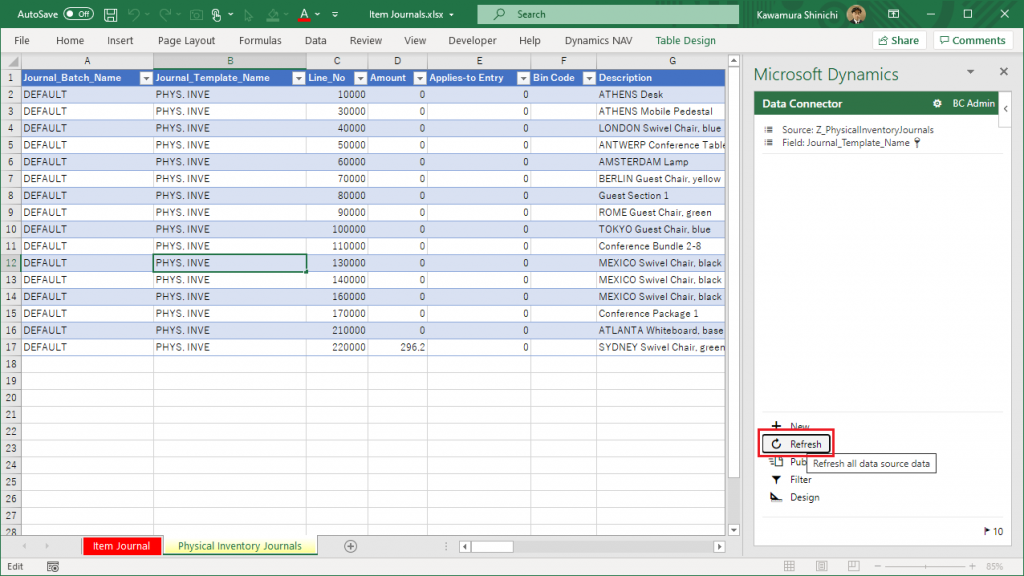
Click Refresh button.
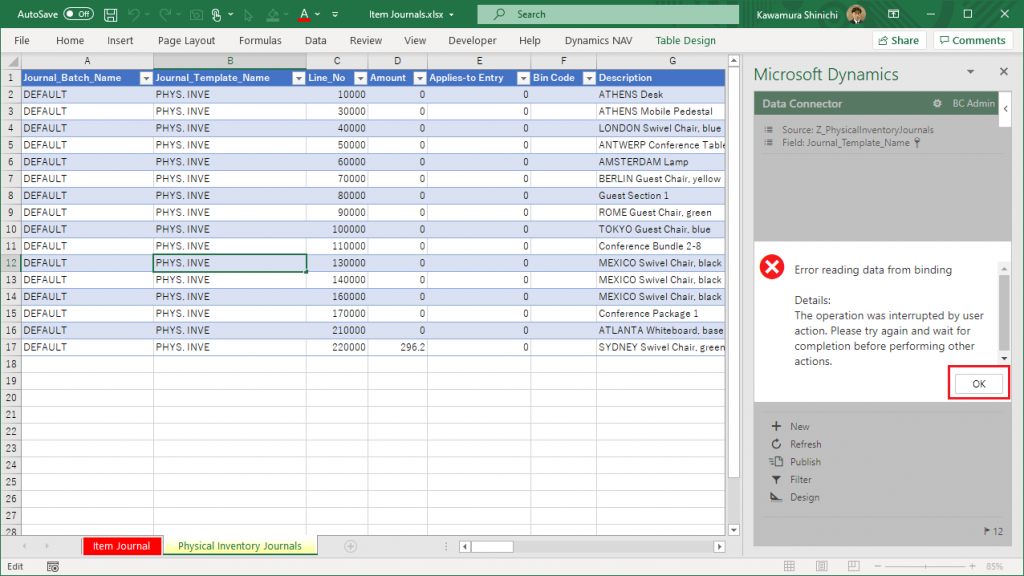
I got an error…The error can be resolved by Refresh in the Another sheet (in this case Item Journal) for some reason.
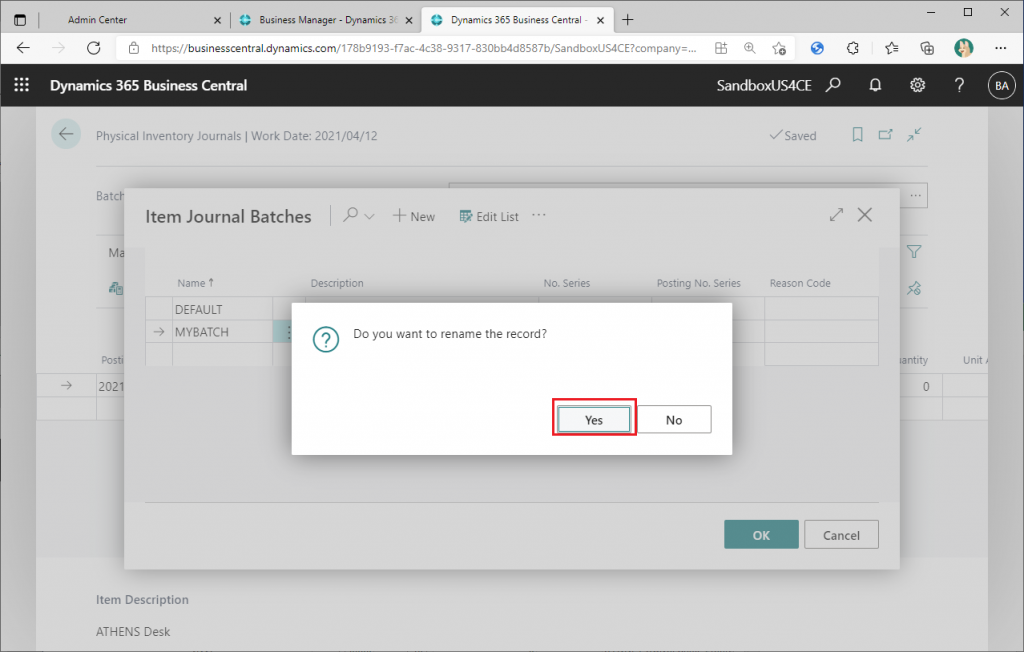
Rename the batch name ‘MYBATCH’ to ‘A_MYBATCH’. The key point is to sort in ascending order by batch name so that ‘A_MYBATCH’ < ‘DEFAULT’.
You will get a warning, but it’s not a problem, so click Yes.
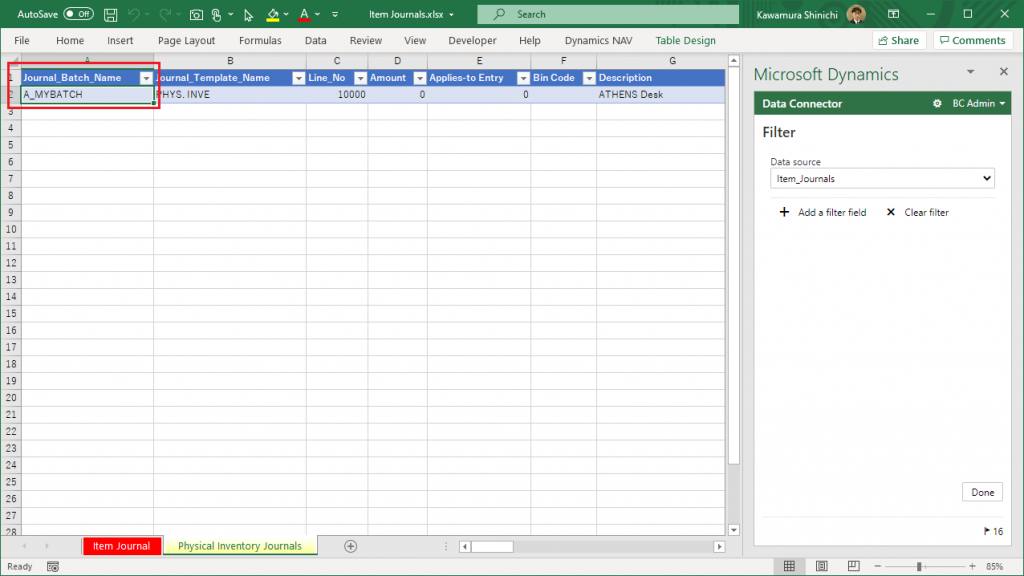
Return to Edit in Excel for the Physical Inventory Journals and clear all filter conditions and click ‘Done’.

Click Refresh button.

Then, the data for ‘A_MYBATCH’ is displayed without error. The data for the ‘DEFAULT’ batch is not displayed, even though all filters have been removed.
Rename the batch name ‘A_MYBATCH’ to ‘Z_MYBATCH’.
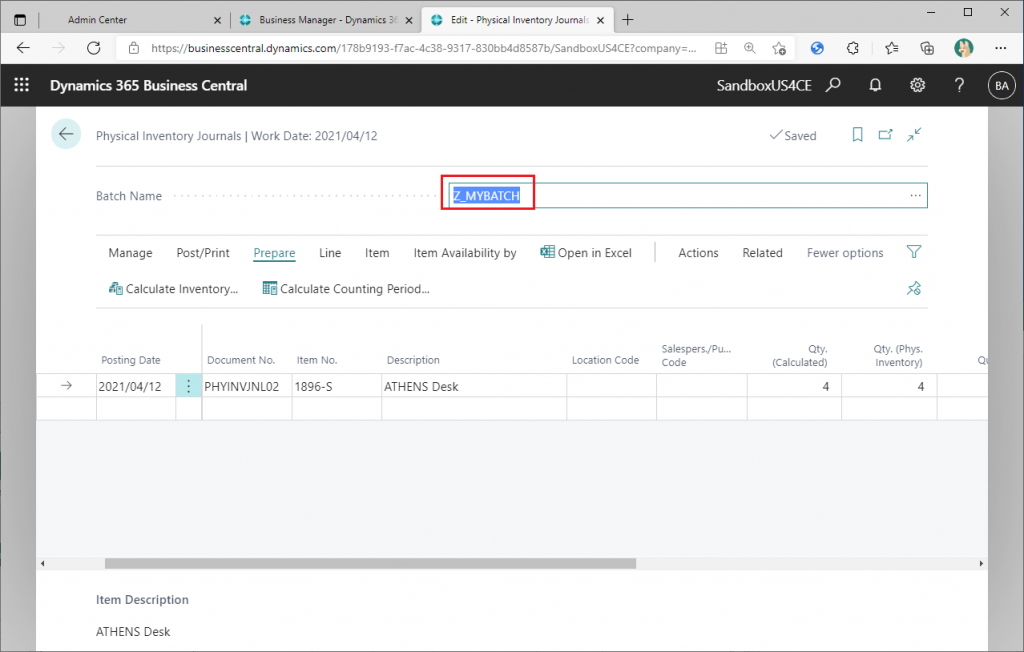
Refresh the Edit in Excel sheet again, and you will see the ‘DEFAULT’ batch data.
If you try setting the batch name to ‘DEFAULS’ or ‘DEFAULU’, you will see that you can only get the first batch name by sorting the batch names in ascending order. I don’t know why this is the intention of this specification, but this is the actual behavior. If you are interested in this, please follow the standard source code. (I’m not a Technical Consultant, so I gave up.)
I looked at various journal pages, and there are a few that don’t have an Edit in Excel button, such as General Recurring Journal. As far as I can tell, only the first batch name is processed in all of them as well.
Someday, I would like to see the Edit in Excel button added to all journal pages, including the Physical Inventory Journal page, so that I can edit the data with any batch name, just like the Item Journal page.
1件のコメント