
Azure AD groups can now be used to control permissions in Dynamics 356 Business Central. This is a new feature added in 2023 Release Wave 1.
Rreference
Manage user permissions using security groups | Microsoft Learn
Table of Contents
- Preparation
- Permission assignment by new feature
- Azure AD Groups other than Security Groups
- Useful Functions
- Nested Groups
- Summary
- My Impression and Idea
1. Preparation
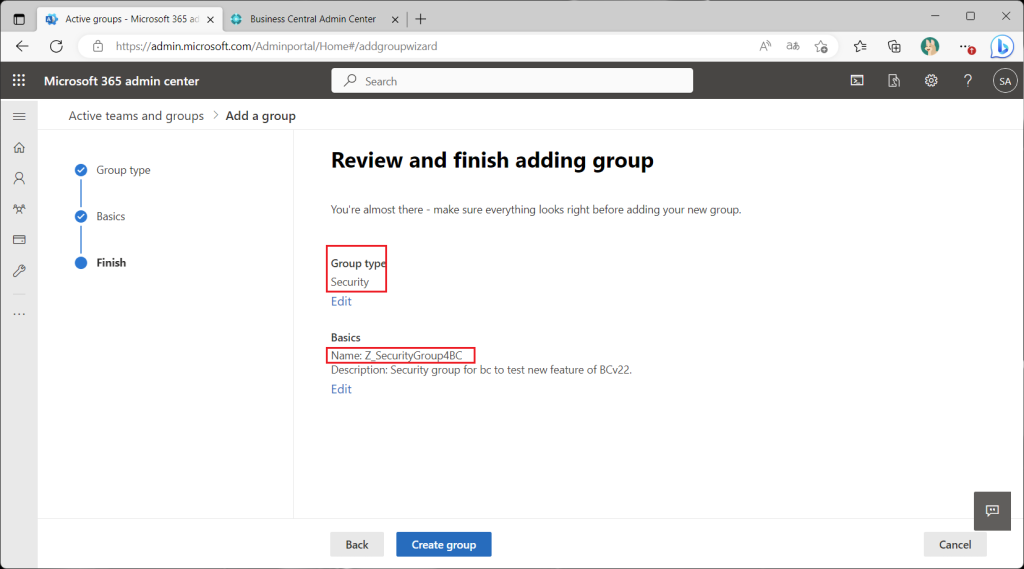
As a preliminary step, create an Auzre AD group; there are several types of groups in Azure AD, but I will create a security group as well as the official release documentation.
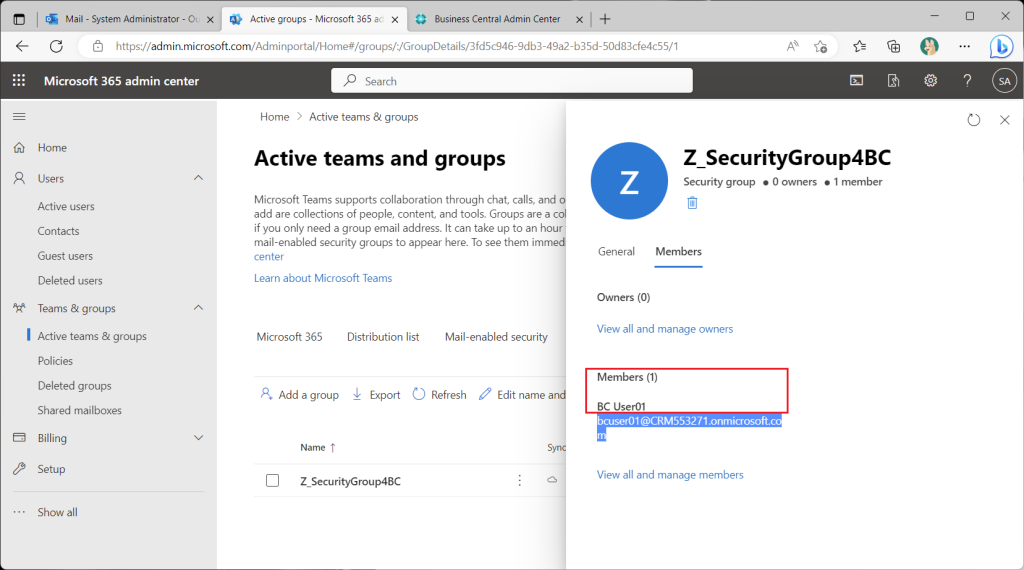
Assign test users to the members of the security group just created.
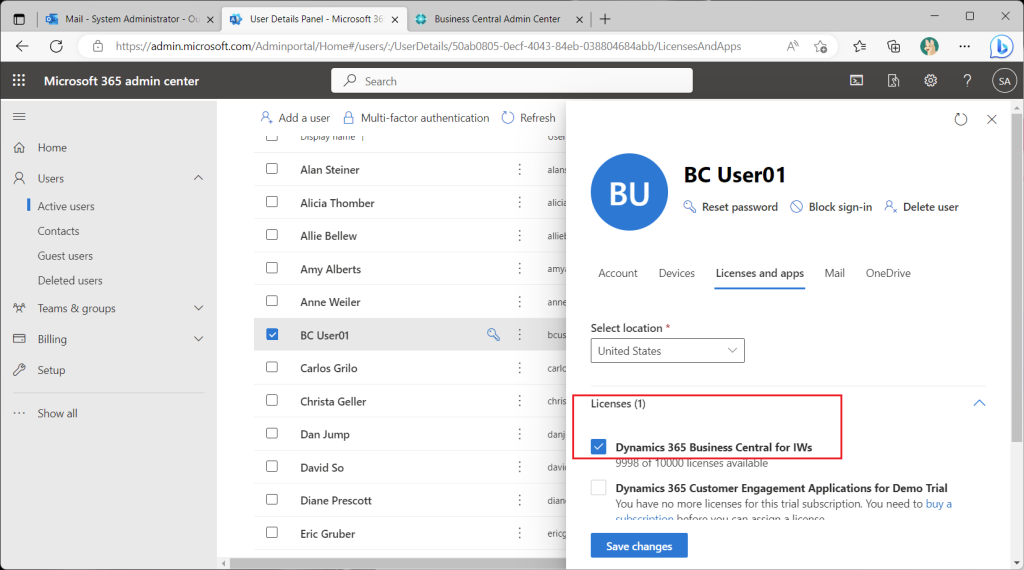
BC licenses are assigned to test users in advance.
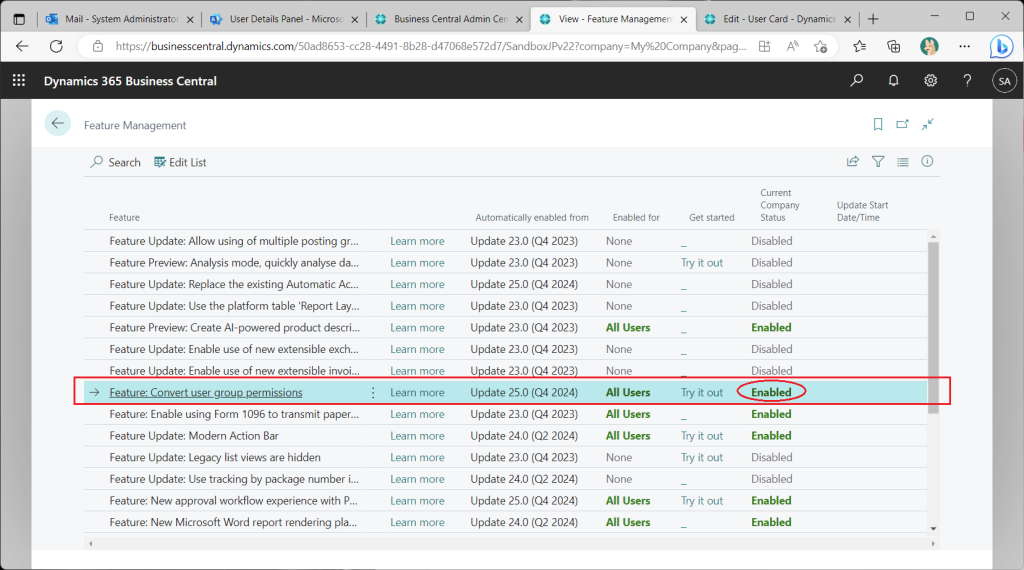
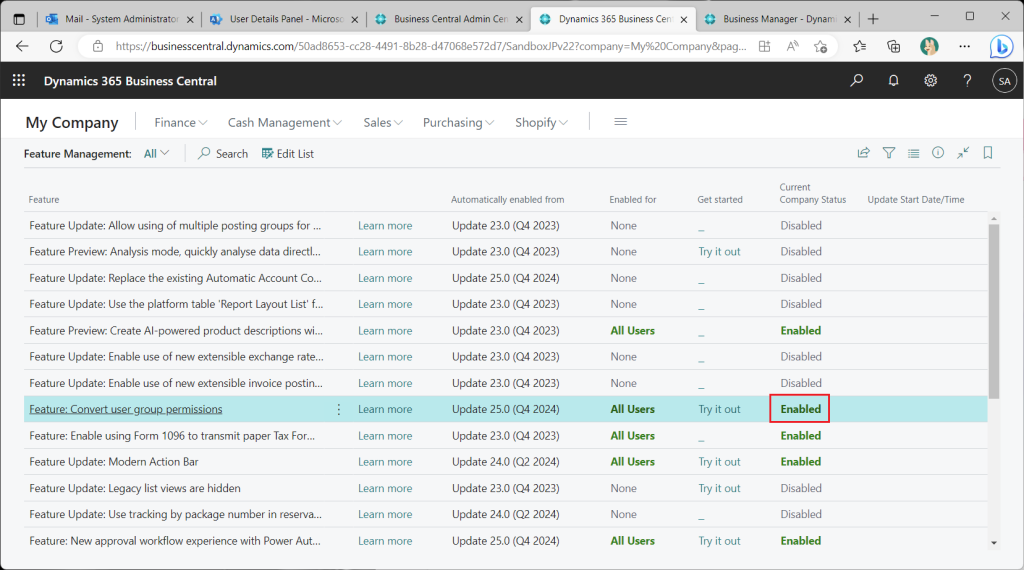
In the Feature Management list page, set “Featrute: Convert user group permissions” to All Users, which should be Enabled by default if you have created a new environment with Version 22.
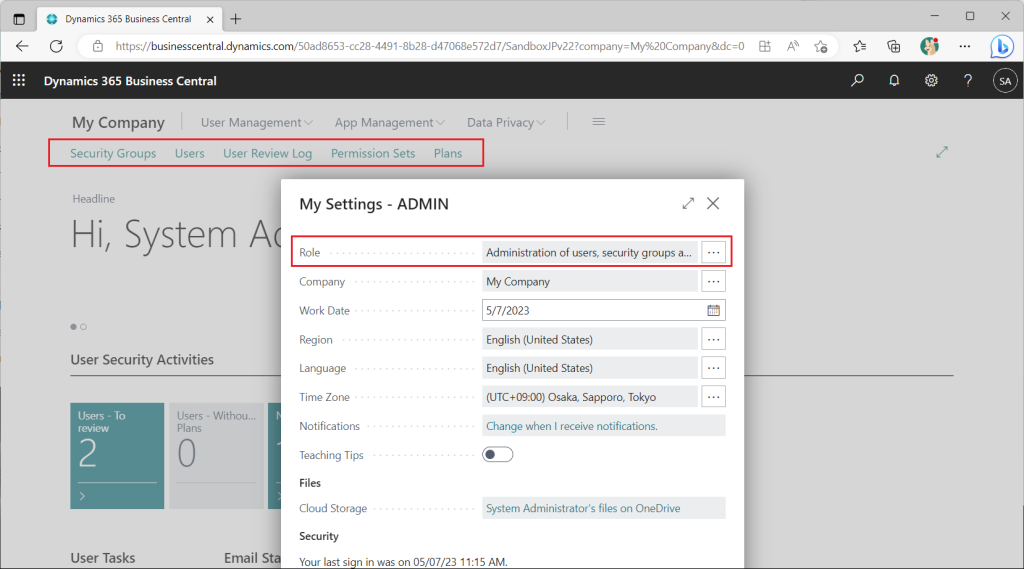
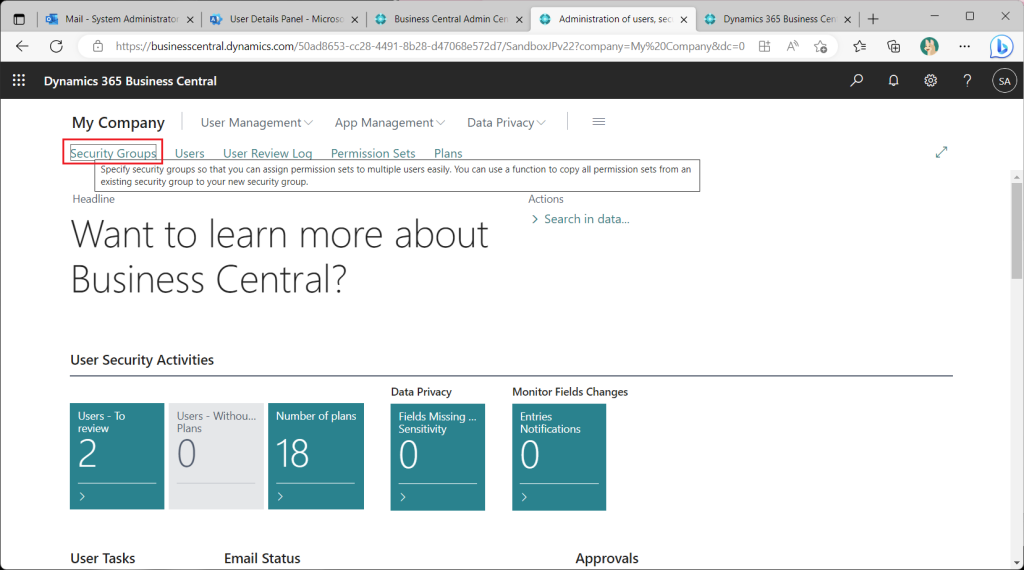
Switch the role to “Administration of users, security groups and permissions”. This is very convenient because the menu for user and permission management will be displayed in the role center.
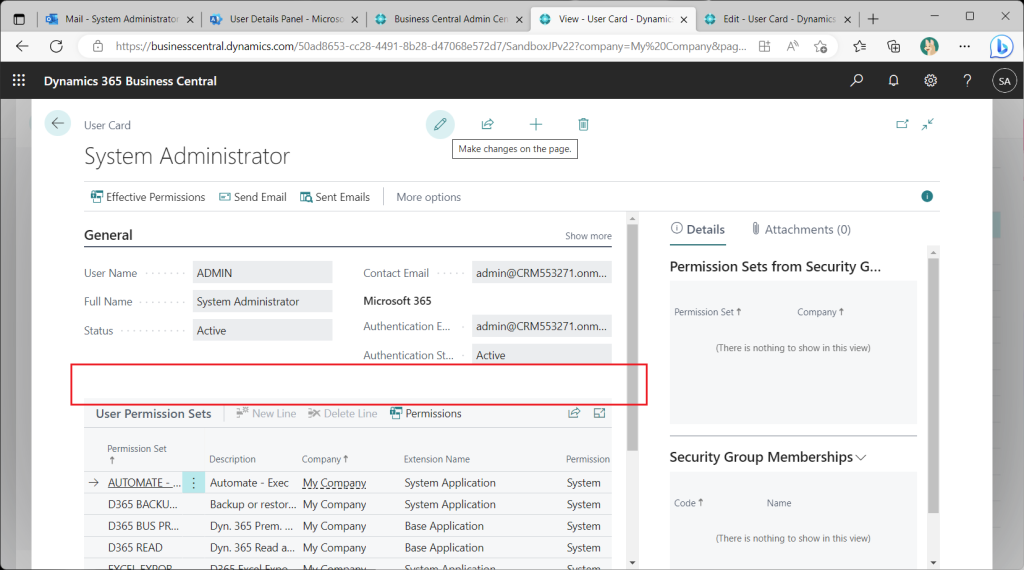
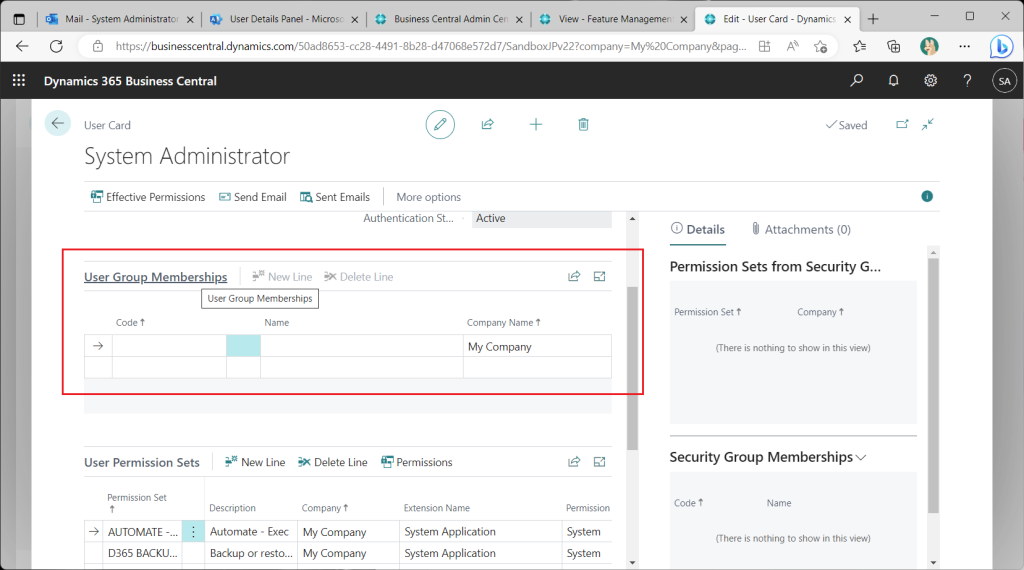
Checking the User Card page, the User Groups tab is not present. This is because Azure AD groups are used to control access permissions instead of *Legacy* BC user groups.
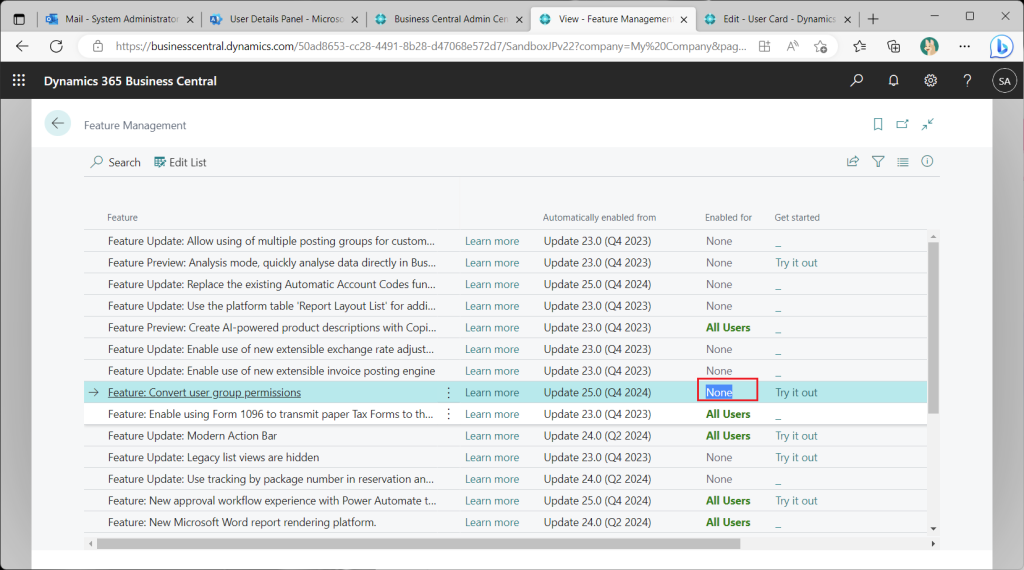
If you want to control access permissions using BC user groups as before, set “Featrute: Convert user group permissions” to None in the Feature Management list page.
The “User Group” tab will then reappear on the user card page.
To continue the check, change the Feature Management setting back to Enabled.
Get test users from M365. (This is an existing feature.)
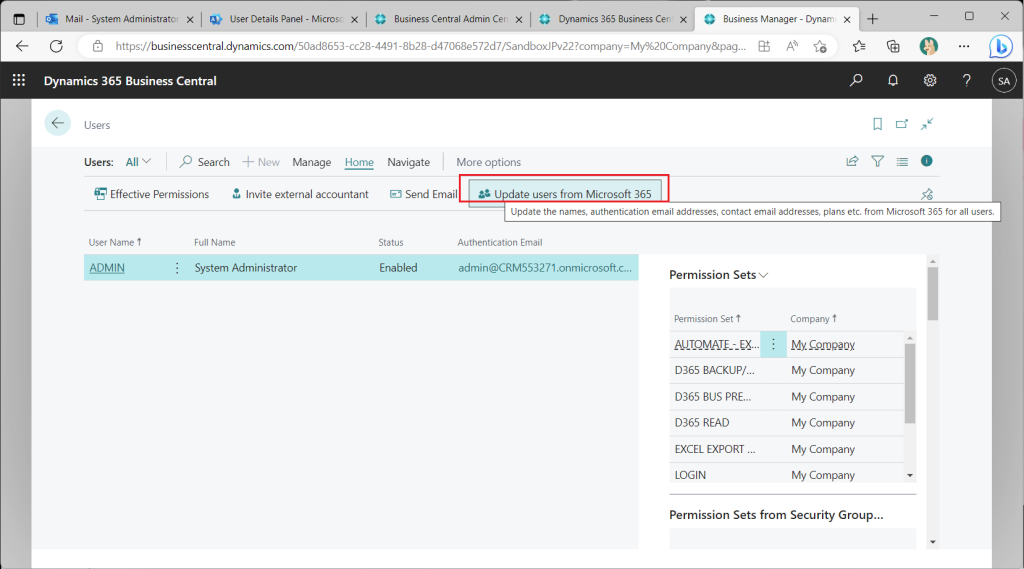
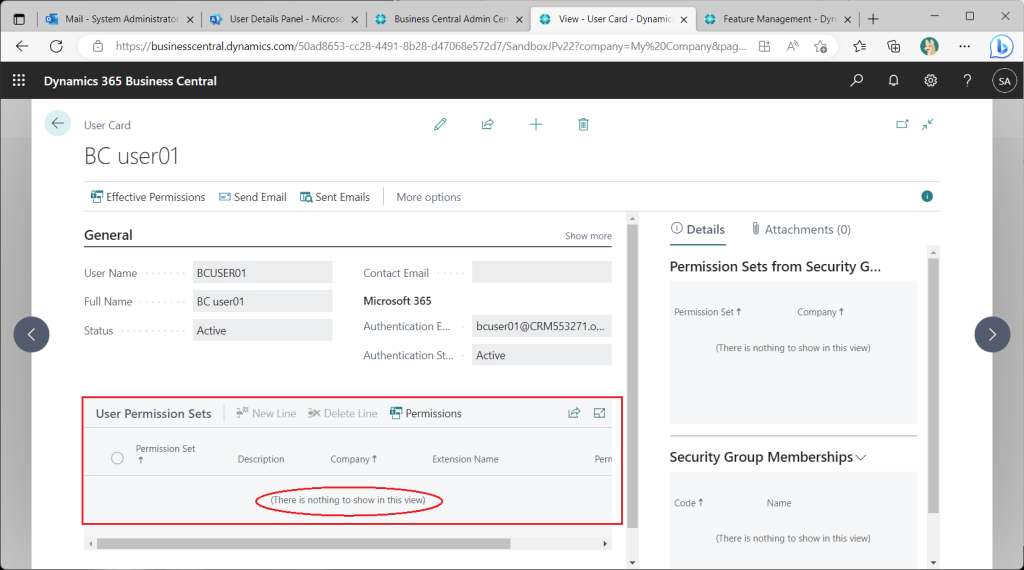
A test user has been created on BC. Various permission sets are granted by default.
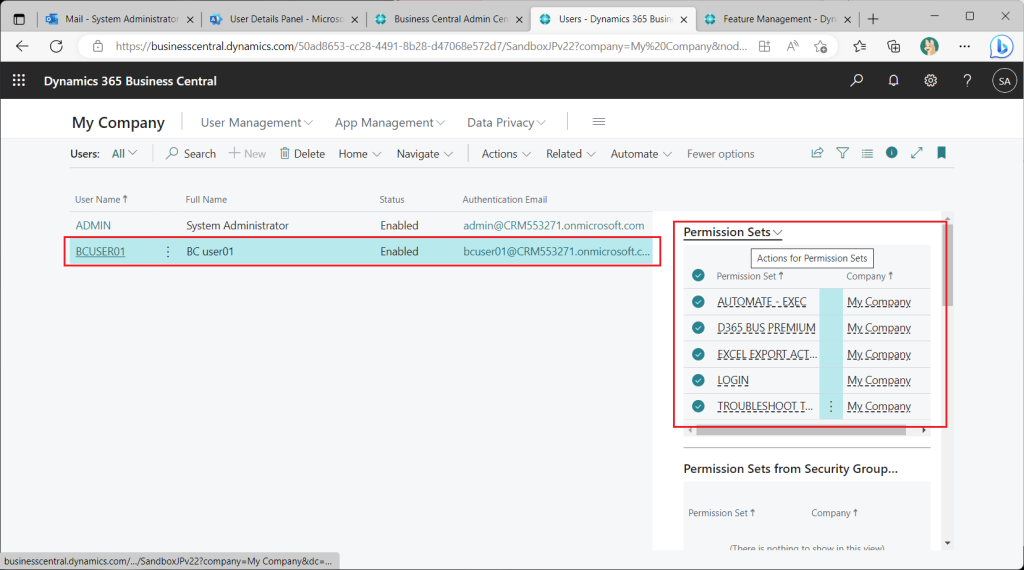
All permission sets assigned to the test user should be deleted, since I will be testing access control.
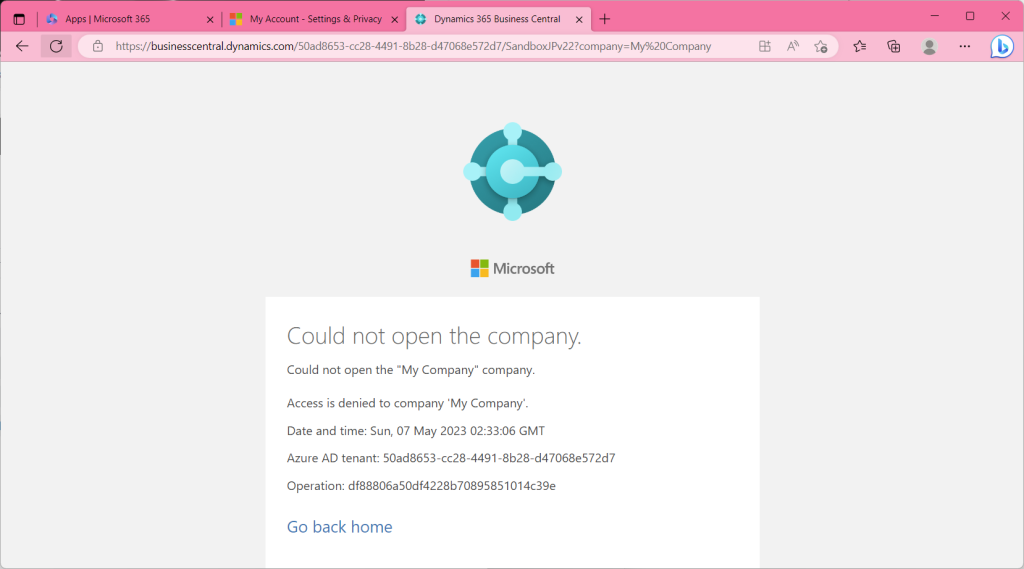
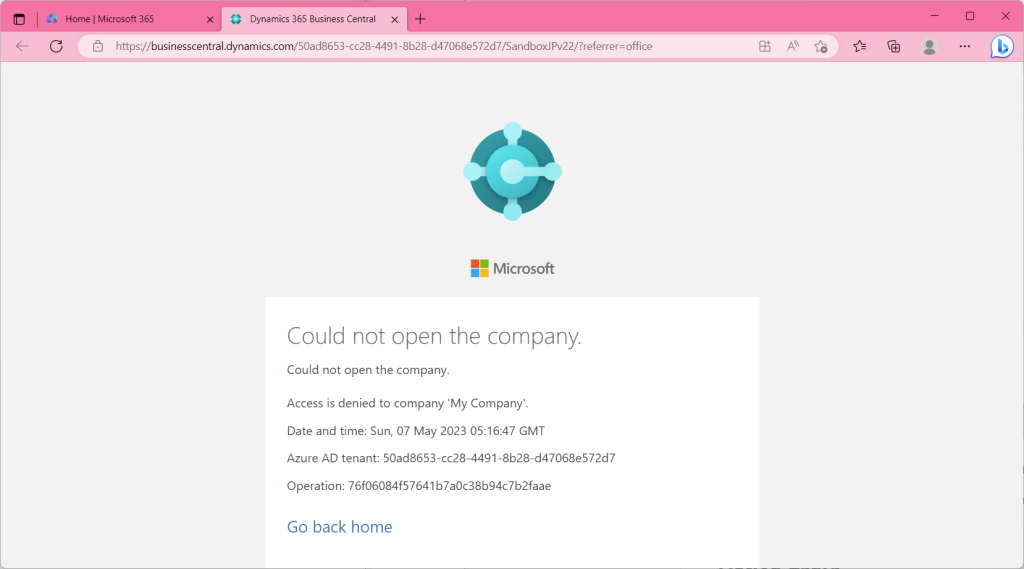
Attempting to sign in to test user BC in this state will result in an error. ( From then on, the browser in the red toolbar is the test user’s.)
At this point, the preparation is complete.
2. Permission assignment by new feature
Now let’s actually assign permissions using the new function. Go to the Role Center and choose “Security Groups”.
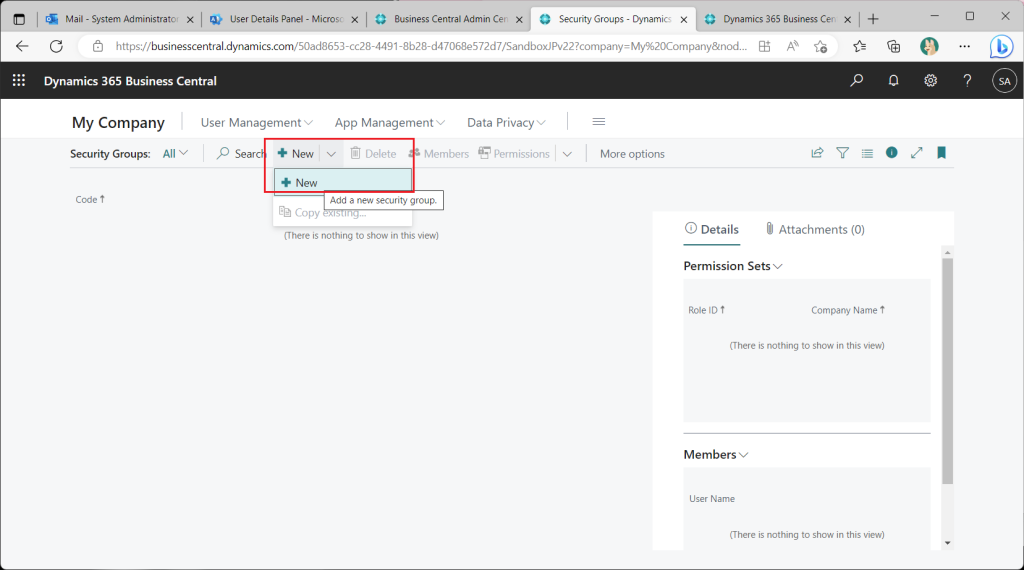
This is the Security Groups list page. Nothing is registered yet. Click the “+New” button.
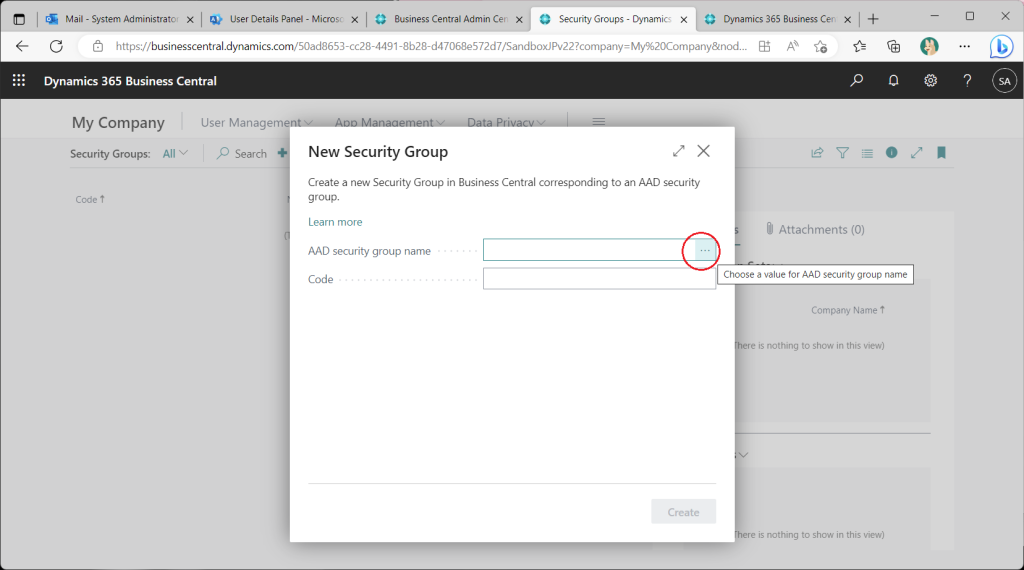
A page for specifying Azure AD security groups will appear. Click on “…” button.
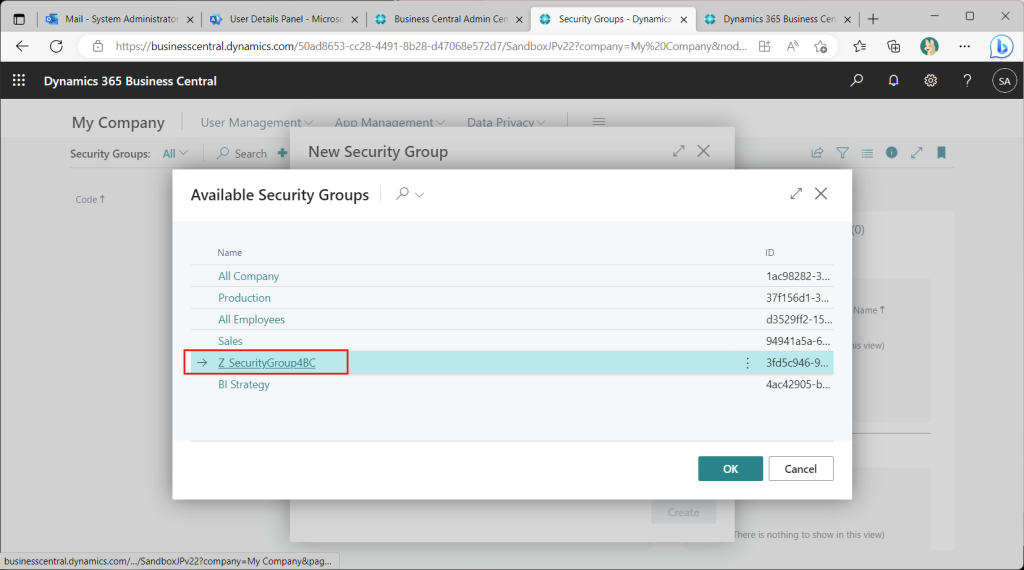
Then the Azure AD security groups are listed. To be precise, groups other than security groups (such as Micrososoft365 groups) are also displayed and can be selected. (I will mention this later.) Choose here the security group already added in the preparation step.
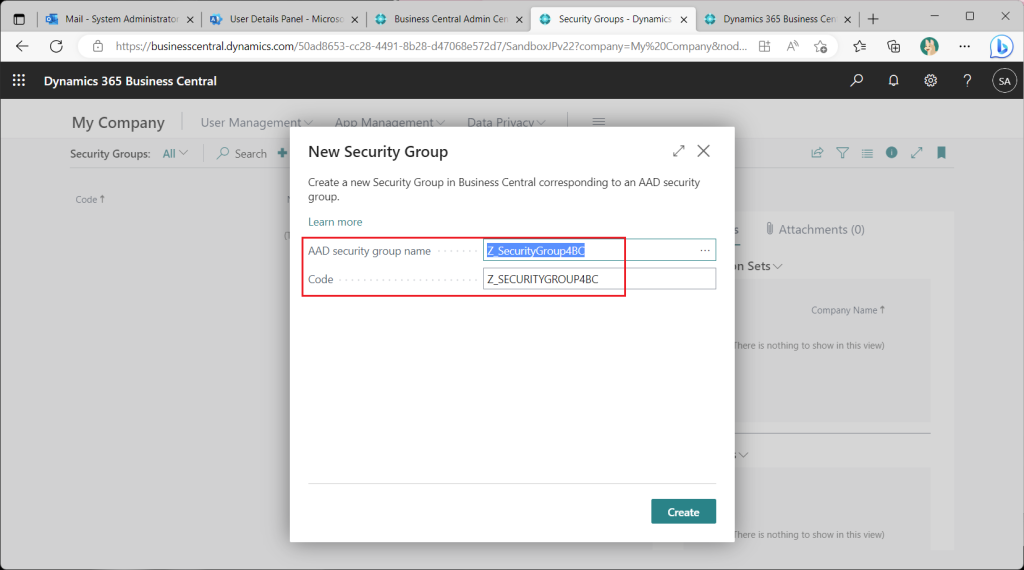
Name the BC security group to the selected Azure AD security group. By default, this is the same as the name of the Azure AD security group. Strictly speaking, the name of the BC security group is the name of the BC security group with the first 20 characters capitalized.
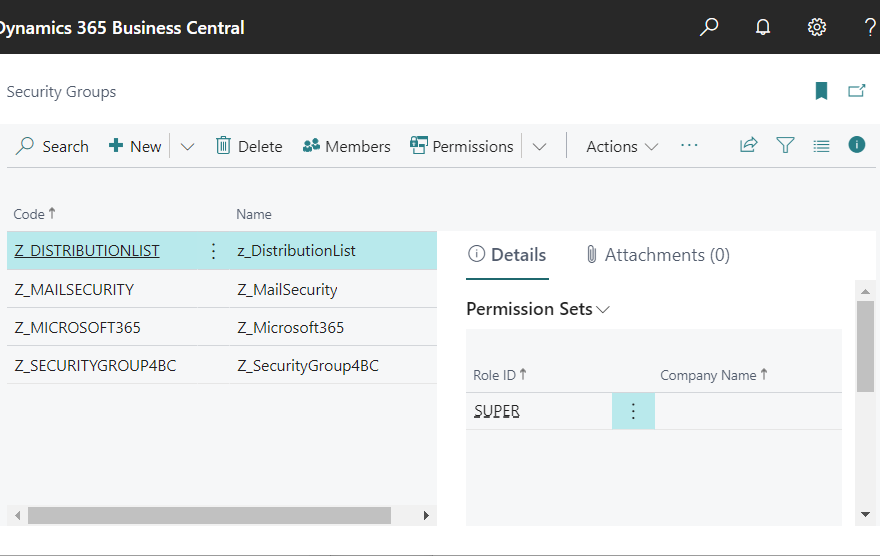
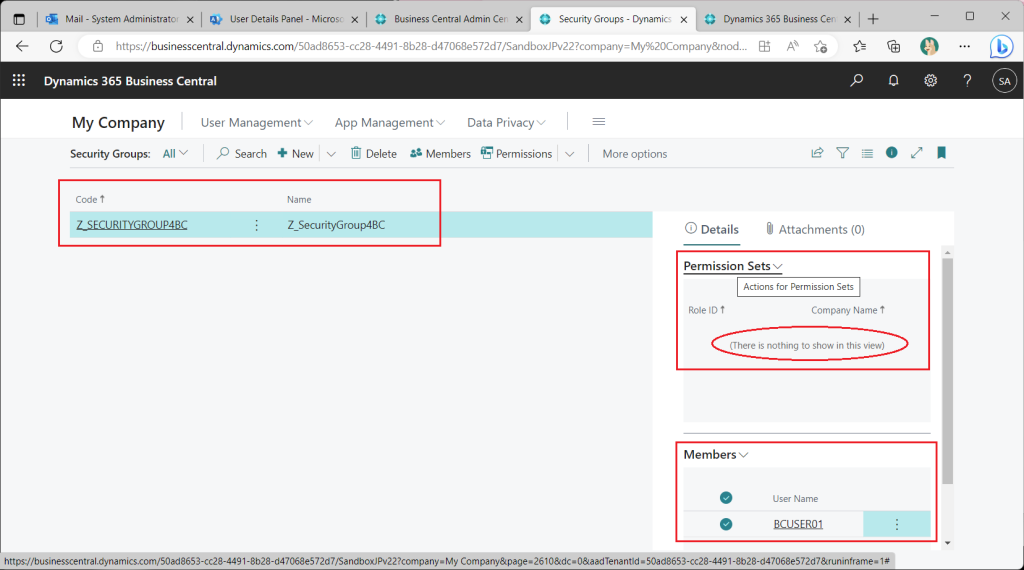
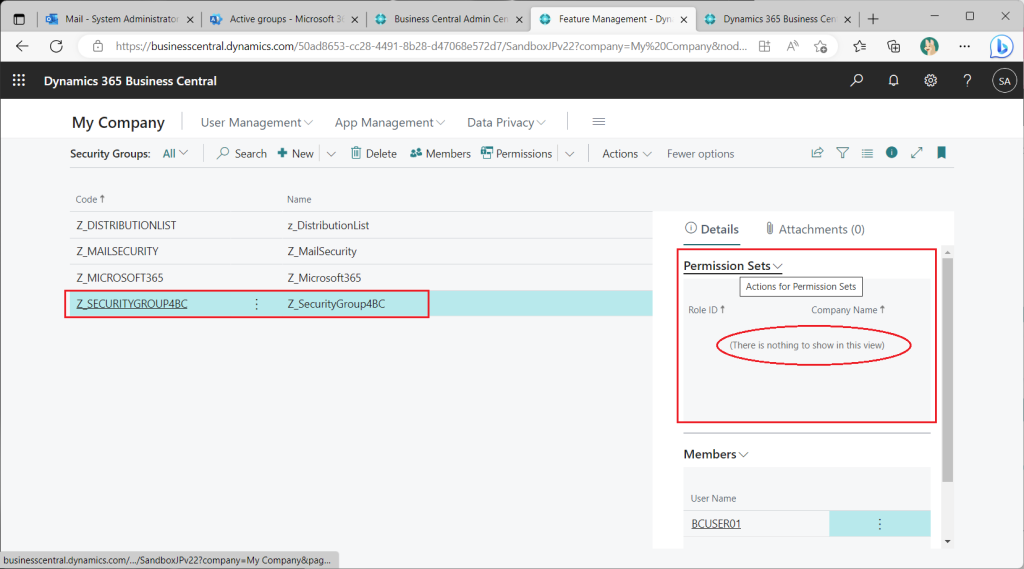
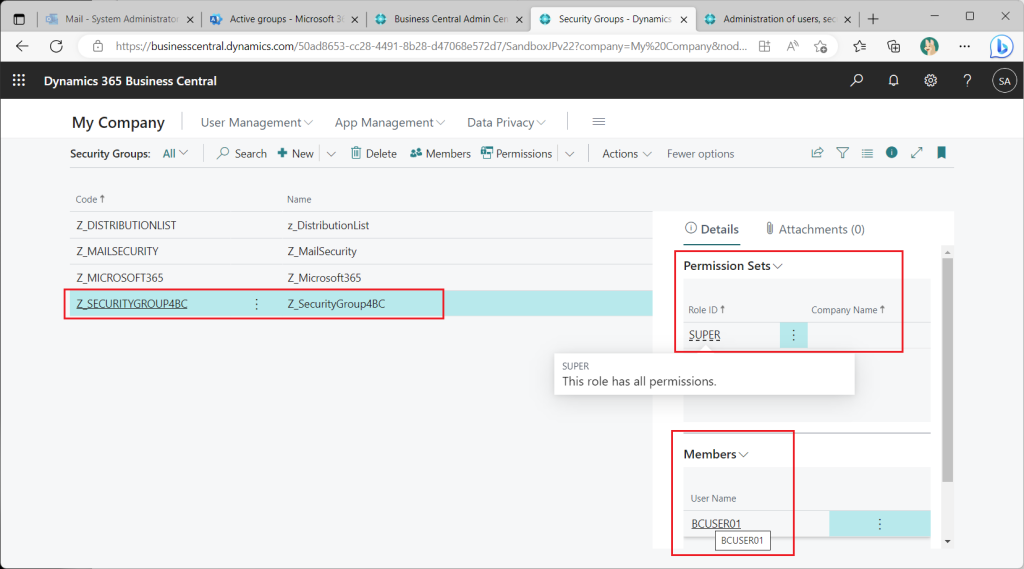
On the Security Groups list page, check the security group just created. In the information box on the right, a test user has been assigned as a member. No permission sets have been assigned yet.
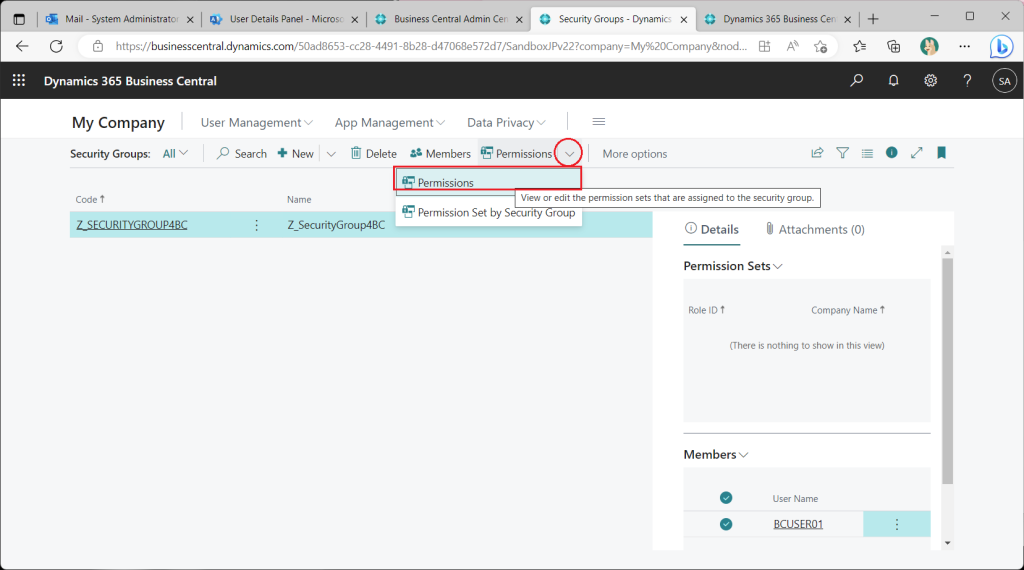
Assign a permission set to the security group.
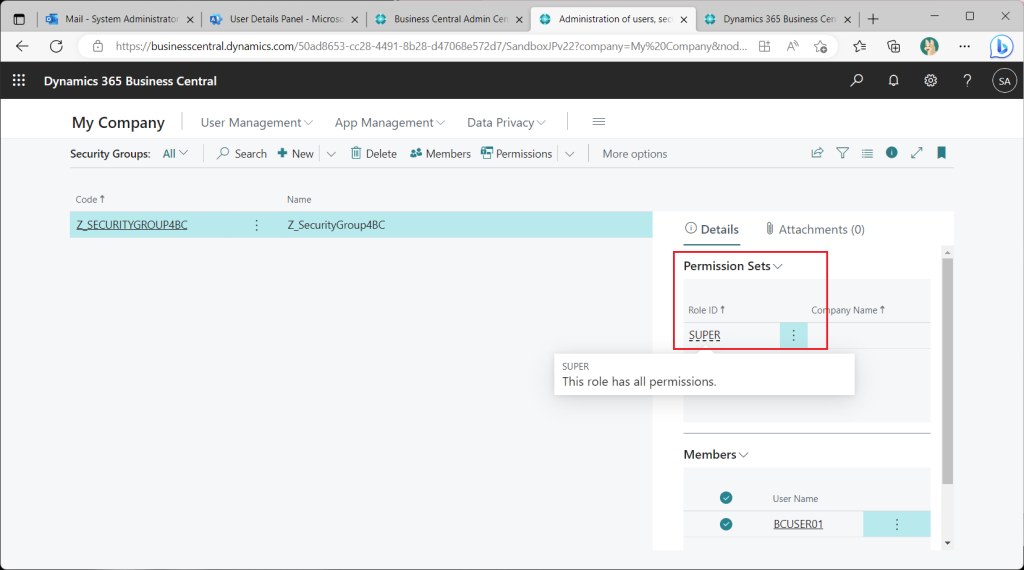
Assign the “Super” permission set as a trial.

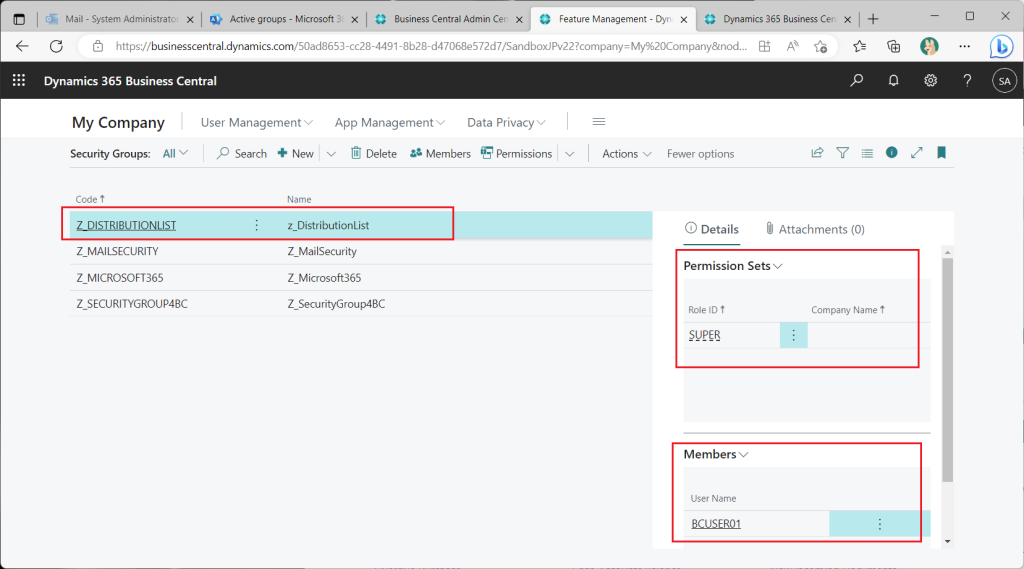
Back on the security group list page, it can be seen that Super permissions set have been assigned.
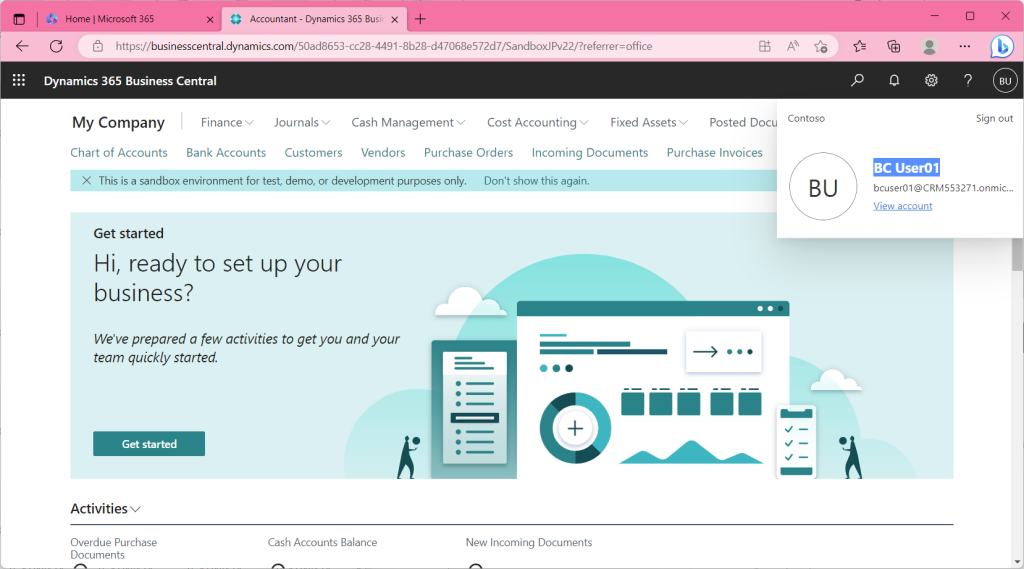
In this state, when the test user tries to sign in, the user is able to sign in; access permissions were successfully granted using the Azure AD security group!

3. Azure AD Groups other than Security Groups
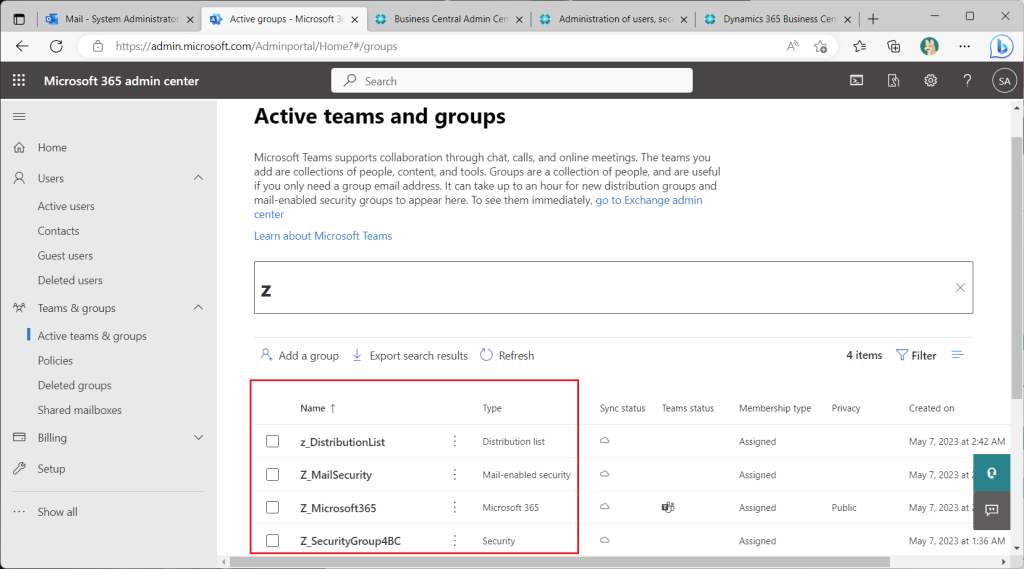
As mentioned earlier, Azure AD has several types of groups in addition to security groups. Specifically, there is a “Distribution List” group, an “Email enabled security” group, and a “Microsoft 365” group. Let’s see if we can use these groups to control access permissions.
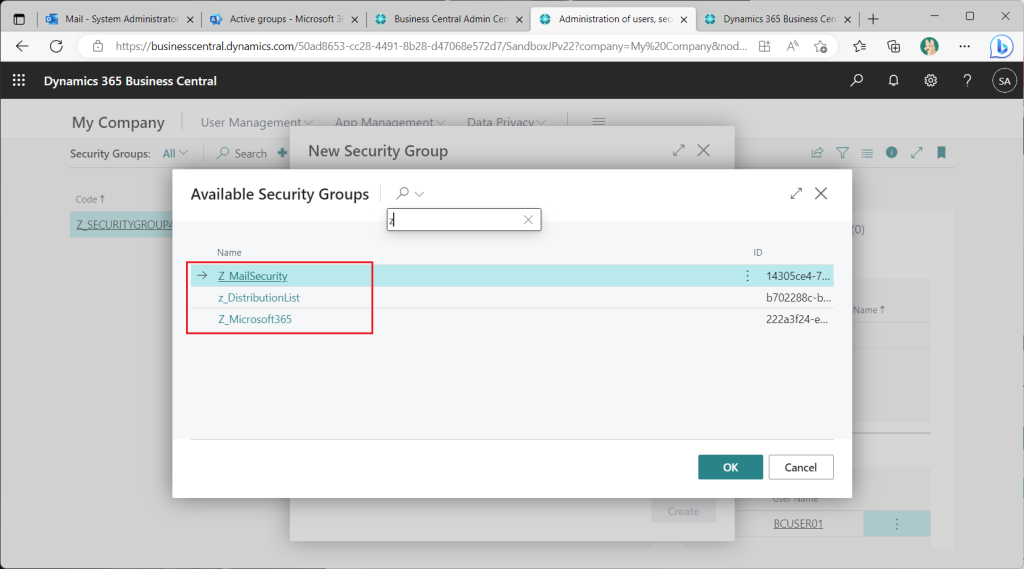
When creating a new group in the BC Security Groups page, the “Distribution List” group, the “Email Enabled Security” group, and the “Microsoft 365” group can also be selected.
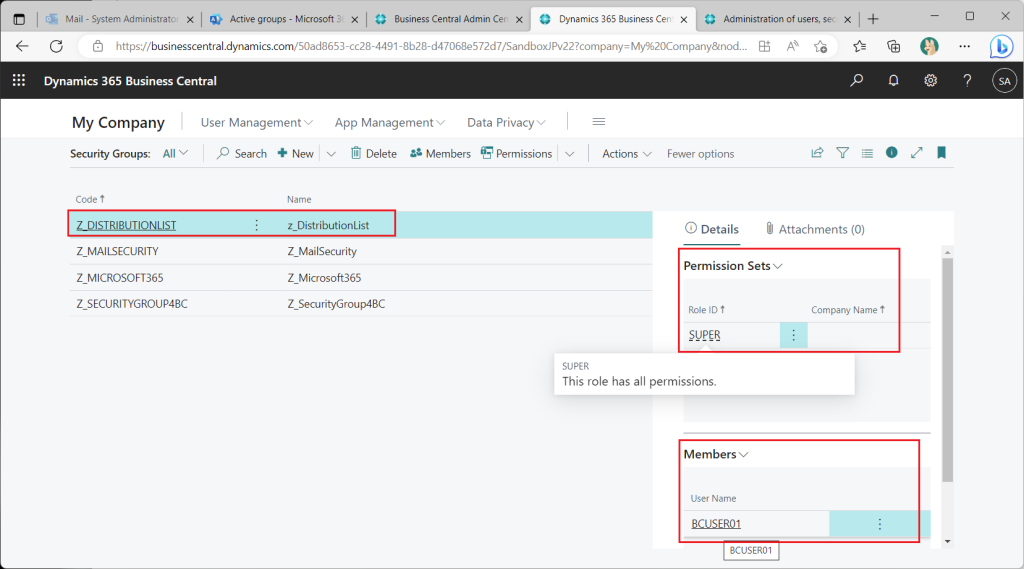
Create a BC security group for each type of Azure AD group. Remove PermissionSet from the BC security group created from the Azure AD “Security” group first. (If this remains, you will not be able to check the permission control.)
Assign permissions to the BC security group created from the distribution list as a test. (Add the test user as a member to this distribution list on the Azure AD side beforehand.)
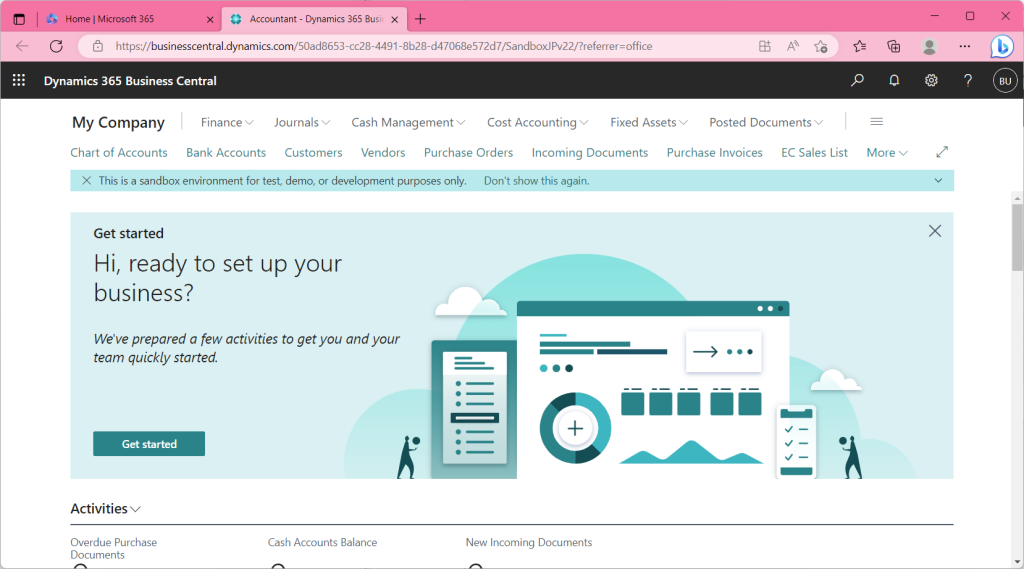
Then, the test user was able to sign in.
As you will see when you try it out, you can grant permission to the “Email enabled security” group and the “Microsoft 365” group as well.
This is a bit confusing, I think BC’s security group should be renamed “user groups” (or “AAD-based user groups”) or something.
4. Useful Functions
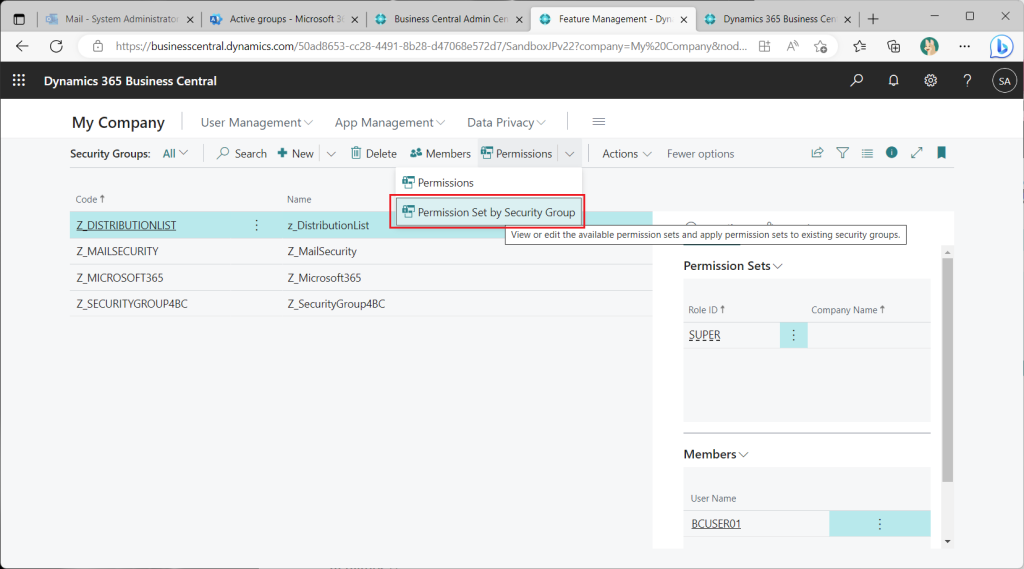
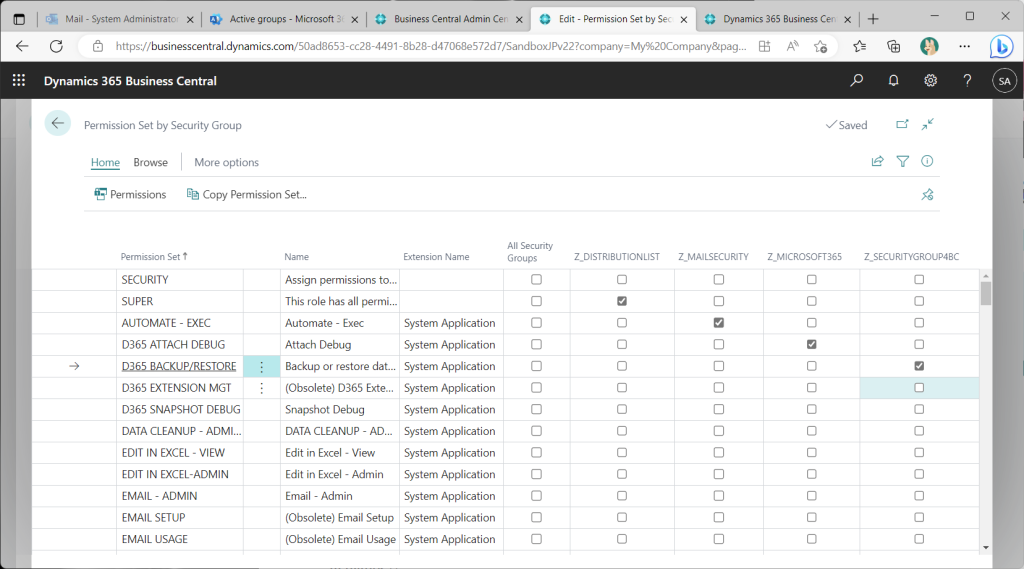
Two useful functions are introduced here, the first of which is the ability to express permission sets and security group assignments in a matrix. This function is almost the same as the existing “Permission Set by User Group”. Select “Permissions”->”Permisson Set by Security Groups” from the security group list page.
A matrix-style page will then appear. By checking and unchecking the checkboxes on this page, you can change the assignment of permission sets and security groups.
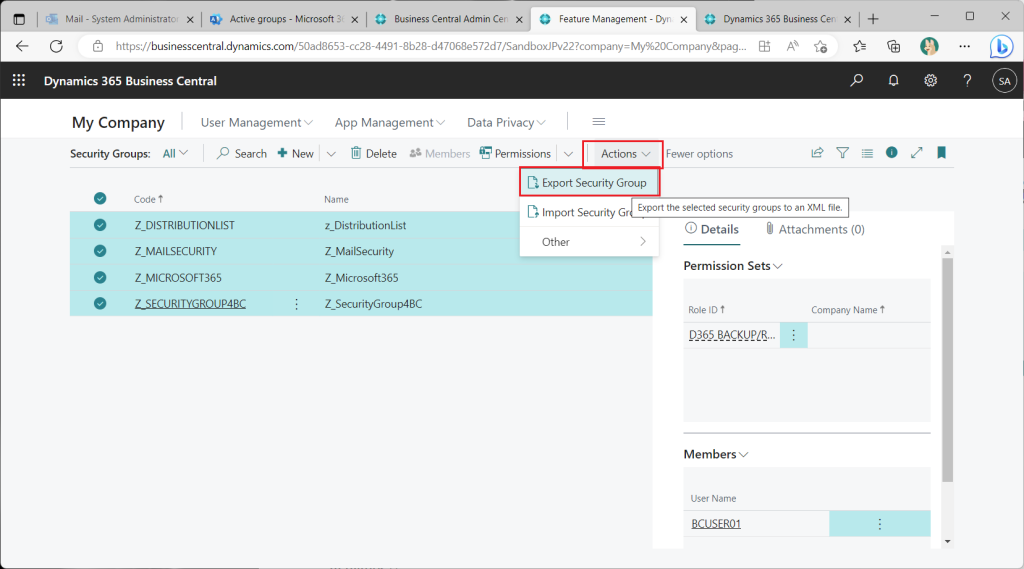
Another useful feature is the xml export/import function, which allows you to select one or more security groups to export.
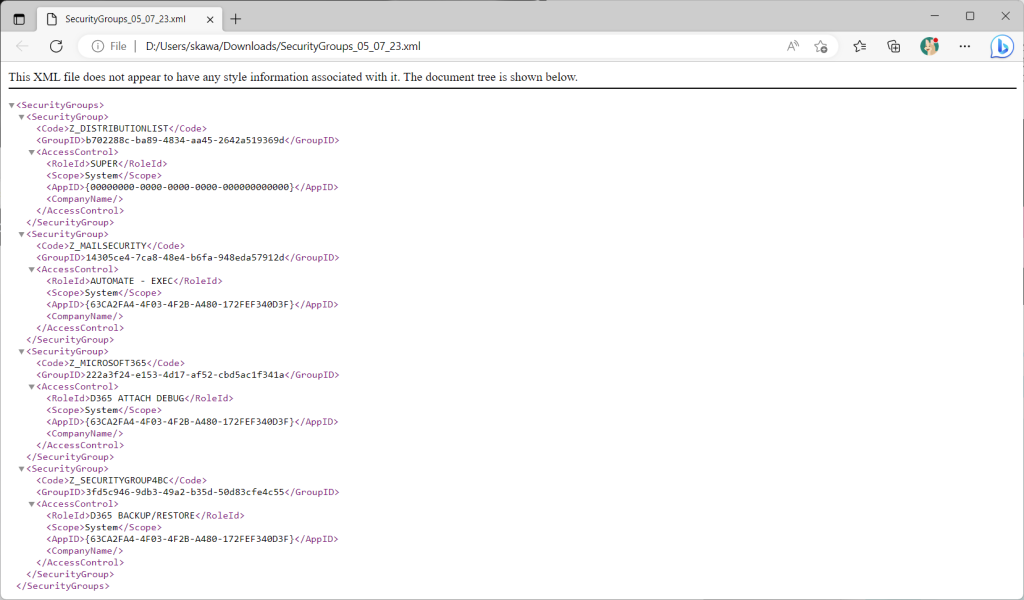
A file like this is exported
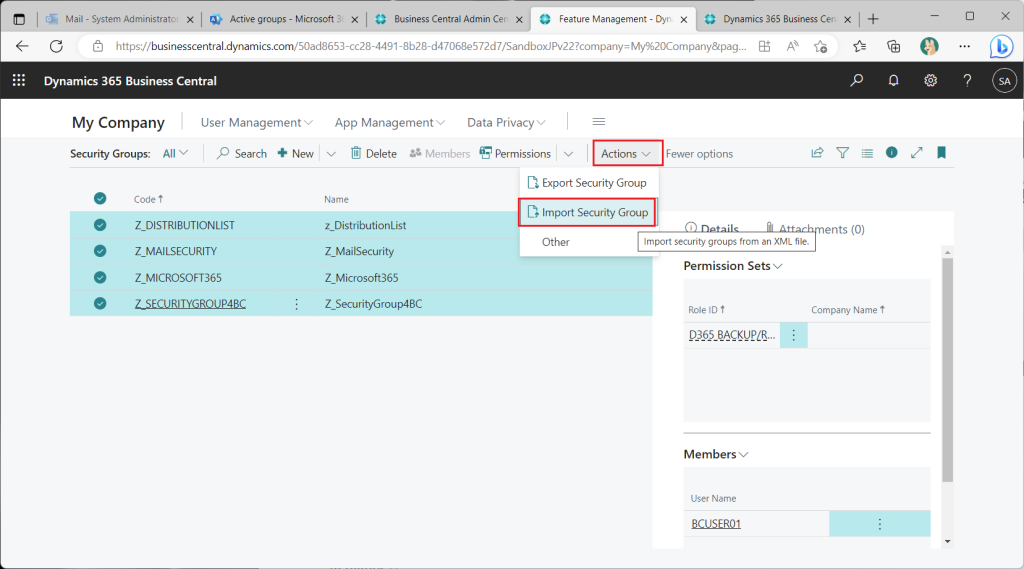
You can also import an xml file.
The xml file contains the security group, permission set, and company code assignments. Naturally, it does not include user ID assignment information (that is a role on the Azure AD side). This is useful for transferring settings from the test environment to the production environment.
5. Nested groups
Considering actual use case, we are interested in whether Azure AD groups can be used for nesting. Let’s give it a try.
Nesting between different group types is possible or not as follows:
| Parent\Child | Microsoft 365 | Distribution List | Mail enabled security | Security |
| Microsoft 365 | NG | NG | NG | NG |
| Distribution List | NG | ON | ON | NG |
| Mail enabled security | NG | OK | OK | NG |
| Security | NG | OK | OK | OK |
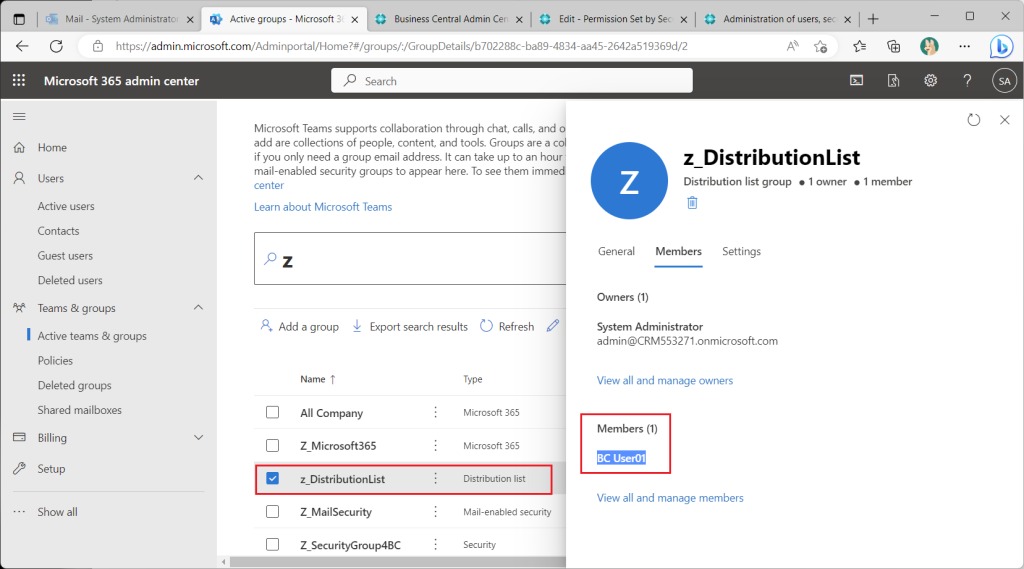
As a test case, let’s experiment with adding a user to the “Distribution List” group, adding the “Distribution List” group to the “Email Enabled Security” group, and adding the “Email Enabled Security” group to the “Security” group.
First, add users to the “distribution list” group.
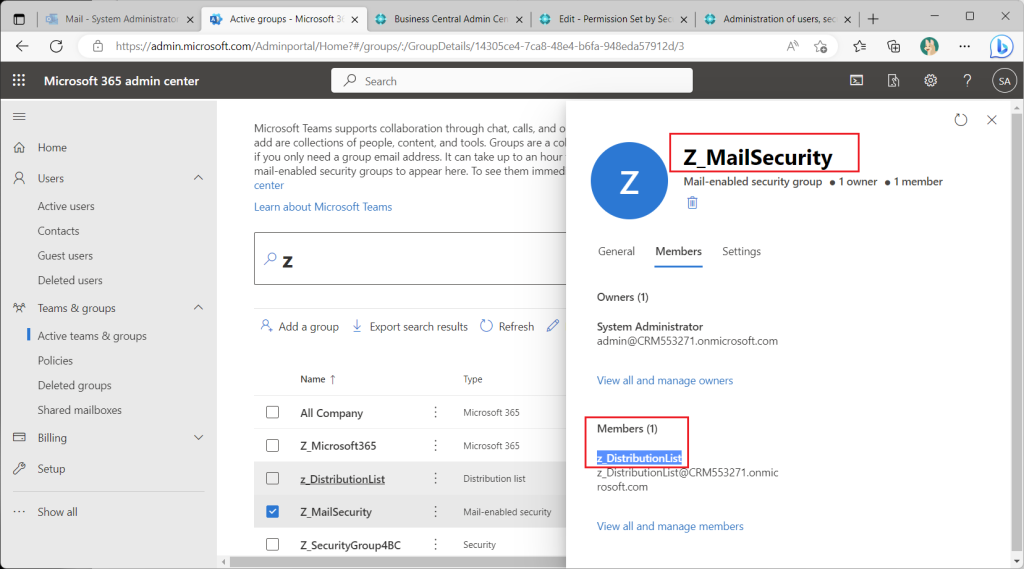
Next, add the “distribution list” to the “Email enabled security” group.
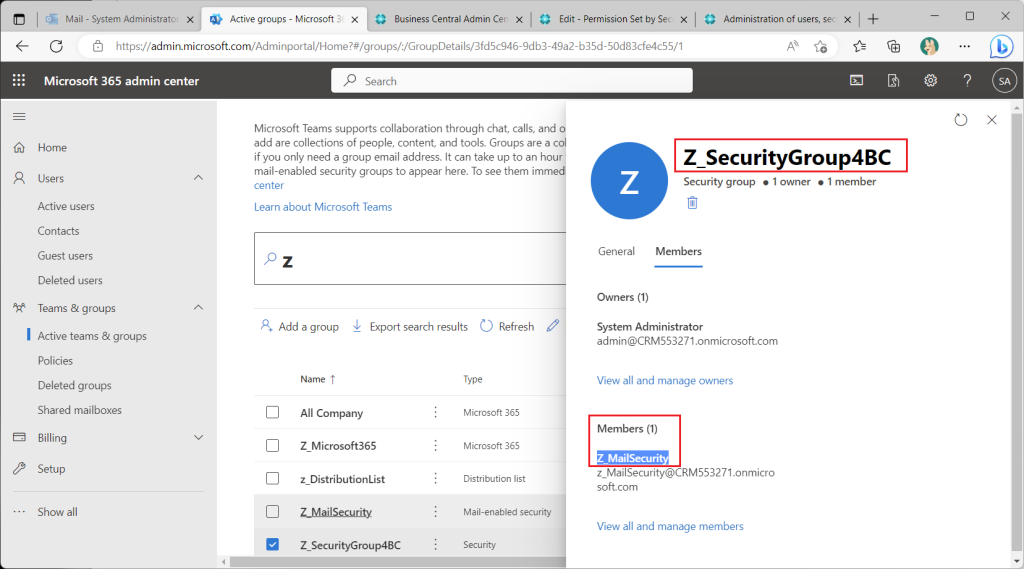
Finally, add the “Email enabled security” group to the “Security” group.
Assign the “Super” permission set to the BC security group created from the AzureAD “Security” group.
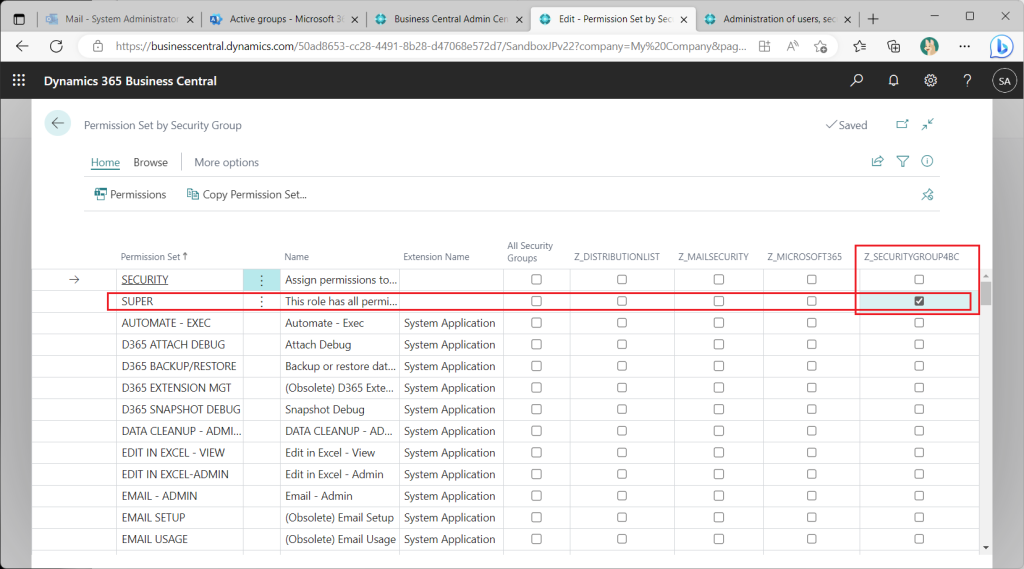
In the BC Security Groups page, the AzureAD security group is assigned the “Super” permission set and a test user, and the test user appears to be able to sign in.
But actually can’t sign in.
Grant the “Super” permission set to the middle nested group (the “Email enabled security” group).

Still cannot sign in.

Assign the “Super” permission set to the lowest nested group (the “Distribution List” group).
This was indeed a sign-in.
As you can see when you actually try it, I could not sign in even if I nested AzureAD groups of the same type. In other words, it is impossible to control access permission by nesting groups.
6. Summary
- Permission Sets can be assigned to users using Azure AD user groups instead of *Legacy* BC user groups.
- Access permission can also be controlled using Azure AD groups other than security groups (M365 groups, distribution lists, email enabled security).
- It is not possible to nest Azure AD groups to control access permission.
7. My Impression and Idea
Since permission can be granted using Azure AD groups, the user assignment will be less time-consuming. When considering actual use case, it will be less time-consuming to maintain both Azure AD groups and BC user groups each time personnel changes are made. I guess we accept the fact that nesting is not possible, since BC usergroups were not originally designed to be nestable. I would be more than happy if they could be nested. On the other hand, it will be a bit complicated for BC implementation vendors. However, in the case of a new BC implementation with M365 already in place, the customer’s Azure AD staff will be asked to assign users, and this will no longer be possible within BC. I think it will be a little difficult to change settings or isolate problems. Nevertheless, overall, it is an improvement in the right direction from a compliance standpoint, as it allows permission control in a manner consistent with the company’s user group management policy.
I hope you will all try it.
Thanks for reading this article.