
This is a sub contents of How to Setup Workflow of D365BC
In the previous article, I created a flow for approving Sales Quote in BC using a Power Automate template. In fact, a BC workflow is also created behind the scenes when the Power Automate flow is created. In this article, we will check this workflow on the BC side.
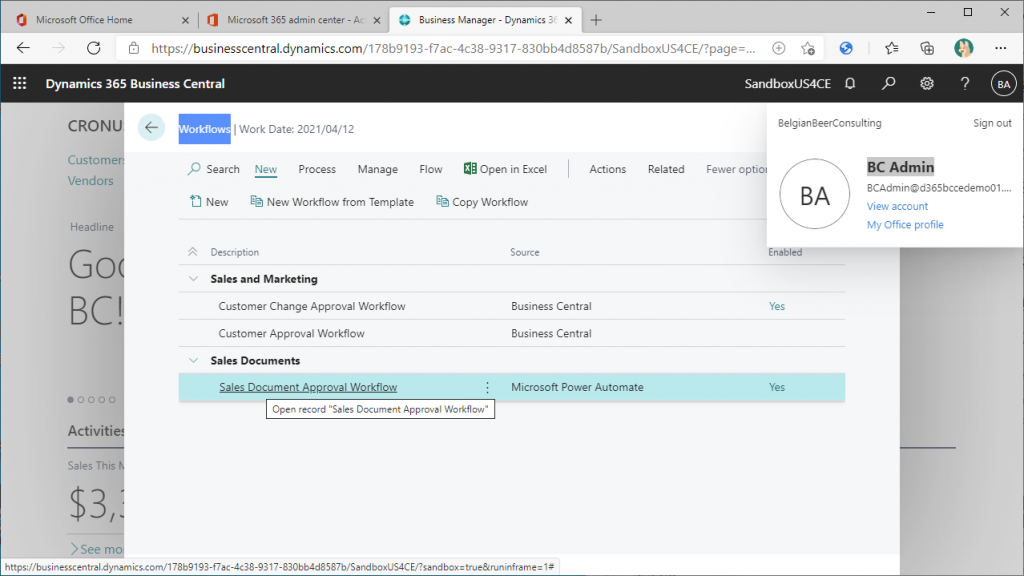
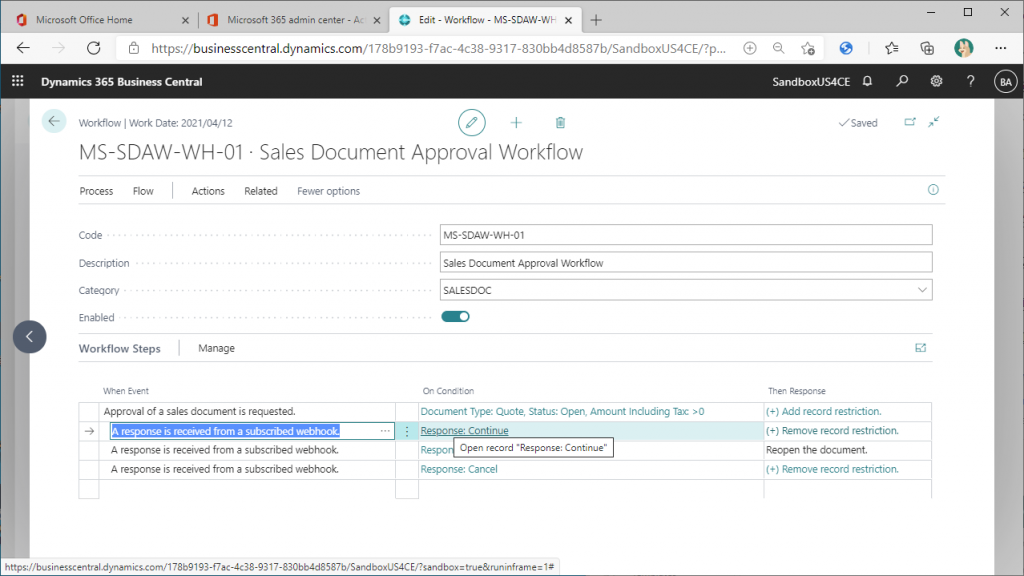
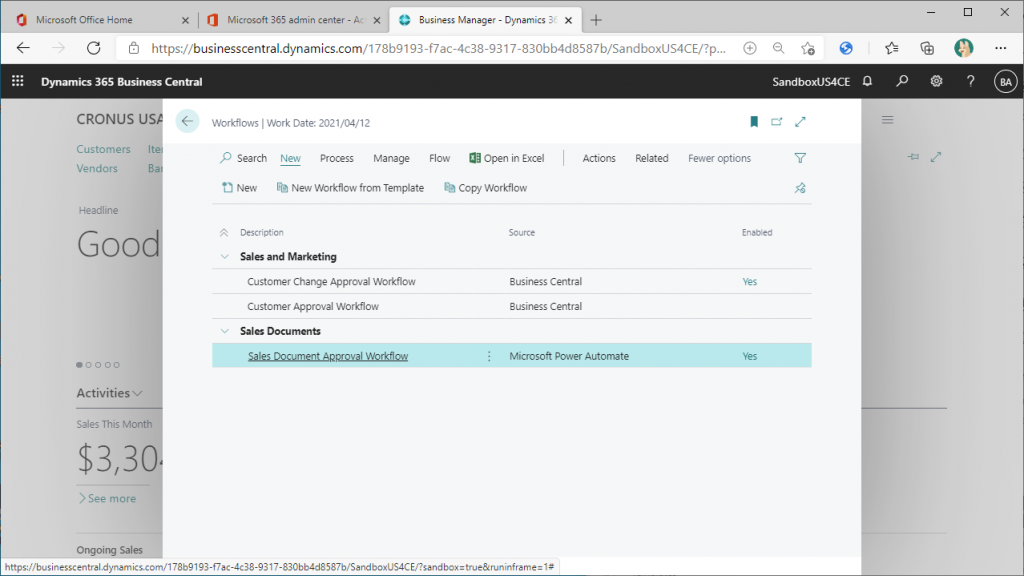
If you check the BC Workflow List page, you will see that a workflow named “Sales Document Approval Workflow” has been created. Click the name of the workflow.
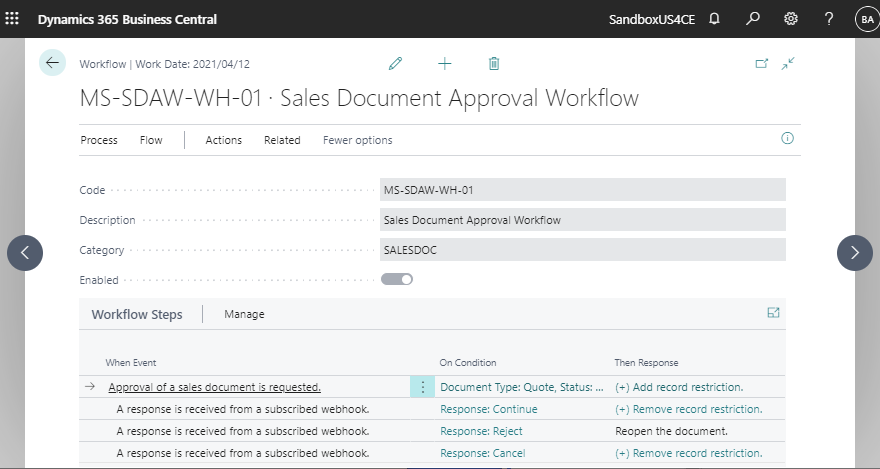
The Workflow card page will open. Let’s take a look at the overall structure.
– Line 1: Describes the conditions for starting the Workflow when approval is requested, and the process to be executed when the Workflow is started.
– Line 2: Describes the detection method and the process to be executed when the Workflow is approved.
– Line 3: Describes how to detect when a Workflow has been rejected and the process to be executed.
– Line 4: Describes the detection method and the process to be executed when a Workflow is canceled.
To check the details of the process in the first line, click “Add record restriction” in the “Then Response” column.
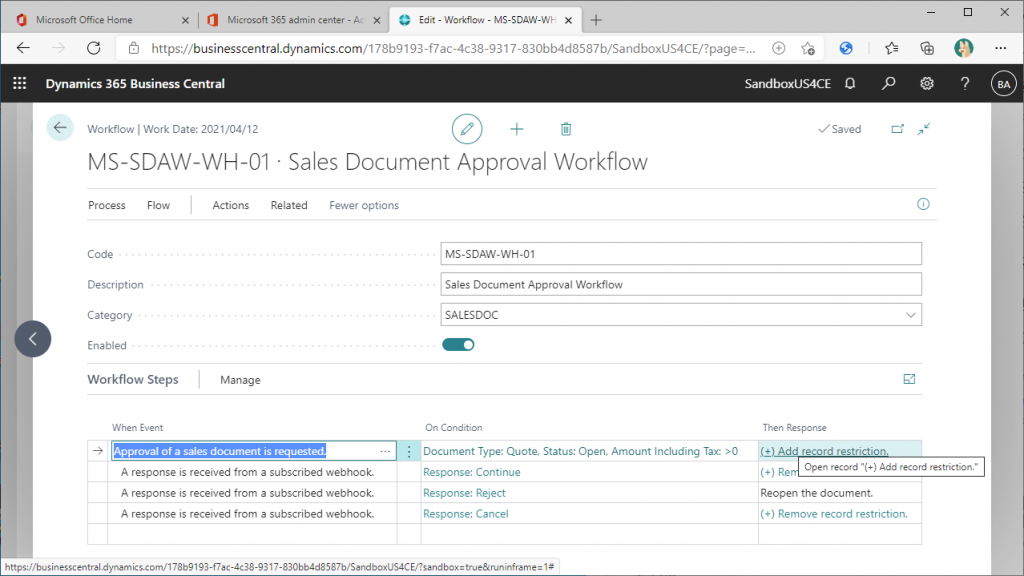
The first and second lines of the response are the same as the BC flow without Power Automate. The first line creates a restriction record, and the second line sets the status of the sales quote to “Pending Approval”.
The third line is a response specific to a workflow that works with Power Automate, which seems to send a notification to the approver via a webhook.
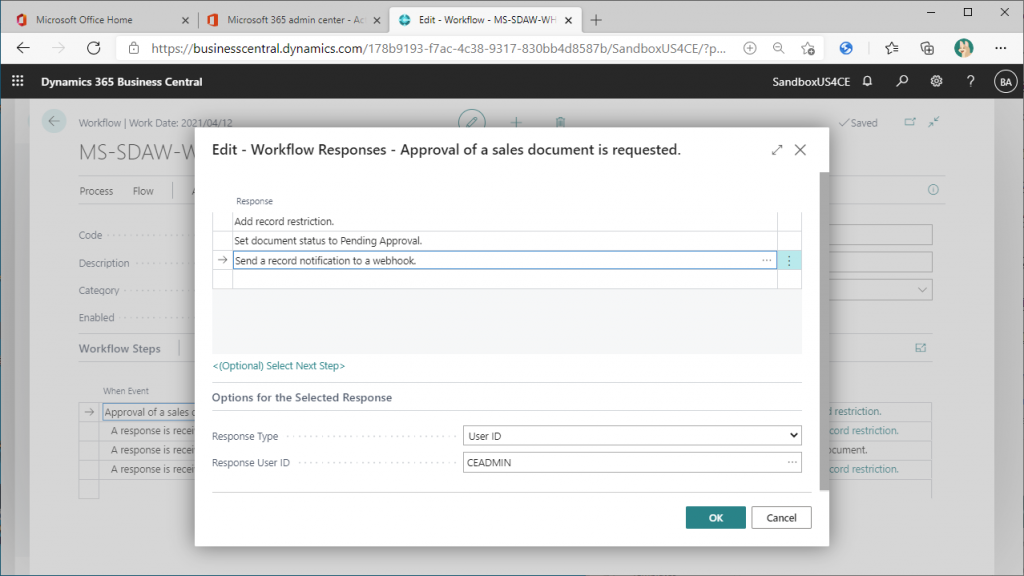
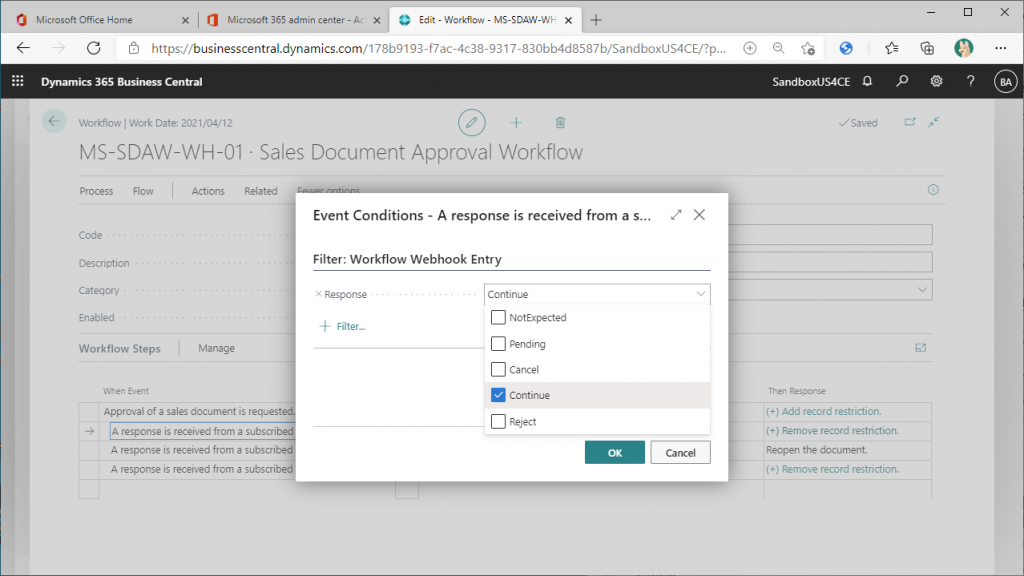
Go back to the Workflow card page and look at the second line. This line describes what will happen when the approval process is completed on the Power Automate side. To check the value of the “On Condition” column, click on “Response Continue”.
You can see the list of values that will be passed from the webhook. “Continue” opton flag is on. Looking at the names of the other options, it seems that the value “Continue” will be passed on if the request is approved.
Also check the response in the second line. Click on “+Remove record restriction” in the “Then Response” column.
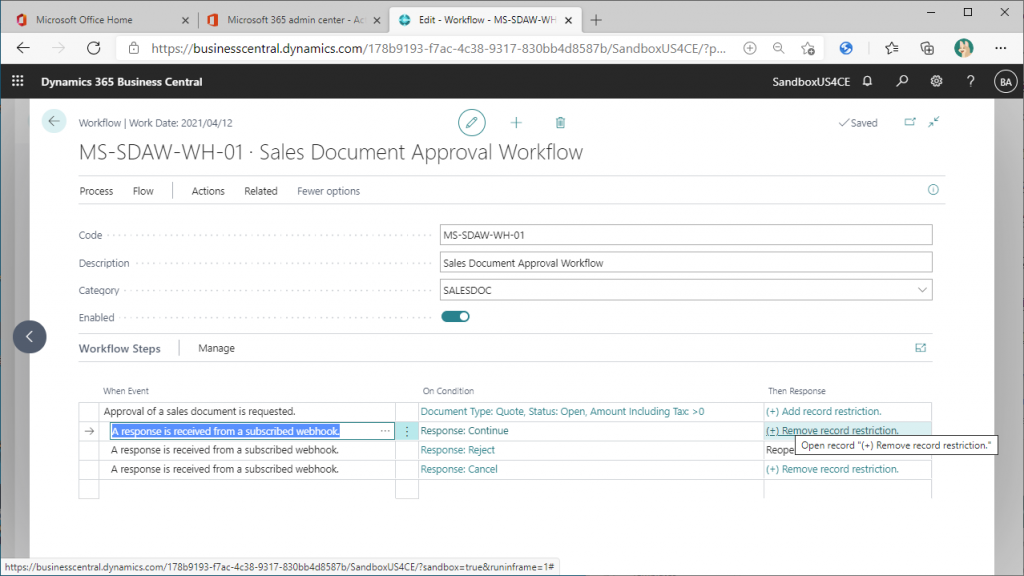
The restriction record is removed and the sales quote is released. This is the same as the BC flow without Power Automate.

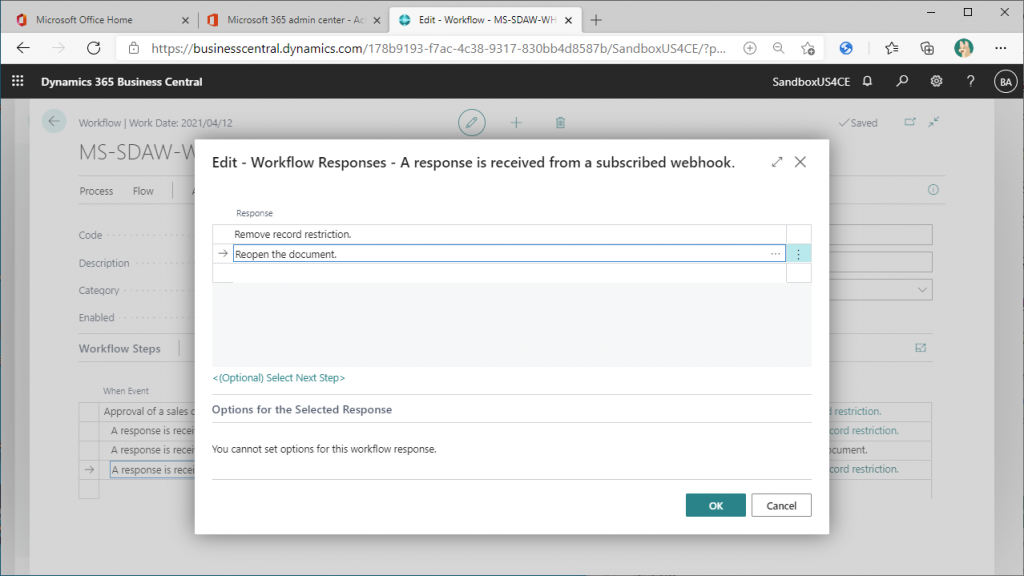
The third line just reopens the status of the document if the approval is rejected by Power Automate. The fourth line describes what happens when Power Automate cancels. Click on the “Then Response” column.
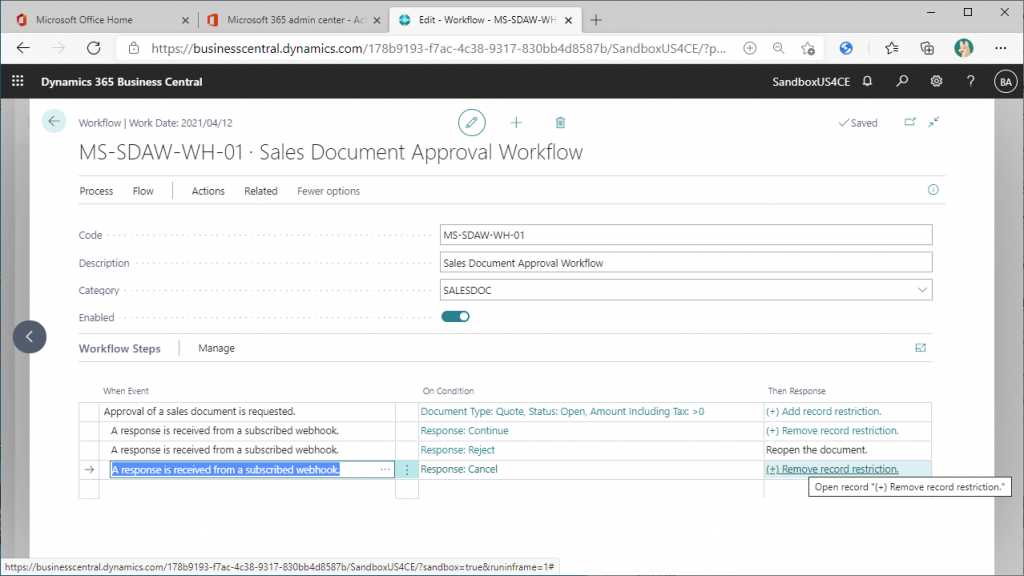
The Restriction Record is deleted and the document is reopened. This is the same as the BC flow without Power Automate.
When checking are done, close the workflow card and make sure the workflow is enabled.
The structure of the workflow on the BC side is very simple, because the part where the approver makes the decision of approval/rejection is processed by Power Automate, and the BC side only receives the result and processes the document (Sales Quote in this case).
For example, if you want to use only the standard BC workflow without Power Automate, you need to separate the subsequent processing depending on whether the approval process is final approval or not, which will be described in other lines.
In the next article, let’s try to run the Power Automate flow by requesting approval of a Sales Quote.
2件のコメント