
Edit in Excel is a very useful tool that allows you to batch update various tables in BC from Excel book. However, by default, only one table can be updated from one Excel book. In this article, I will introduce a tip that allows you to update multiple tables data from a single Excel book.
As an example, let’s try to update Customer and Payment Method table from a single Excel book.
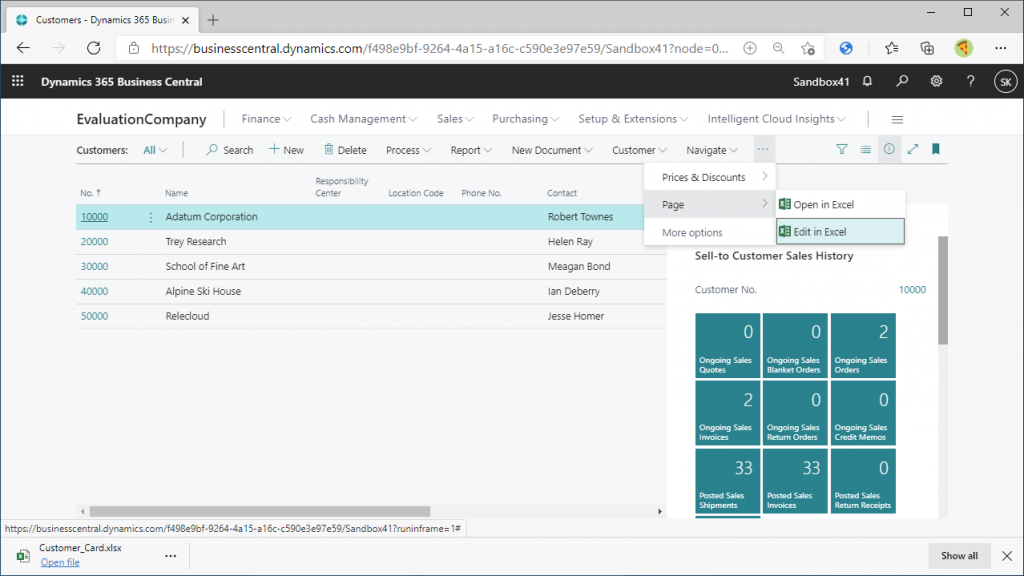
First, go to Customers list page and select ‘Edit in Excel’ from the Page tab. Excel file will be downloaded.
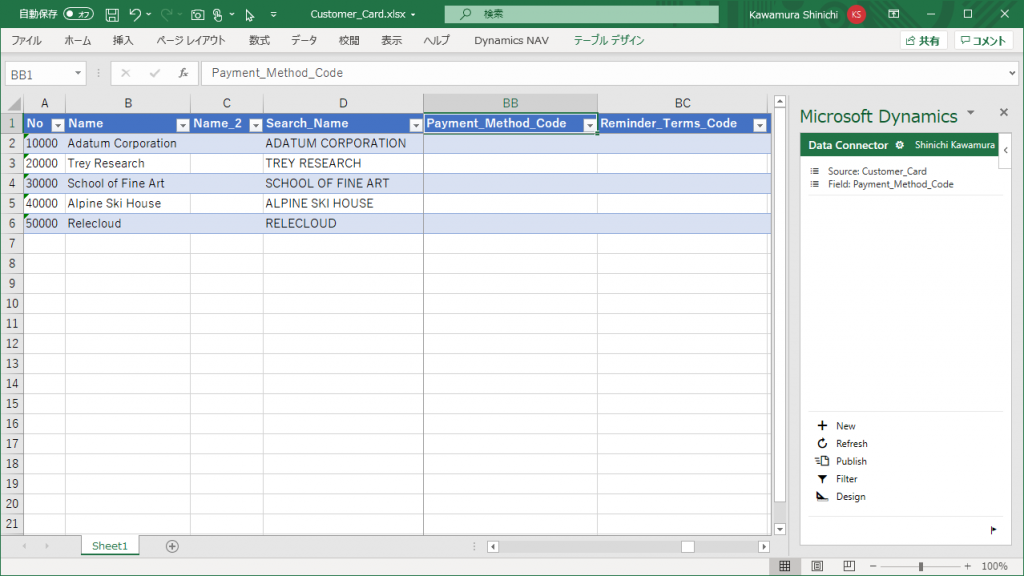
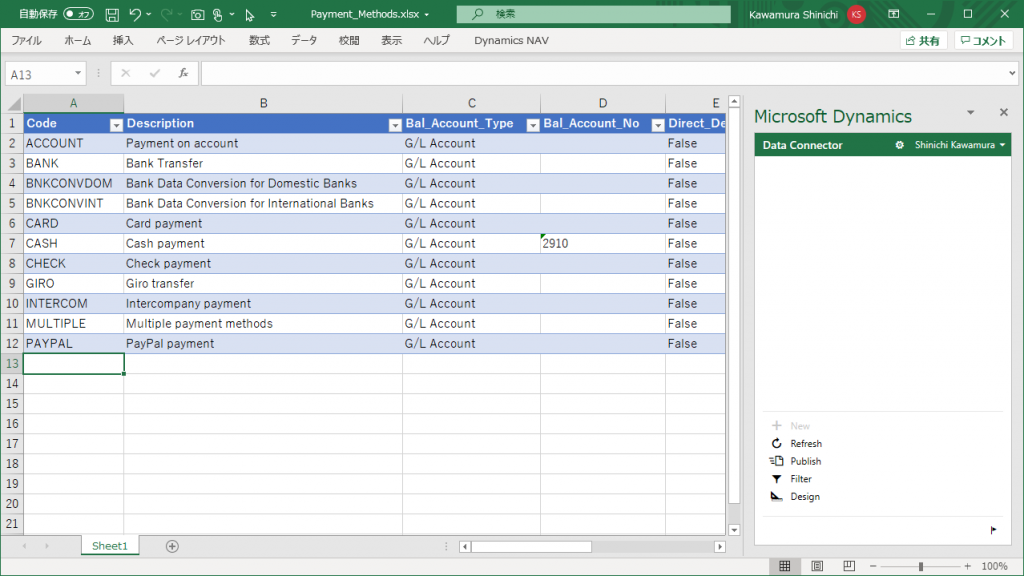
When you open the file, you will see a list of Customer data and the D365BC Excel connector on the right pane. (I will not explain the sign-in procedure detail.)
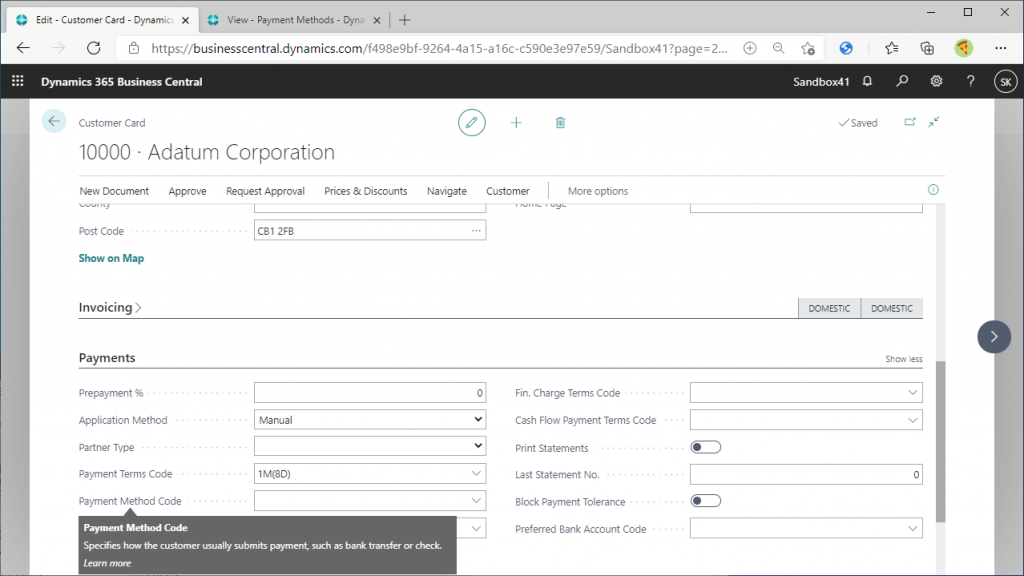
Customer has a Payment Method. This field defines the means of payment. When you decide to start a new transaction with a new customer and a new payment method, it is useful to be able to create both the customer and the payment method in Excel.
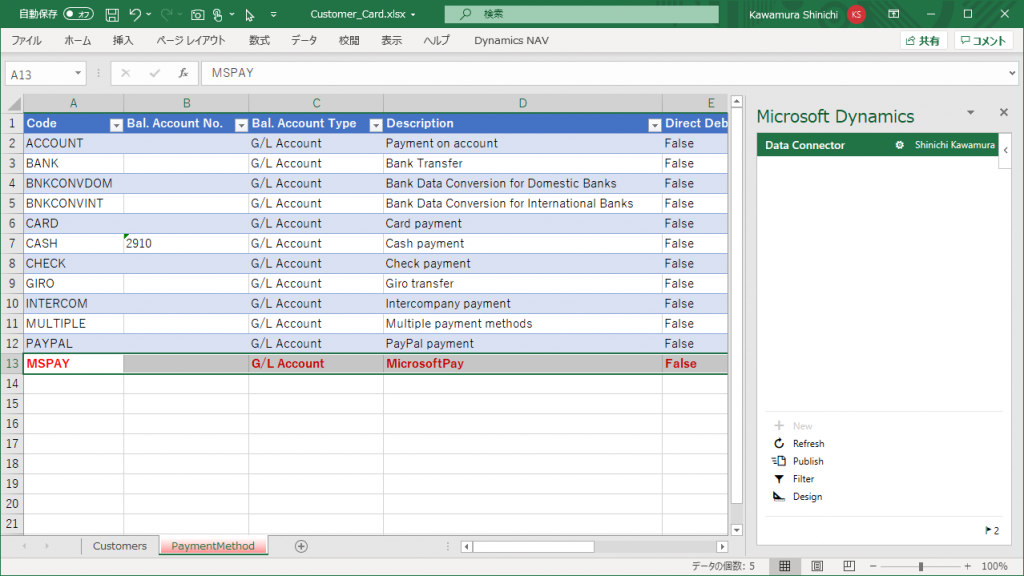
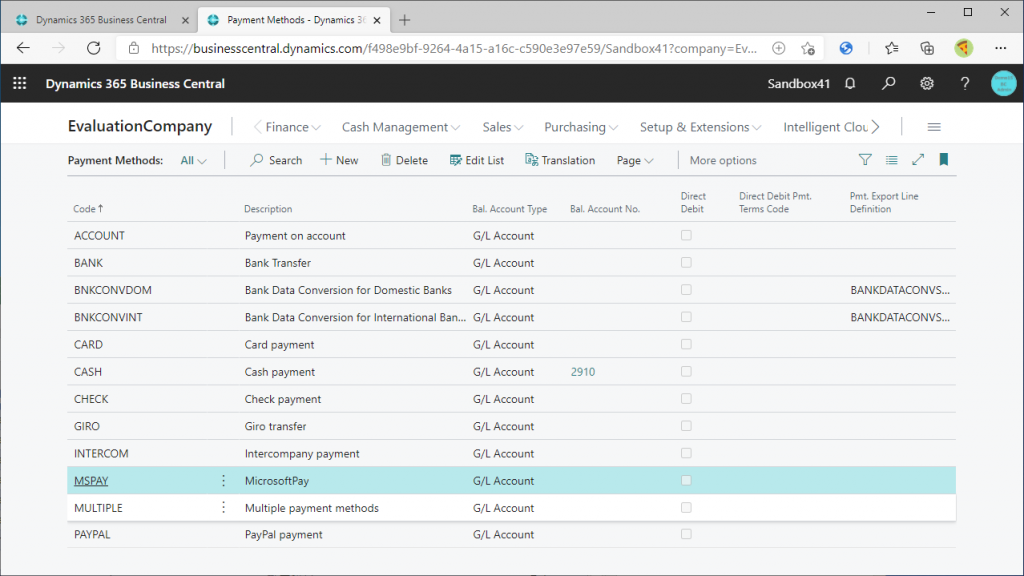
On the Payment Method list page, download Excel file in the same way.
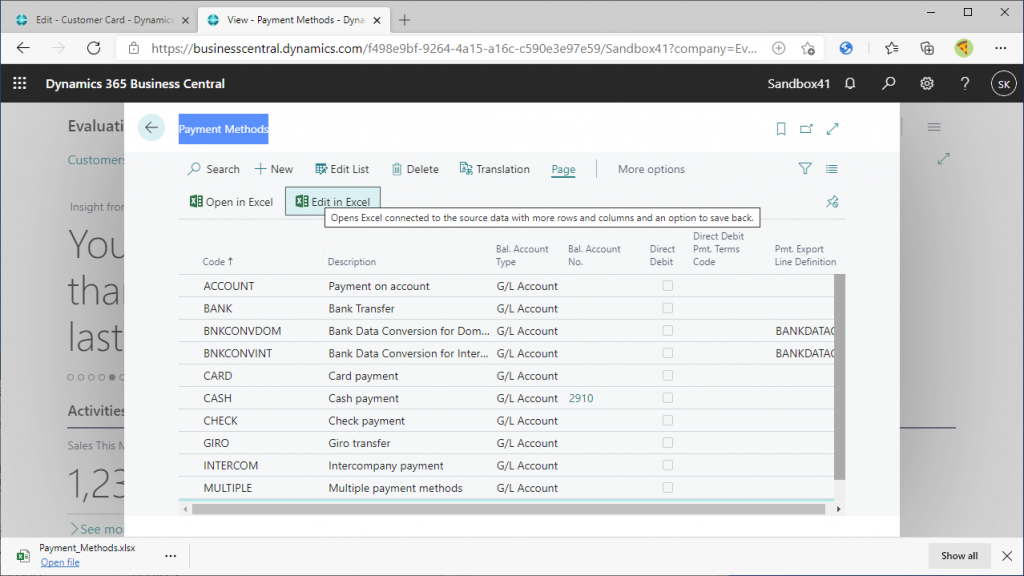
Downloaded.
Next step is very important. This is the key point of this blog post.
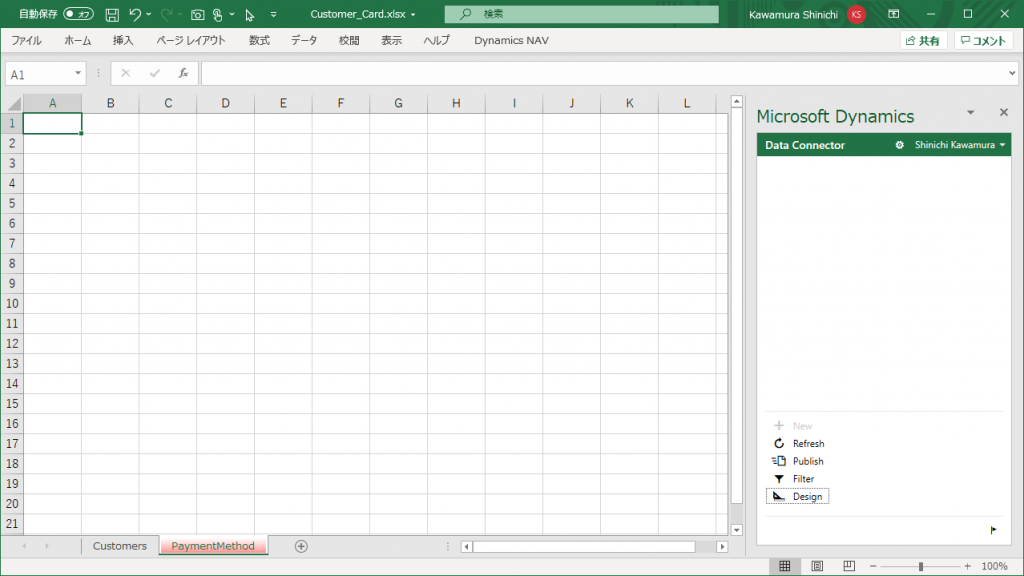
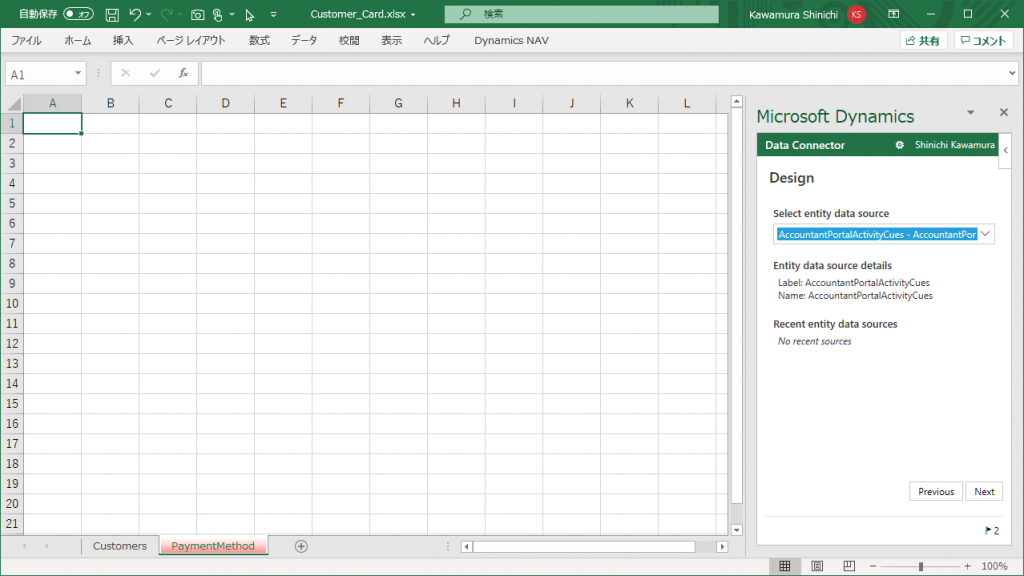
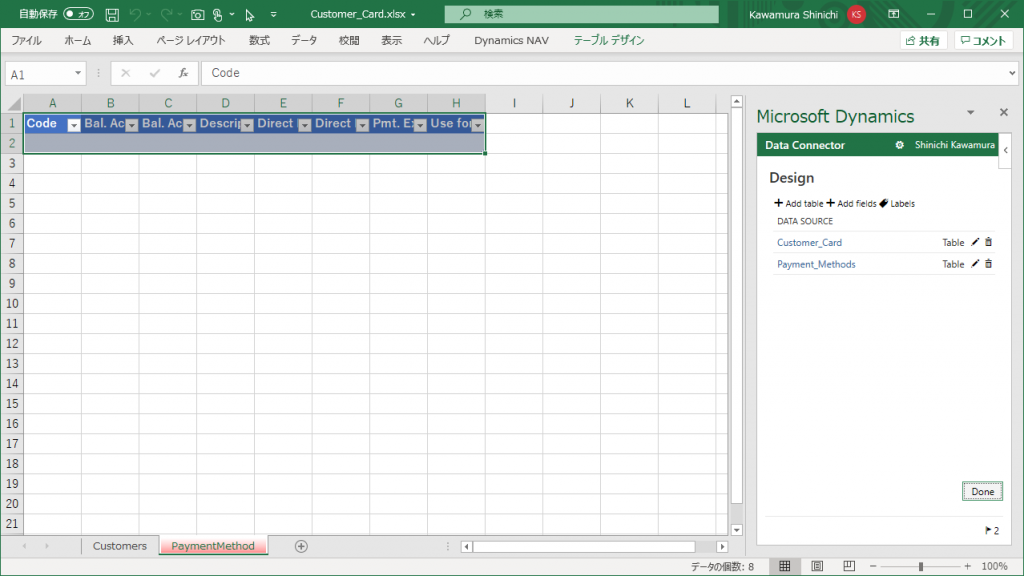
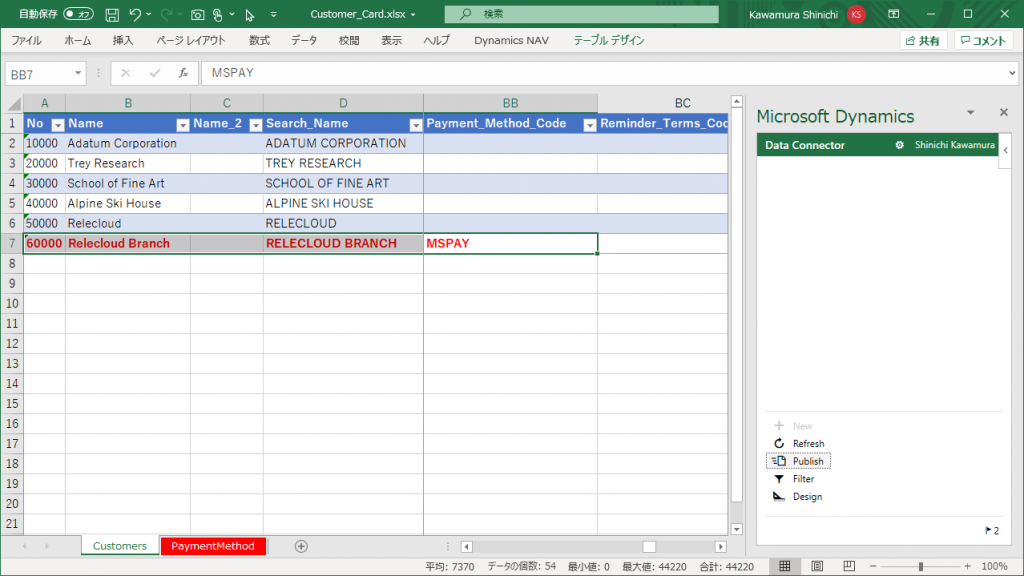
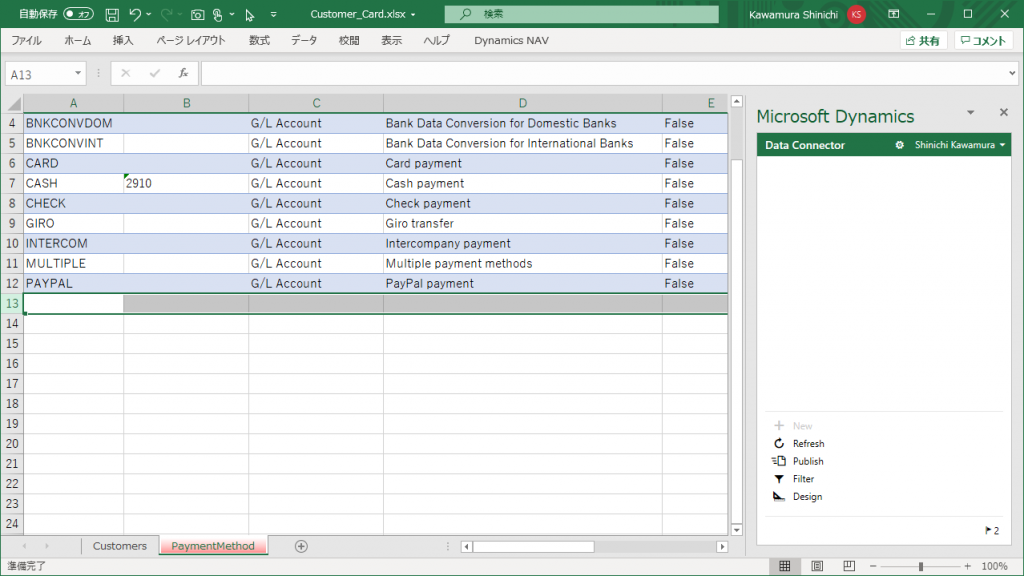
Go back to the downloaded Excel file for Customer and add a sheet for Payment Method . It’s better to give the two sheets names so that you can distinguish it. Then click on the “Design” button on the bottom of data connector.
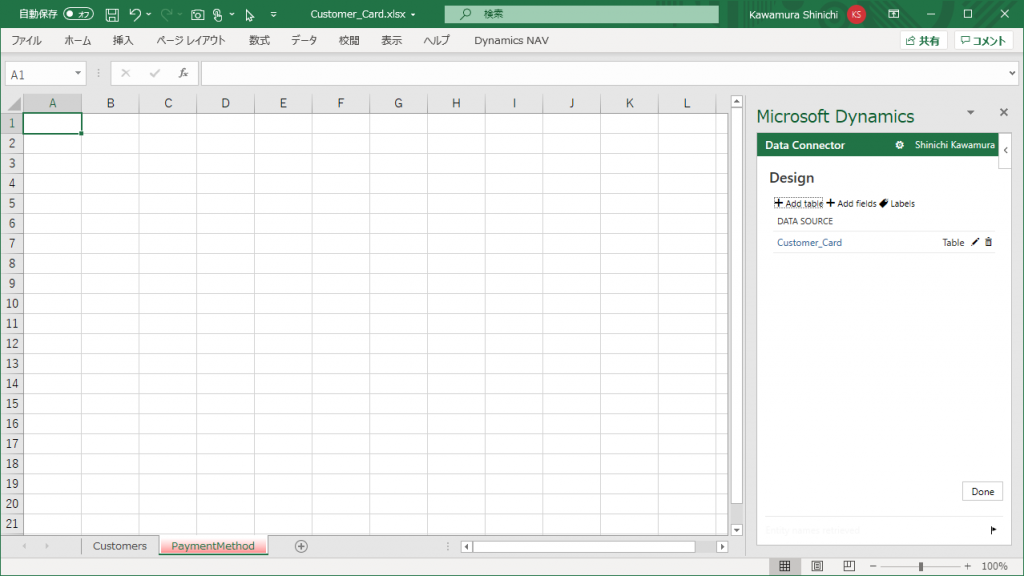
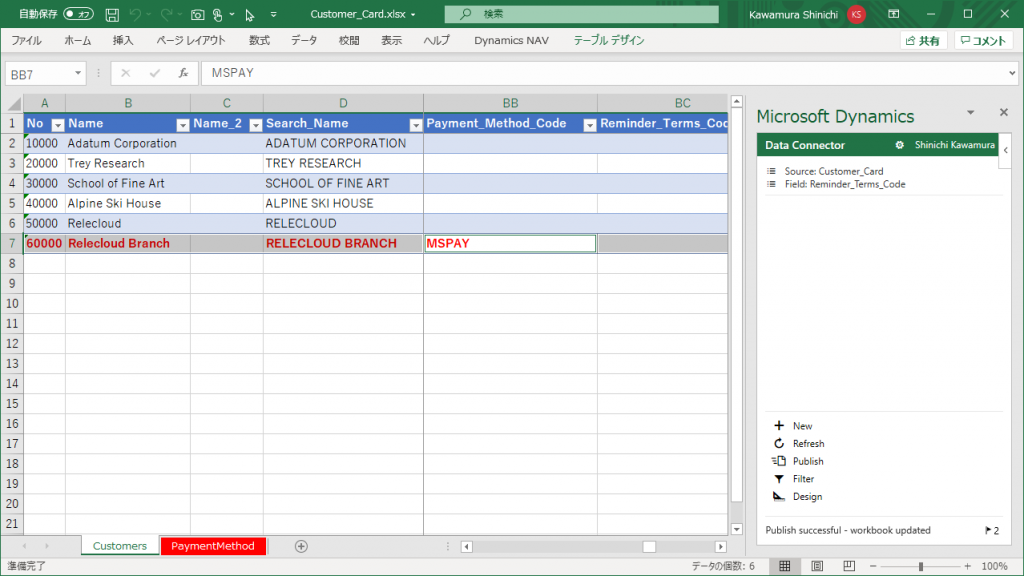
This will open the design screen on the connector. Click “+ Add table”.
You will then be asked to select the data source. You can select from the pull-down menu.
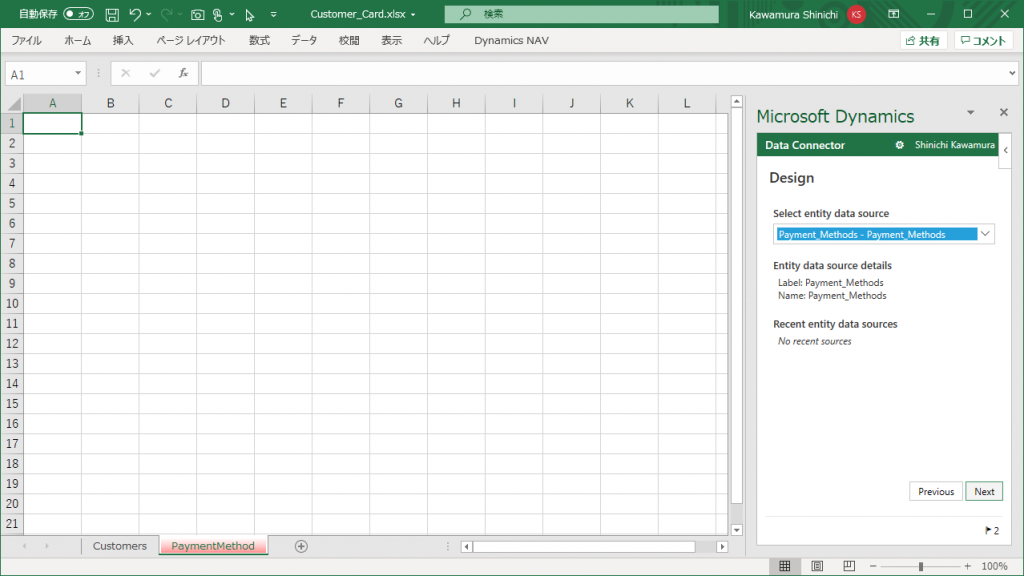
Select “Payment Method” from the pull-down list and click “Next”.
You will then see a list of available fields for “Payment Method”. This time, select all of them and click “+Add” under “Selected Fields”.
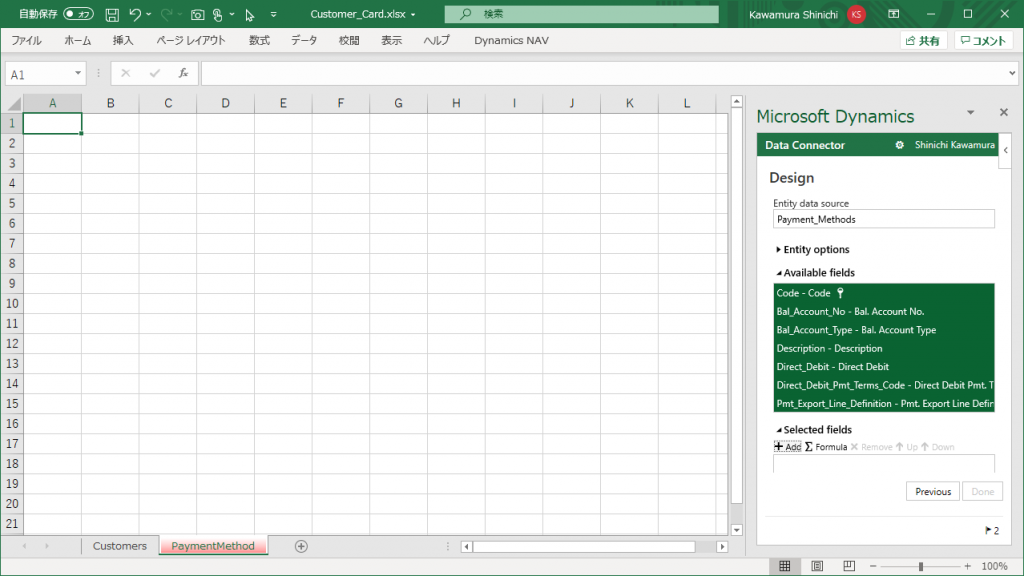
Then all the fields will be moved to the selected fields. Then click “Done”.
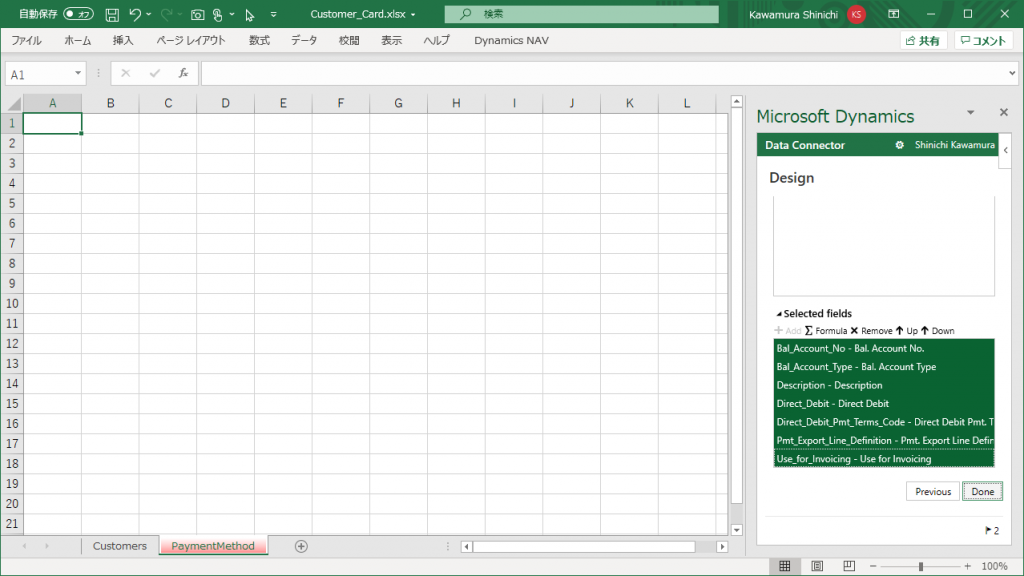
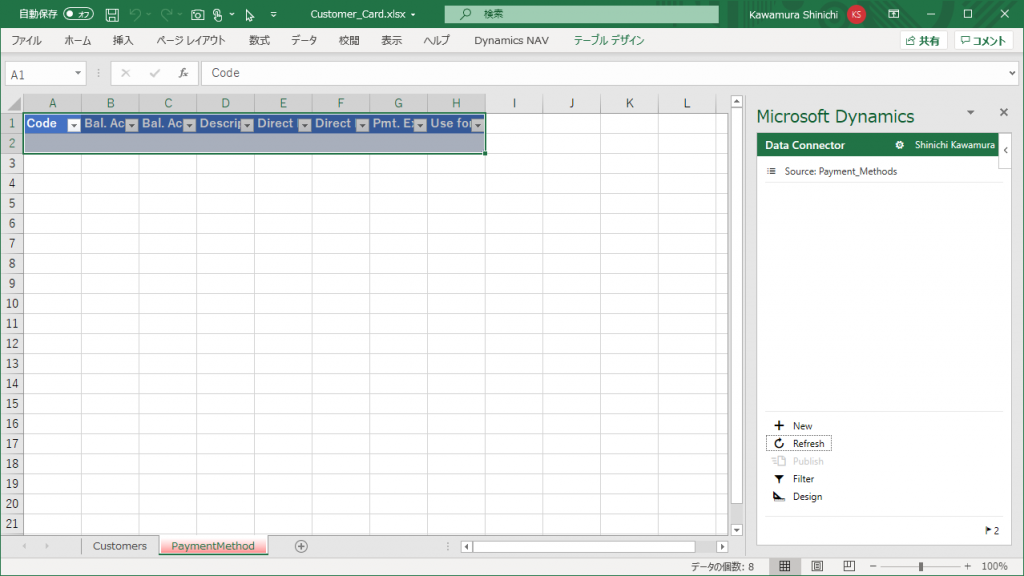
Then, Payment Method was added to the list of data sources, and the Payment Method fields were added to the Excel sheet.
No data is displayed yet. Now click “Refresh”.
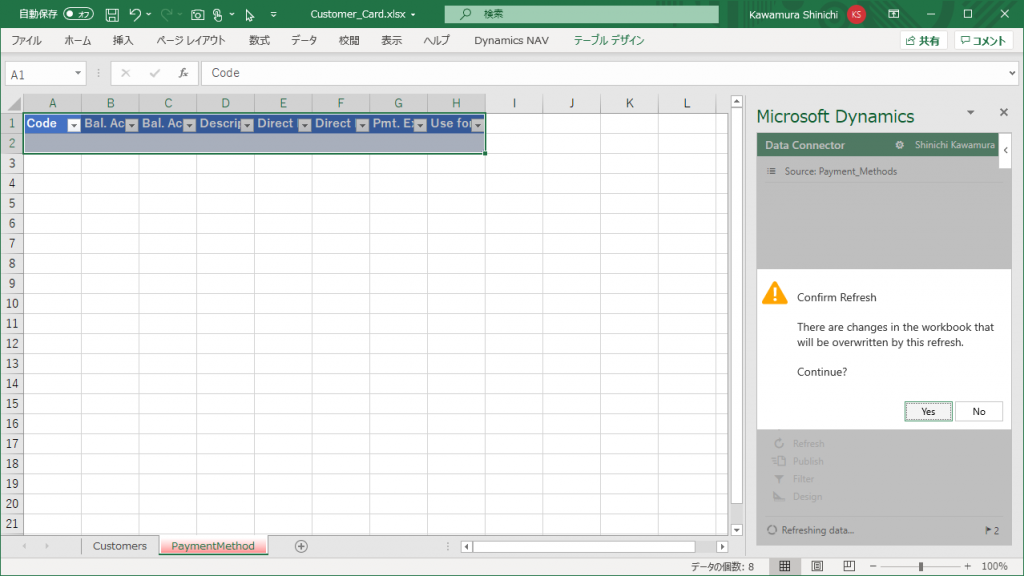
You will see a message that your data will be overwritten. Click on “Yes” to continue.
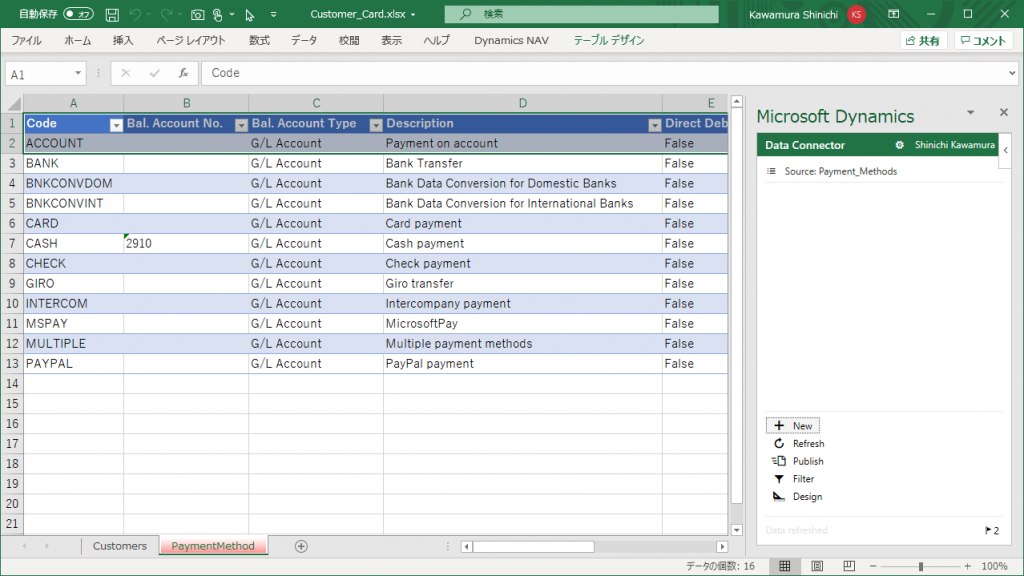
The data is now displayed. Now you can see the data of multiple tables in one book.
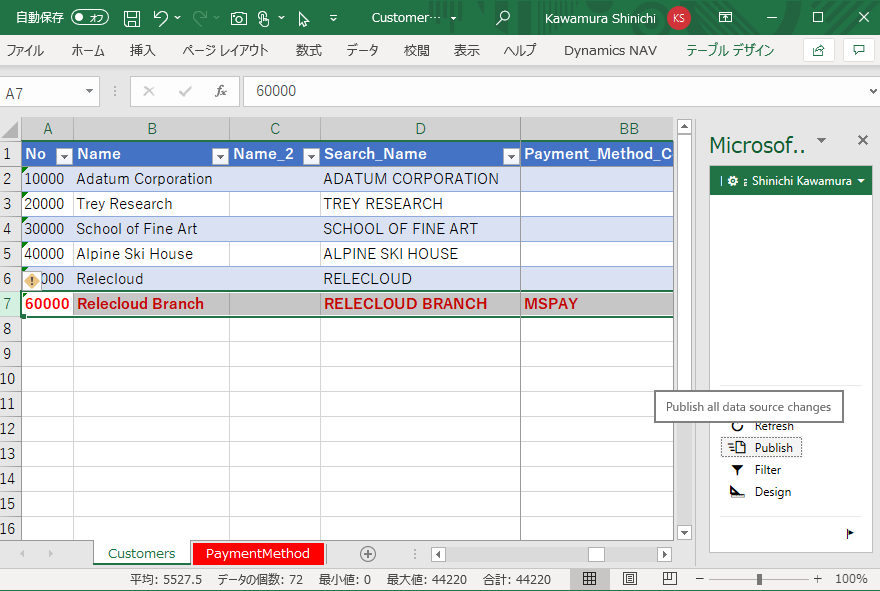
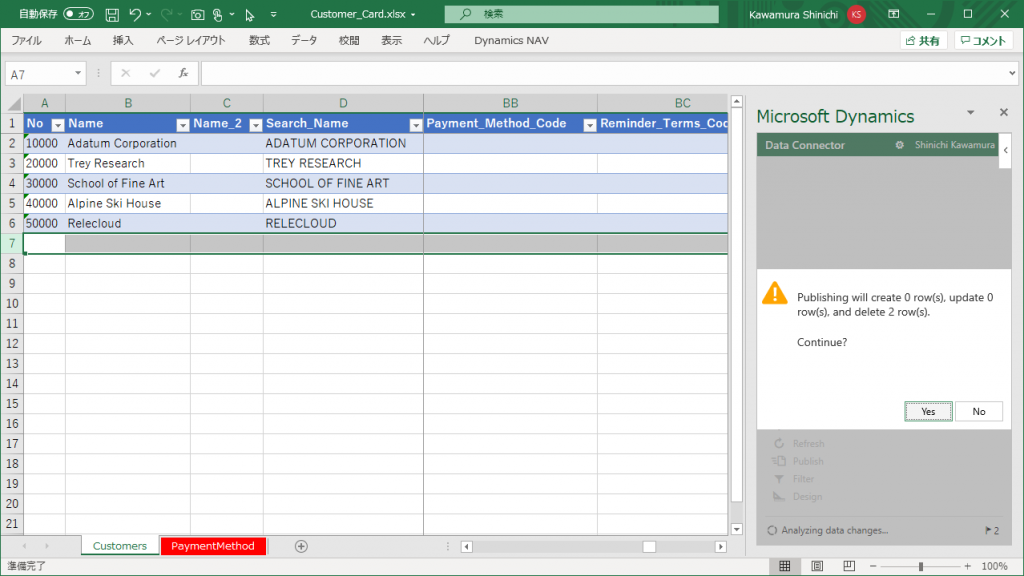
Let’s update the data. First, let’s add a row to the Payment Method sheet.
Next, in the Customer sheet, add a new customer, and in the Payment Method column, specify the Payment Method that you just added. Then click “Publish”. (It’s a good idea to copy the Customer column above, change the code and name, and clear the read only field (ex. Balance) as blank.
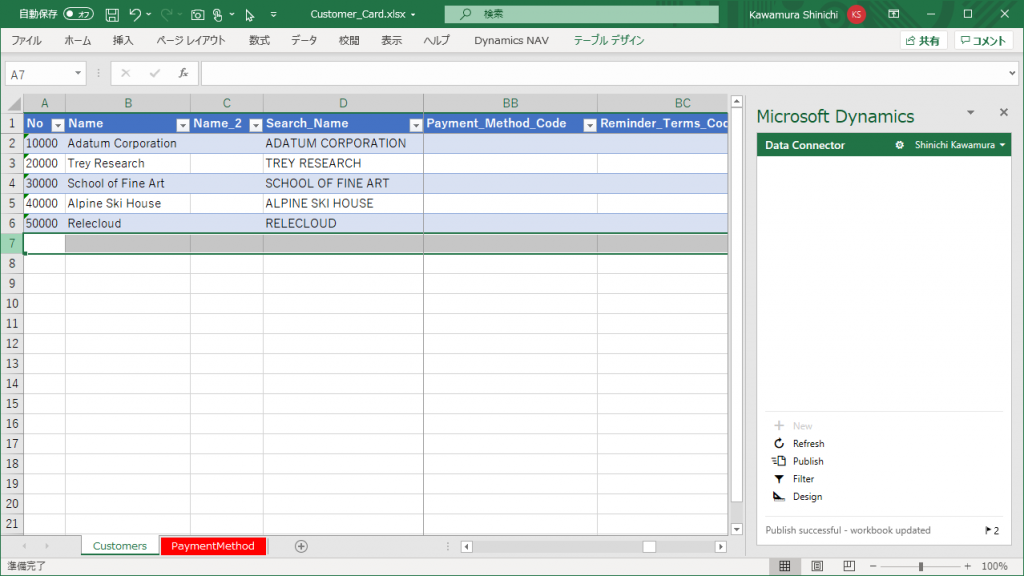
The update was successful. It is quietly displayed under the bottom of connector part on the right side.
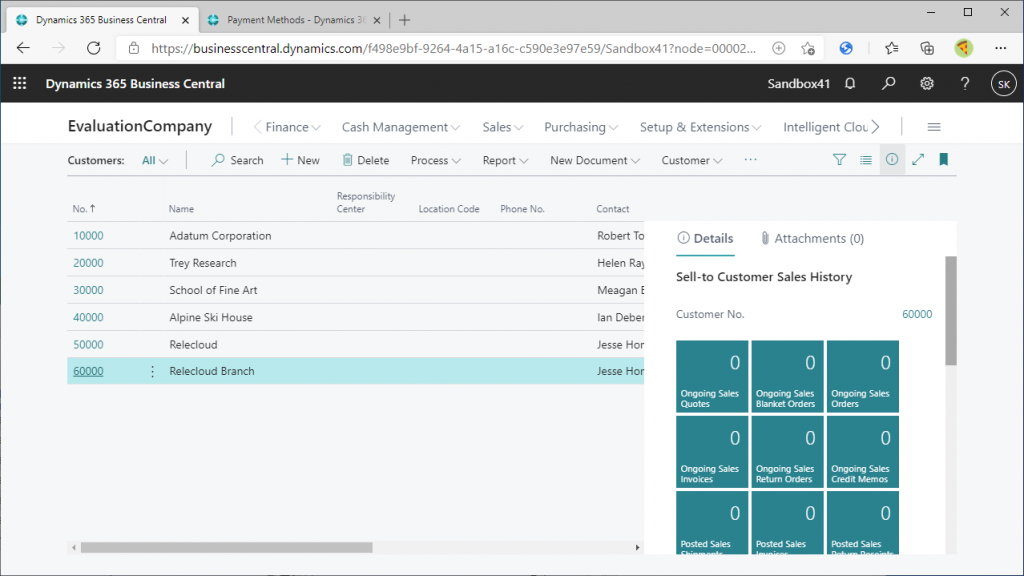
Check the BC screen, and you will see that the customers you added in Excel have been added to the list of Customers.
Go to the Payment Method list page. The new payment method has also been added.
You can also delete the data in Excel. Delete the Payment Method that you just added and click, and then..
Delete the customer that you just added. Then click “Publish”.

It will tell you that two lines will be deleted, one for Customer and one for Payment Method. Select “Yes”.
You will see a message that the data was updated successfully, and you can see the data has been deleted on Customer list page and Payment Method list page on BC.
The Excel book is not only temporary, but can also be saved on a local PC and used to update data on a different day. So, if you can update multiple tables at once, you can use it for migration and other tasks. I think it’s very userful.
1件のコメント