
In this article (and maybe next article), I will explain correcting dimension feature of D365BC. This is a feature added in the 2021 Release Wave1 of D365BC.
Summary
1. We can now correct Dimension values of POSTED G/L Entries.
2. It is possible to prohibit changes to certain dimension code.
3. Dimension value correction can be reflect immediately in G/L entries G/L entries and Analytics view
4. Dimension value correction can be also reflect in G/L entries G/L entries and Analytics view later using job queue.
5. It is possible to set the conditions for filtering G/L Entries and correct their dimension value all at once.
This blog post contain 1. and 2. and 3.
1. How to correct a G/L entry
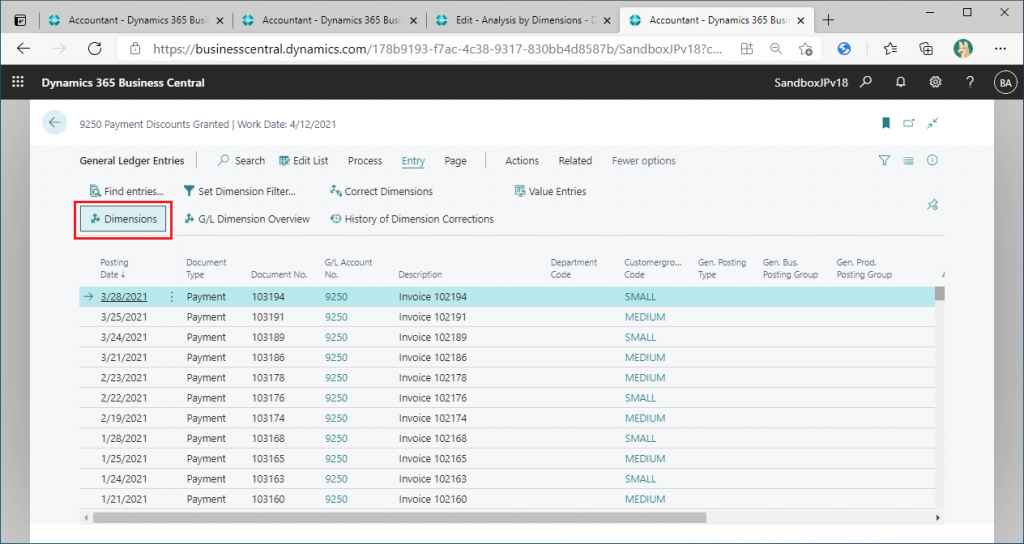
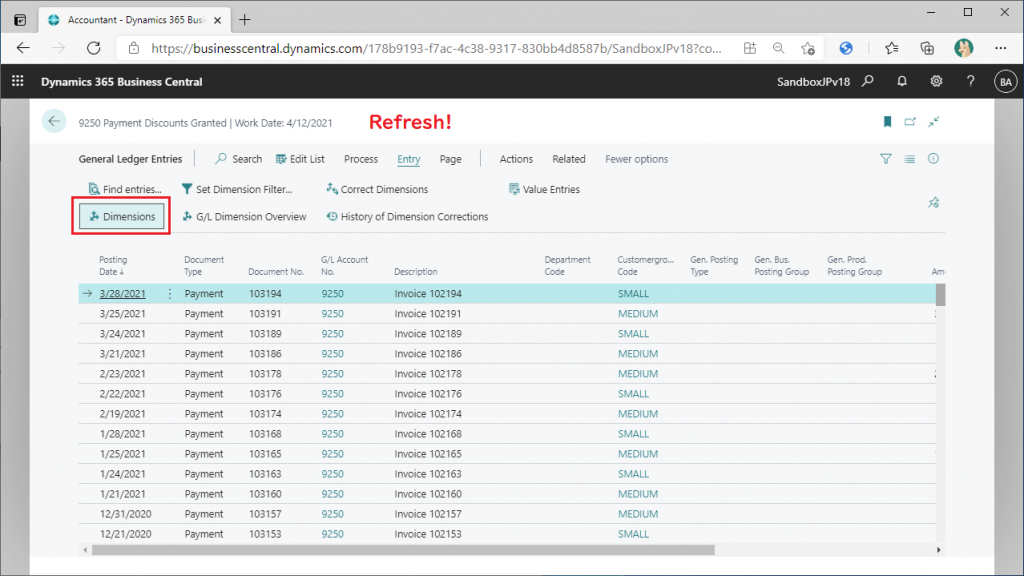
Open “General ledger entries” list page.
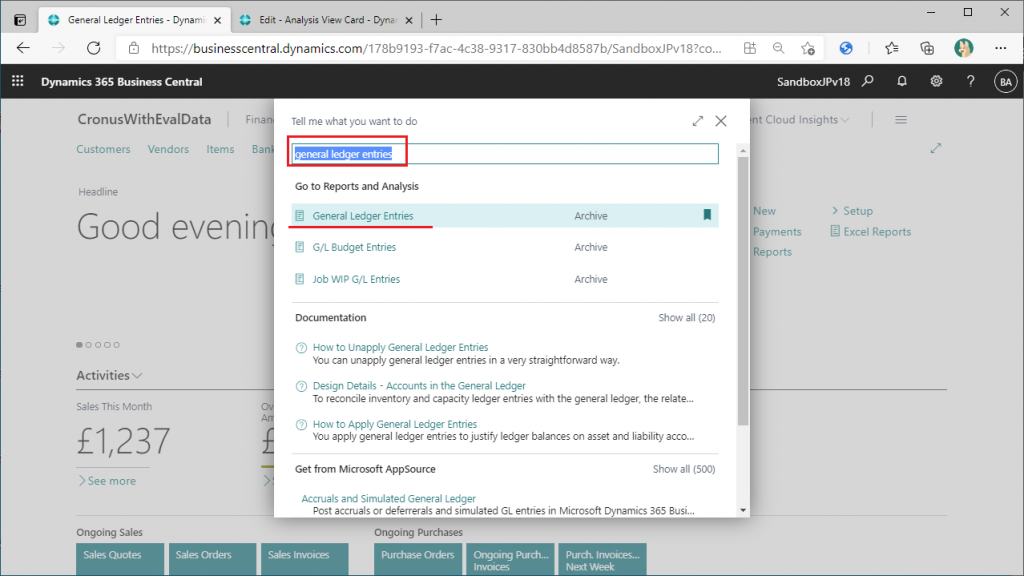
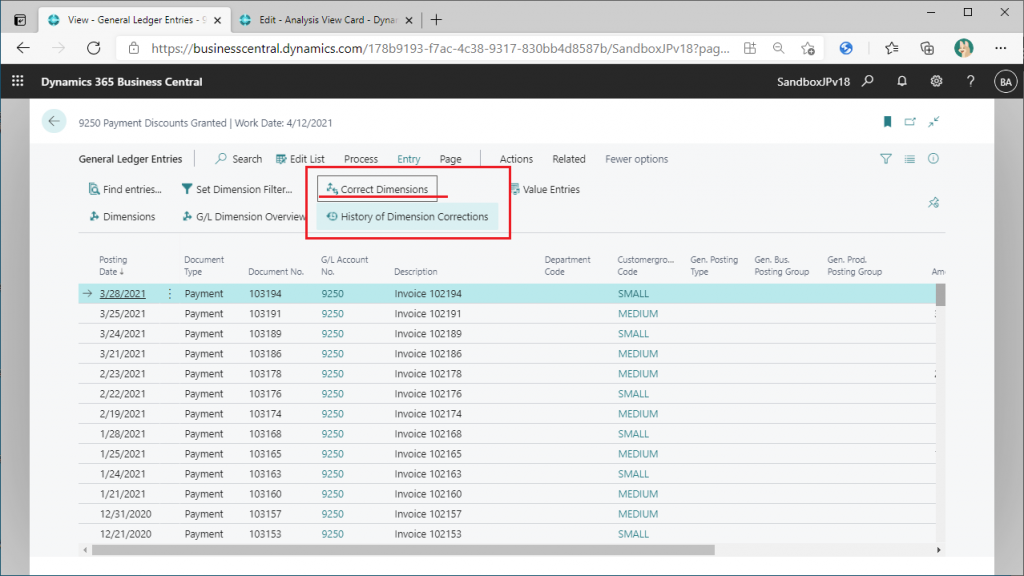
In the new version, two buttons have been added to the “Entry” tab. Choose the top entry and select “Correct Dimensions”. (I used Cronus Company for this explanation.)
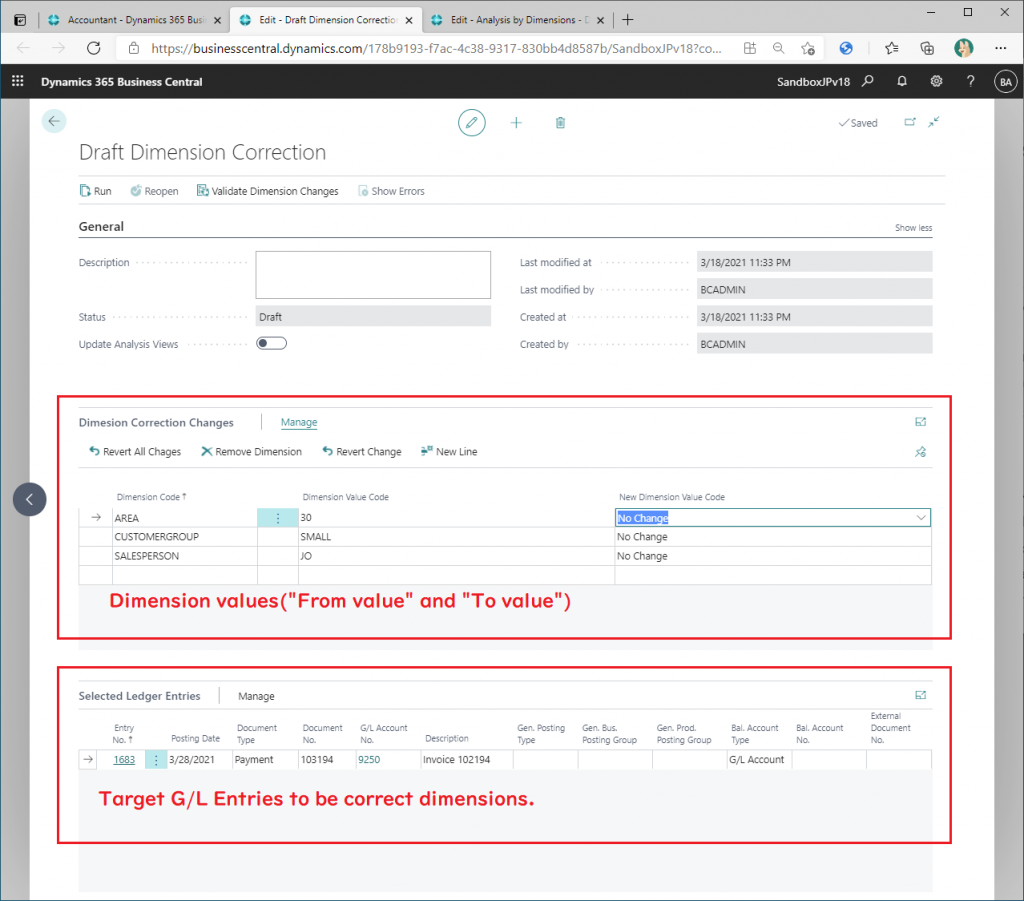
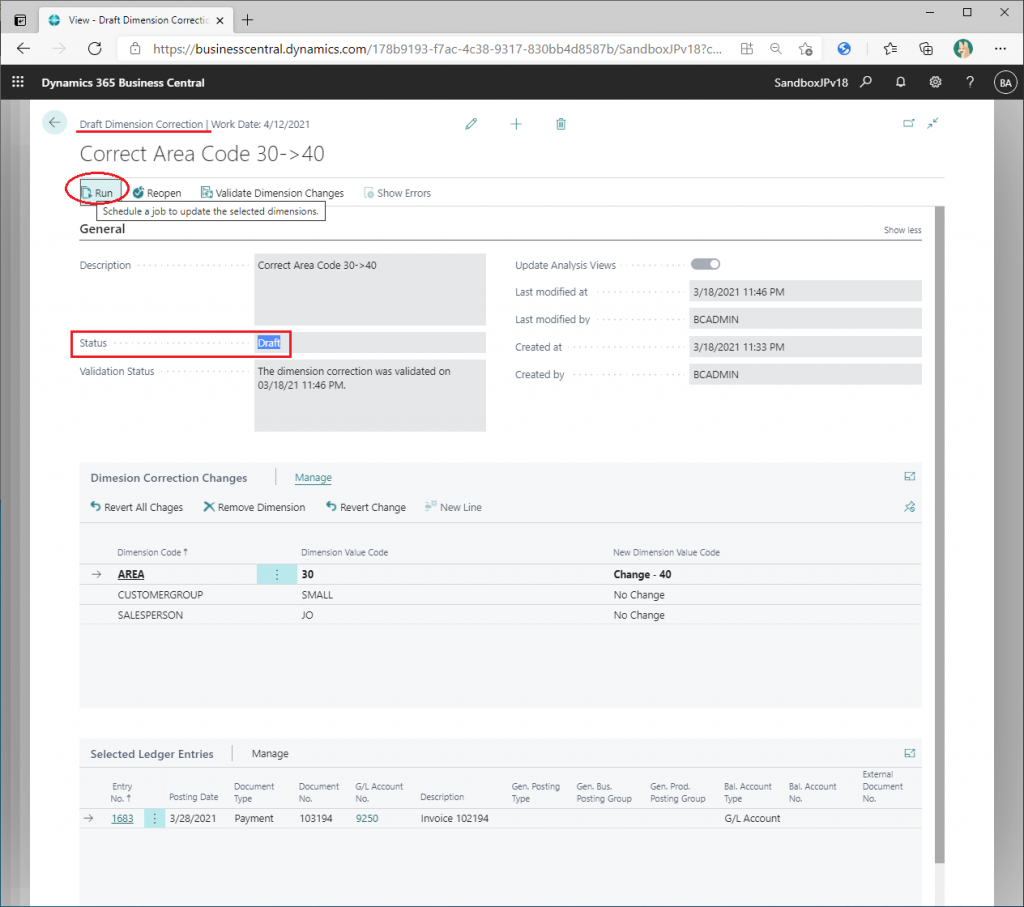
The “Draft Dimension Correction” card page will open. (What’s “Draft”.. I will explain later.)
The bottom section shows the G/L Entry to be corrected. The middle section shows the current values of the dimension code and you can specify the new values.
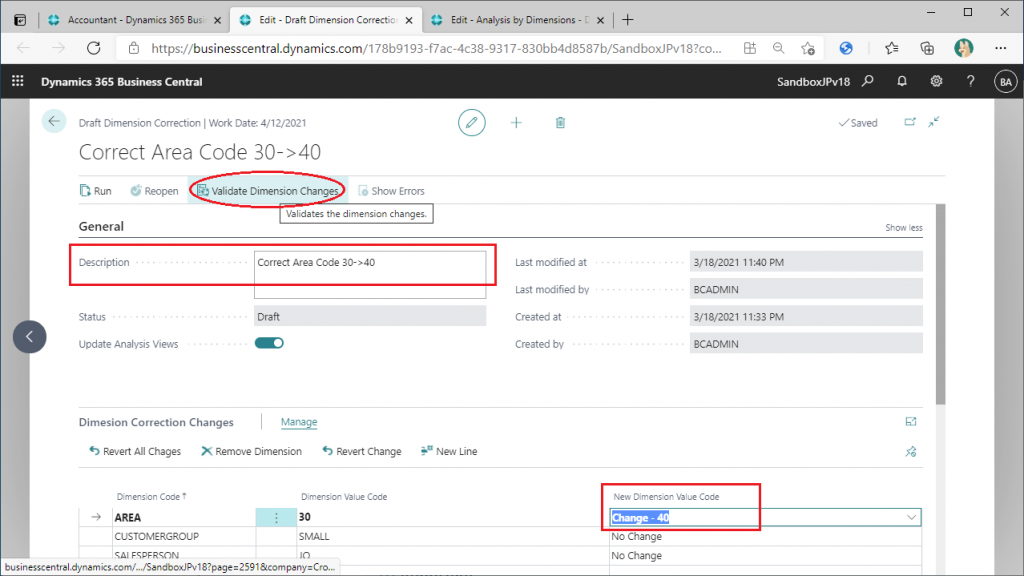
Now, let’s correct the dimension value. First, enter the “Description” and then choose the new values for “Area” dimension code. Current value is “30” and new value is “40”. And click “validate Dimension Changes” button.
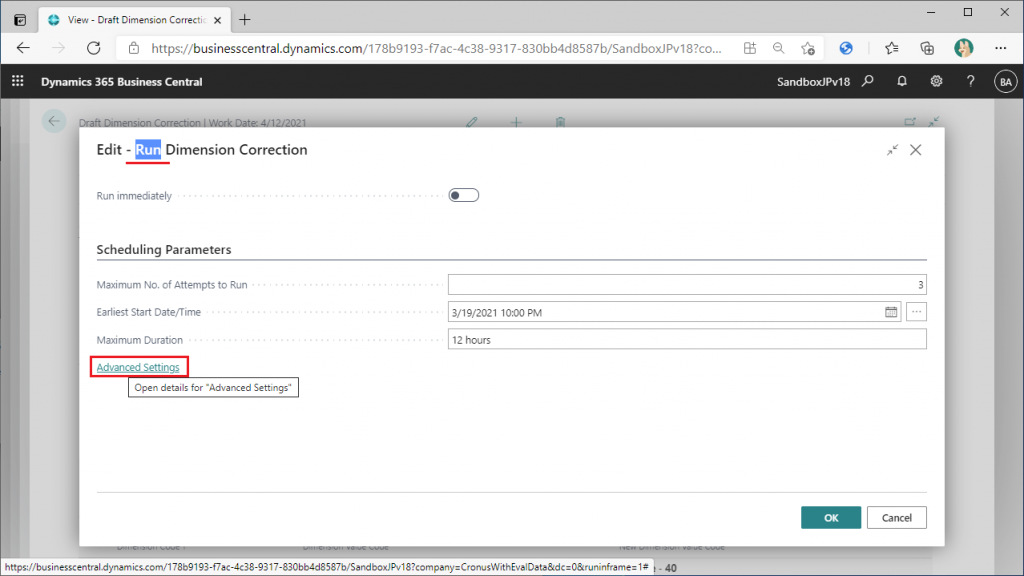
A page like the following image will open. It looks like a batch process. To know the function of this page, click ”Advanced Settings”.
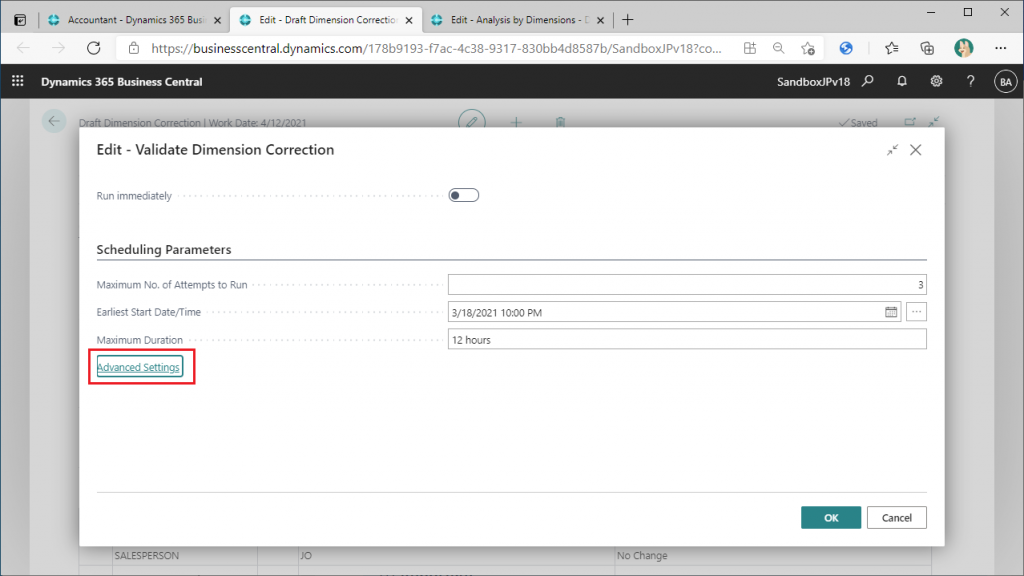
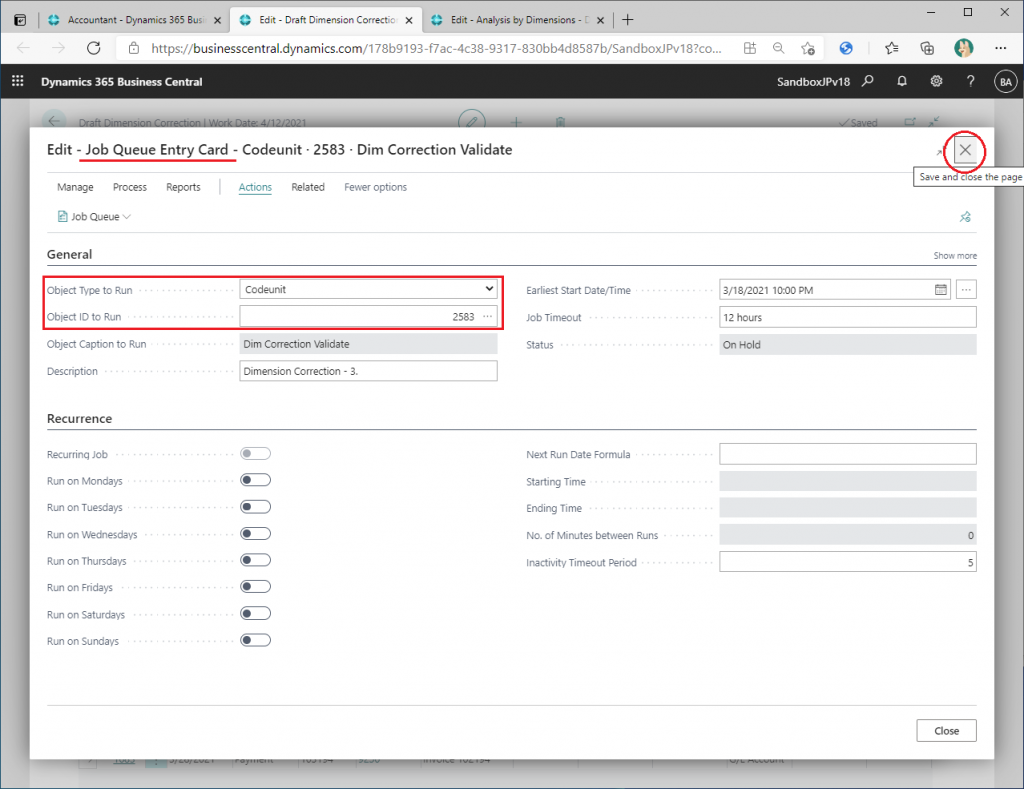
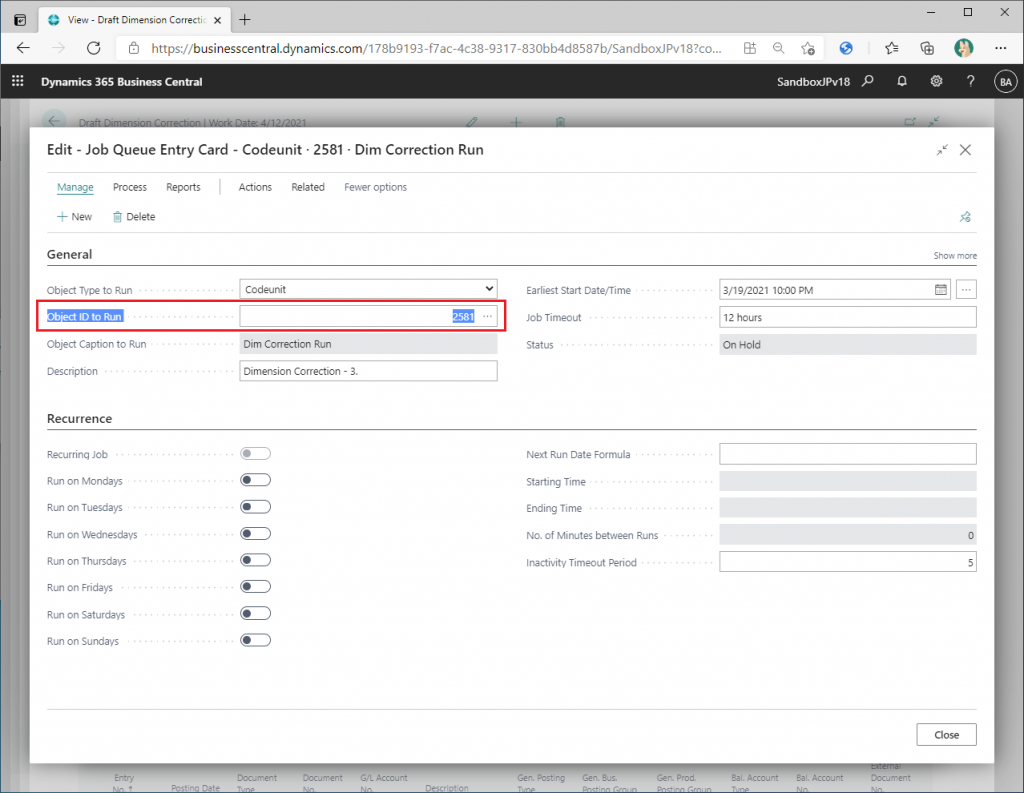
The “Job Queue Entry Card” page is now open. This means that “validate Dimension Changes” will run the program in Codeunit 2583(Dim. Correction Validate). All right, go back to the previous page by clicking the X icon on the upper right.
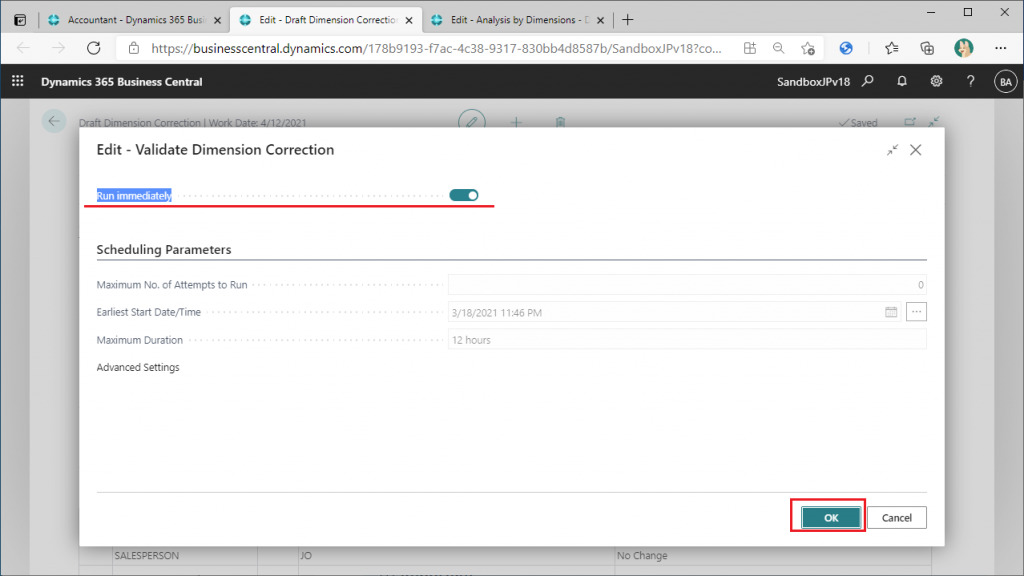
There is an option for immediate execution, so use this one. Check ”Run immediately” on and then click “OK”.
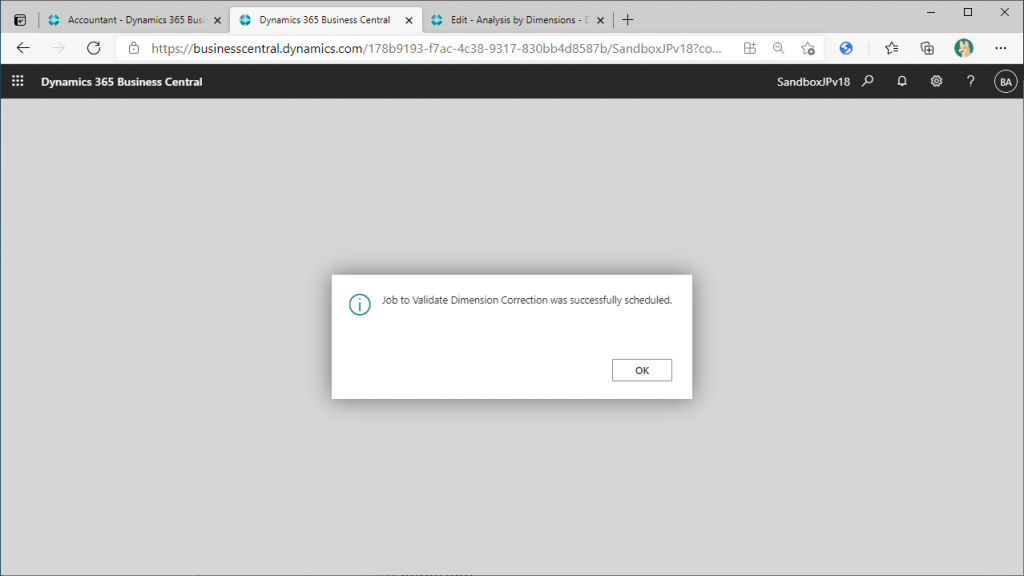
This message makes me a little unsure if it has been executed or just scheduled.
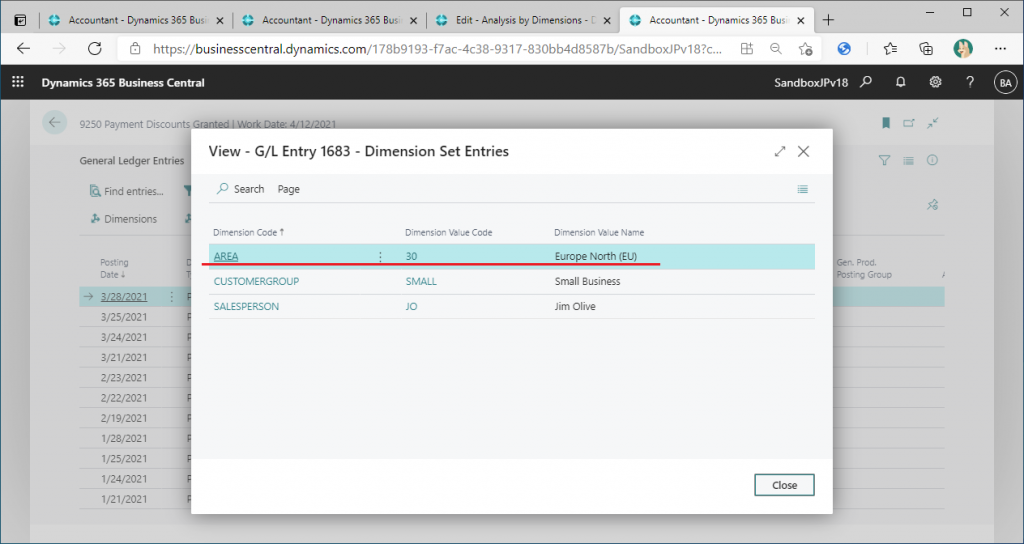
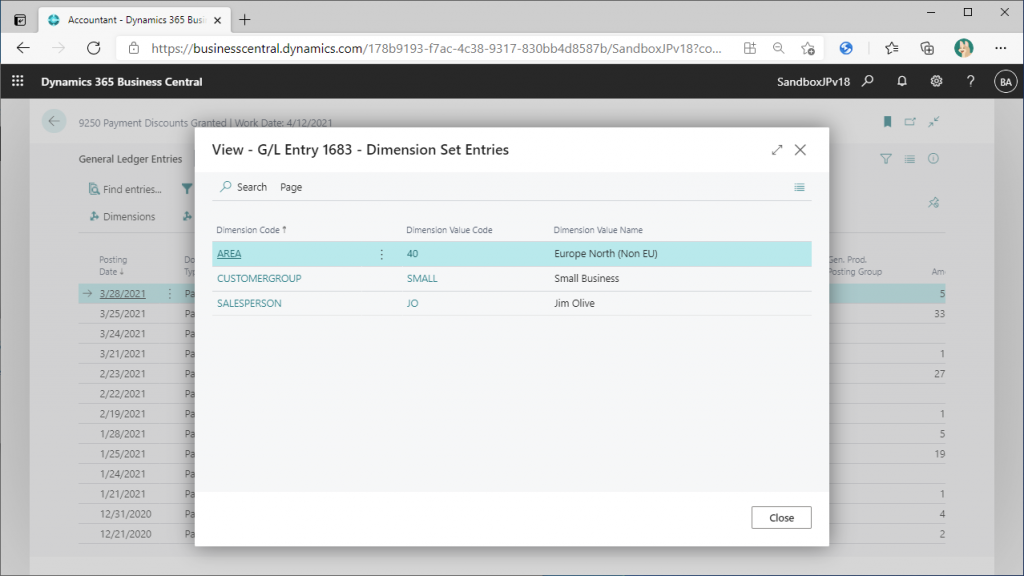
Let’s see the result to see if the value has been changed. Go back to general ledger entries list page, choose ledger entry and click “Dimensions”.
The dimension value has not been changed… Why?
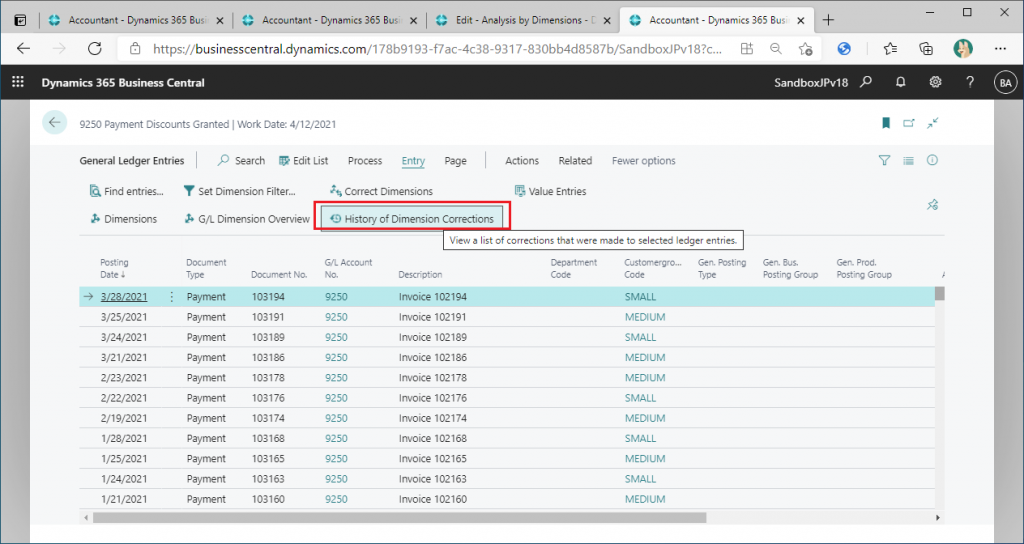
There is a “History of Dimension Correction” button, click on it.
The status is still “Draft”. To figure out why, click on the “View” button.
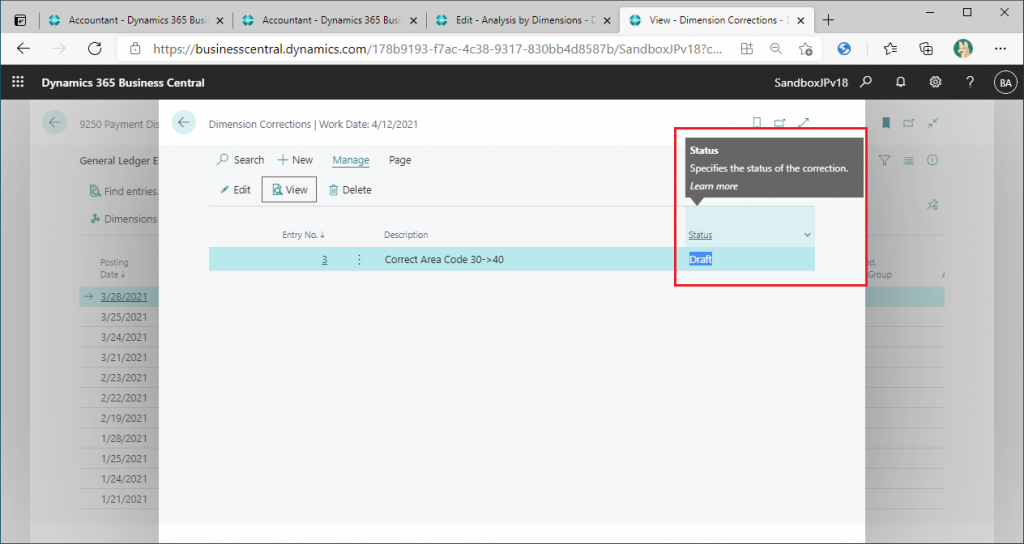
”Dimension Correction” card page opened again. Of course, the status of the card page is also “Draft”, but what is noteworthy is the title of the card page ”Draft Dimension Correction”. In other words, this page is a “Draft” page, and “Validate Dimension Change” will only perform a check, not reflect the change. To reflect the changes, you need to click on the “Run” button.
The page looks like the previous one, but the title is ” Edit – Run Dimension Correction”. The previous page was titled “Edit – Validate Dimension Correction”. There is also an “Advanced Settings” link on this page, so let’s click on it.
The “Job Queue Entry” page is displayed as before, but the code unit number is slightly different: 2581: “Dim. Correction Run”.
Return to ”Edit – Run Dimension Correction” page. Check on “Run immediately” and click “OK”.

Job is scheduled. Click “OK” button.
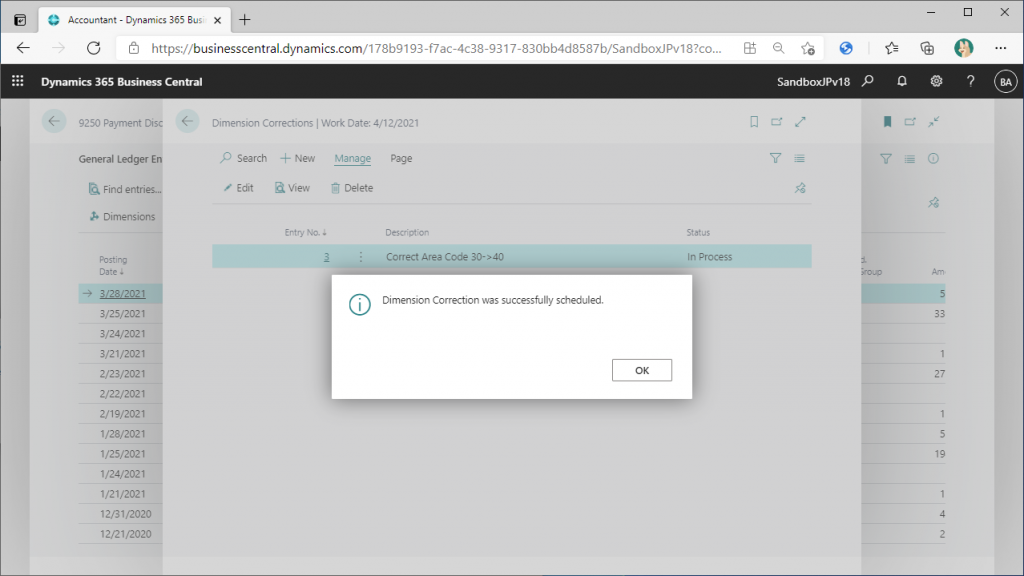
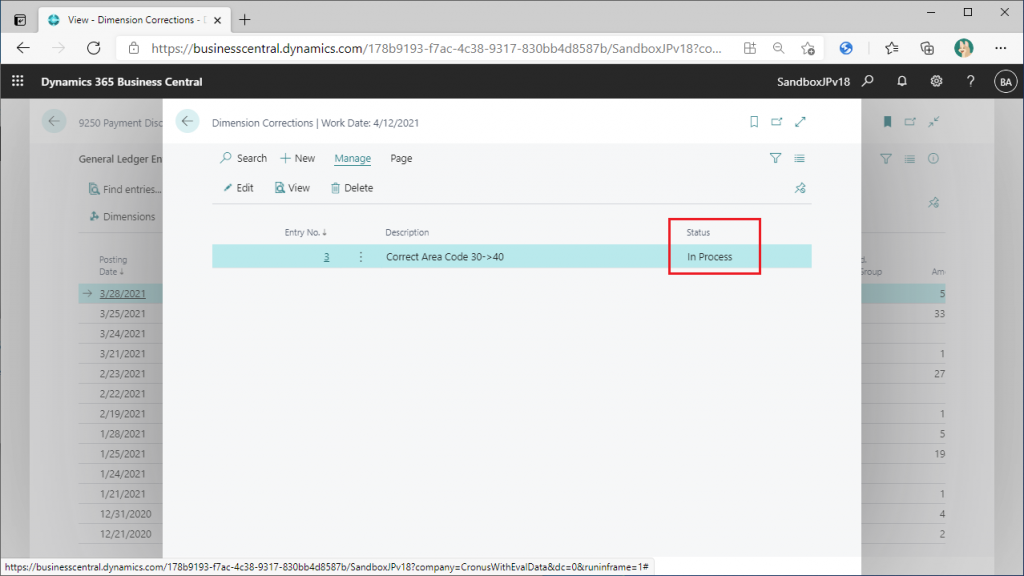
Status changed from “Draft” to “in Process”. Looks good.
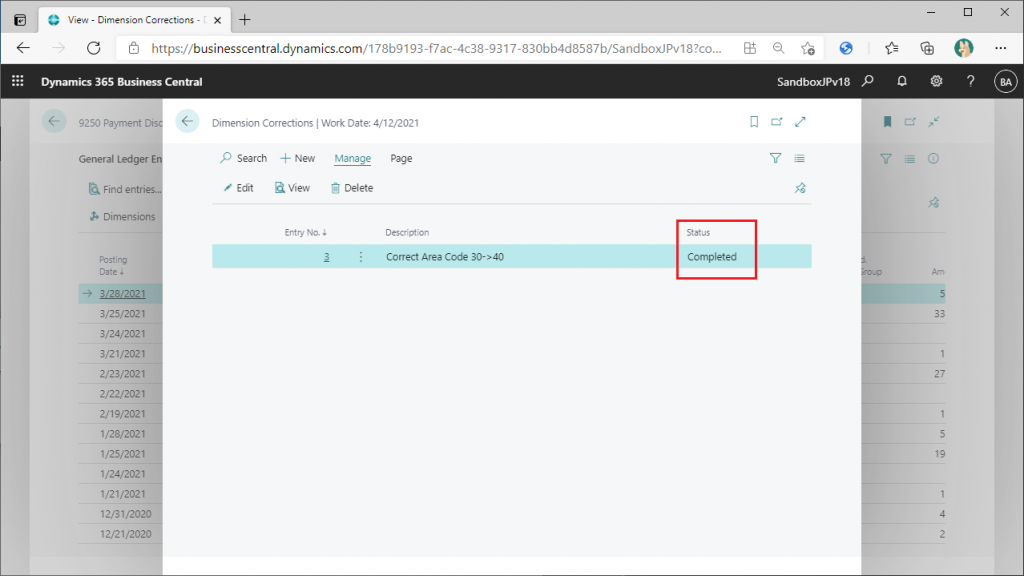
After a few seconds, the status changed to “Completed”. It looks very good!
Go back to the “General Ledger Entries” page and click on “Dimension” to check if the changes have been reflected.
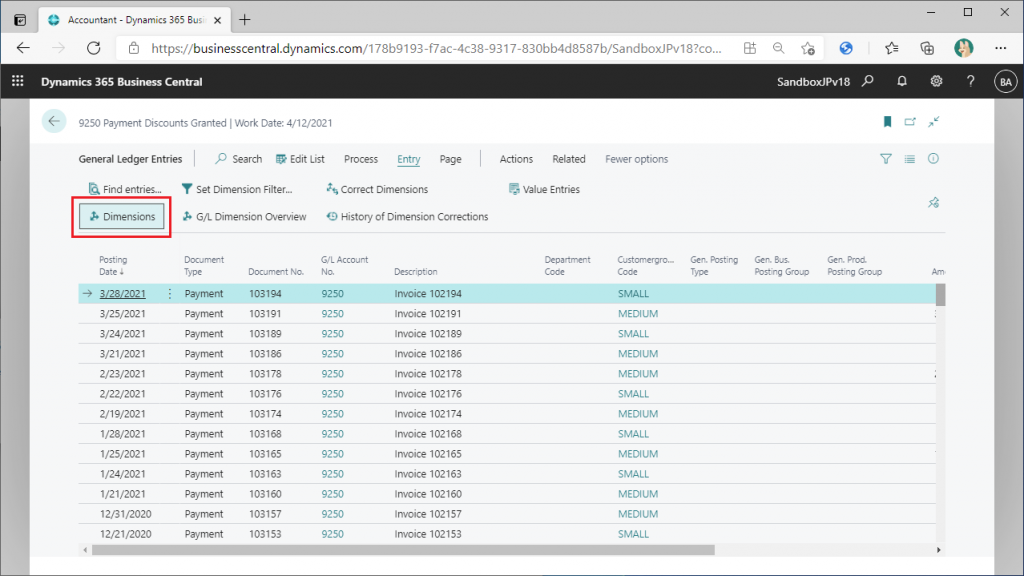
Hmm, it doesn’t seem to have been reflected yet.
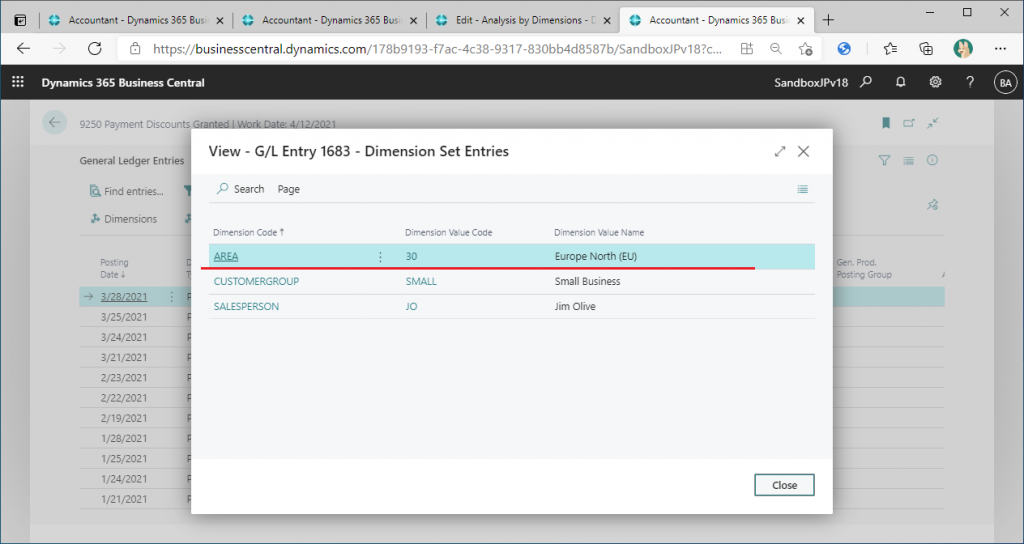
In fact, this page needed a refresh, so press F5 to refresh the screen and click “Dimensions” again.
The “Area” item is now set to “40”. Success!
It was a bit of a detour, but the first correction was completed.
2. Setting Correction Prohibition
The next topic is the setting to prohibit correct to dimension values.
The next topic is the setting to prohibit changes to the analysis item values.
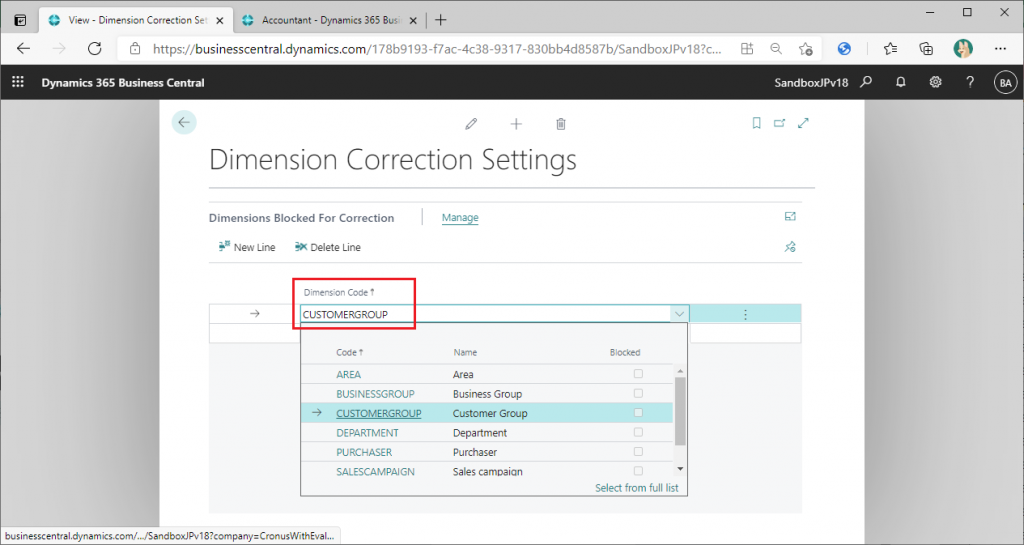
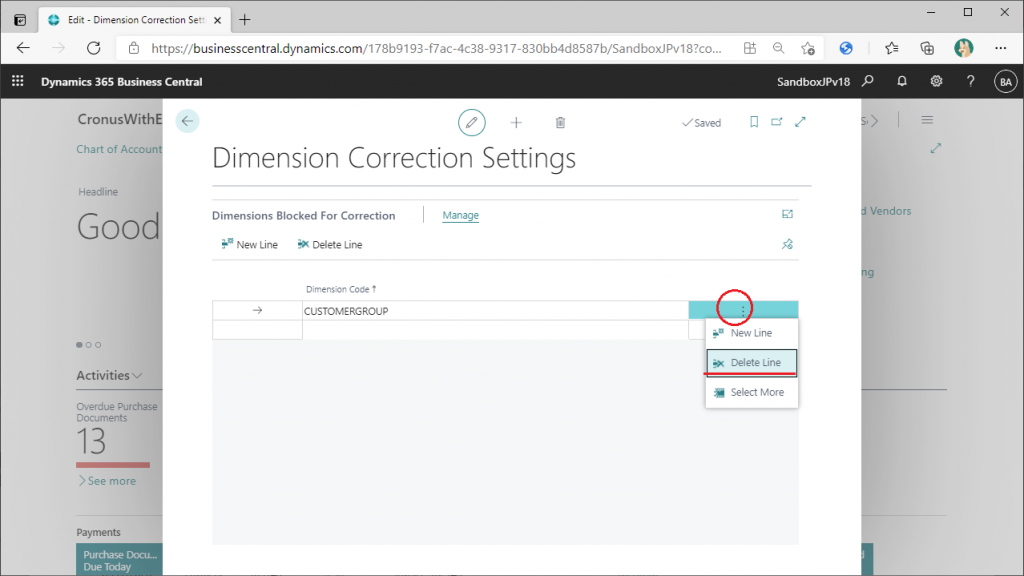
The title of the page is “Dimension Correction Settings”, but the section title is “Dimension Blocked For Correction”. The structure of the page is very simple and only allows you to specify the Dimension Code.

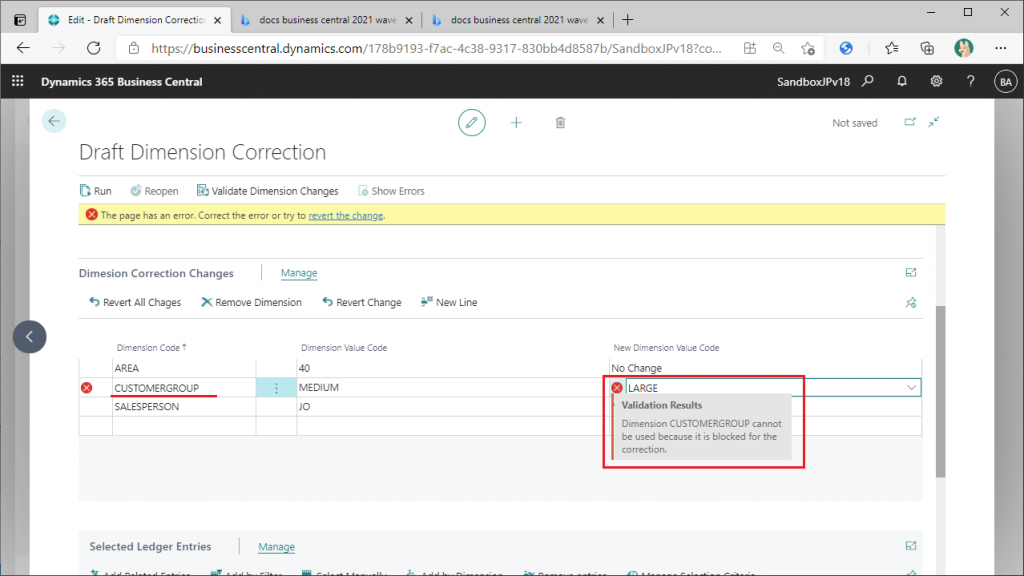
Choose Dimension Code ”CustomerGroup”.
Go back to Dimension Correction Page, and then try to change CUSTOMERGROUP Dimension code, an error will occur. This is because of the setting you just made in previous step.
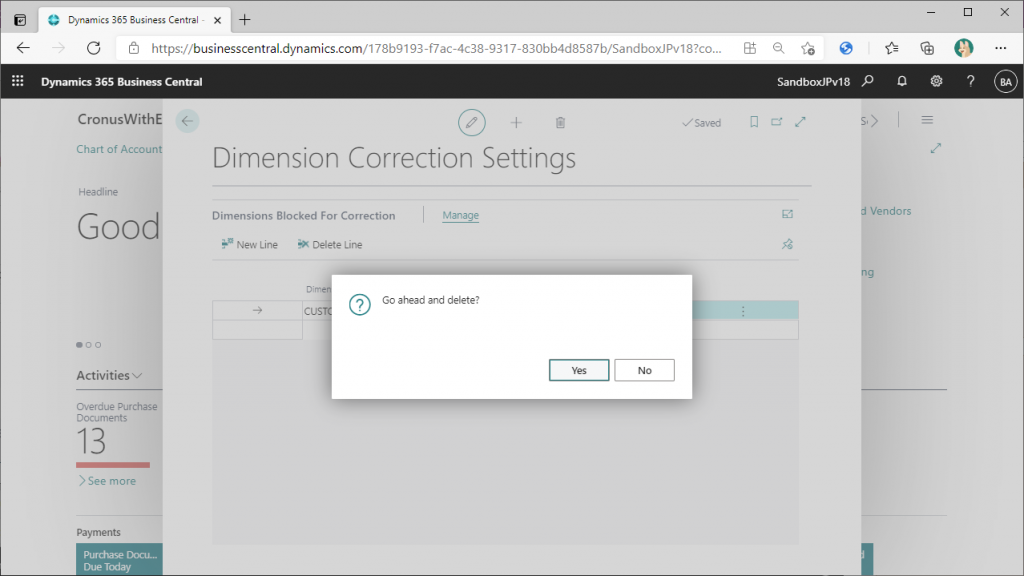
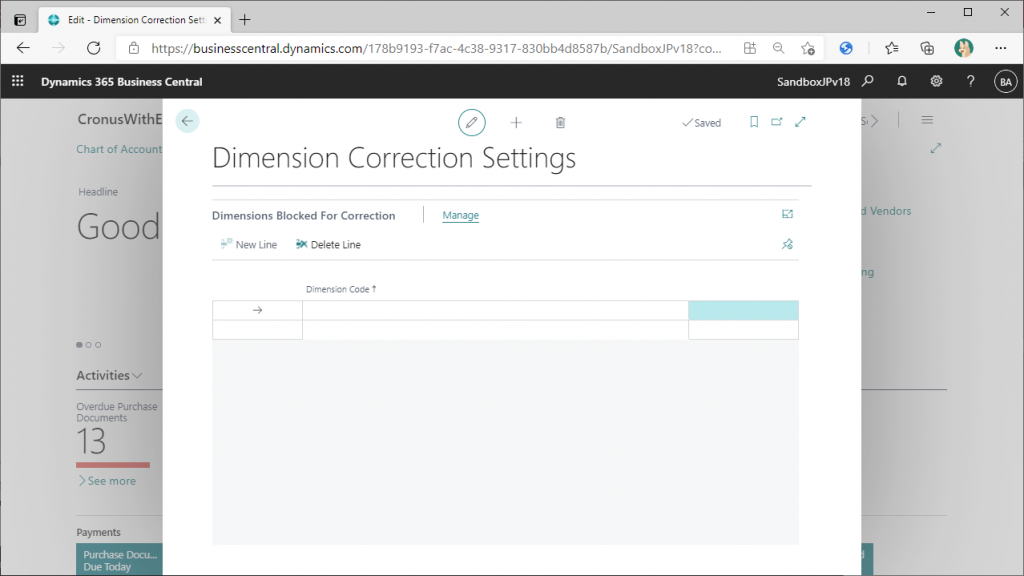
The settings should be restored to their original settings.
The correction feature is very useful, but if anyone can easily correct the data, the analysis data will change and management decisions will not be possible. Therefore, I think this function is provided to prohibit changes to analysis data that should not be changed.
For the next article topic.
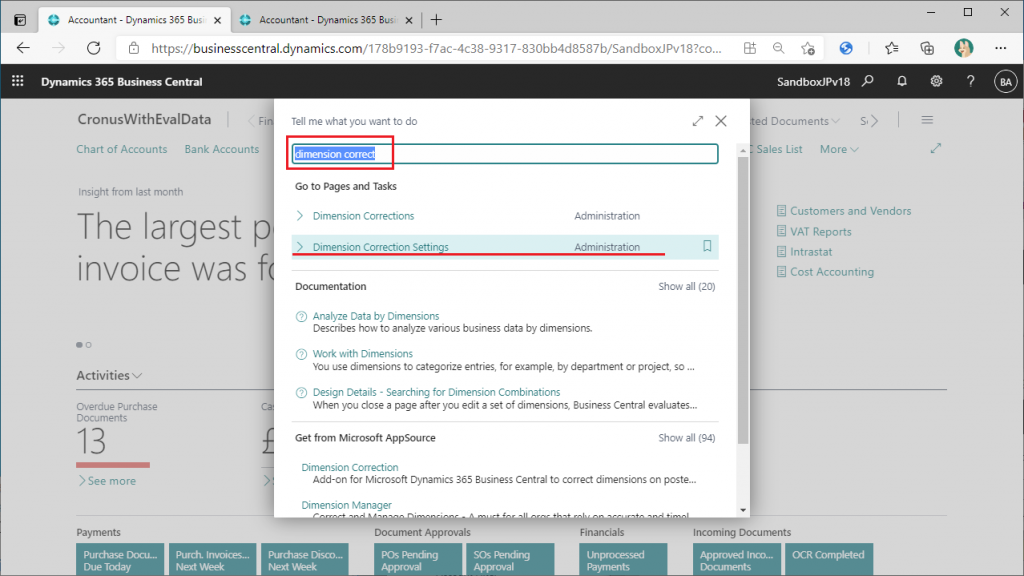
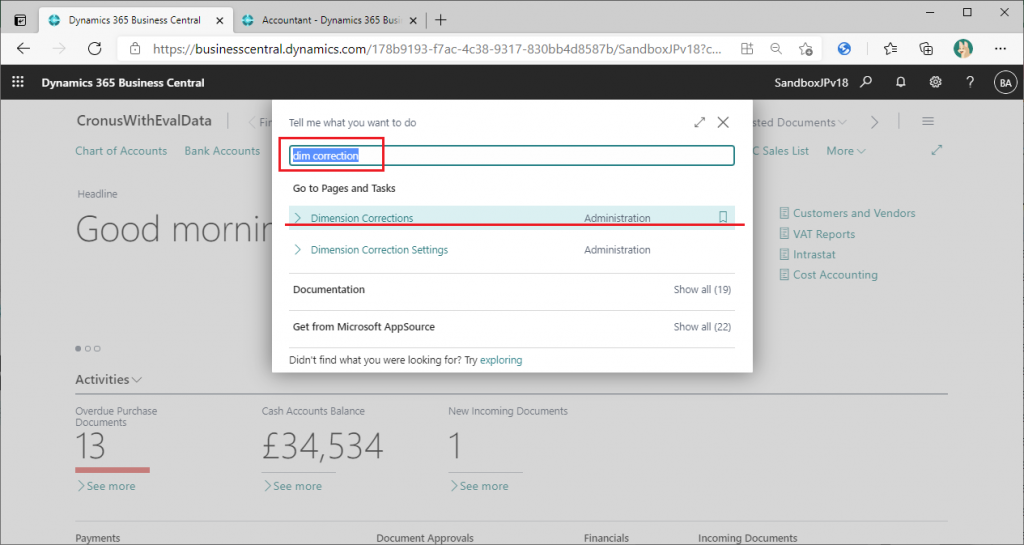
Let’s take a look at another feature that shows up when you search for “dim correction”.
The “Dimension Correction” list page will be displayed. Although only one correction is supposed to have been performed, there are many details here. What is this?
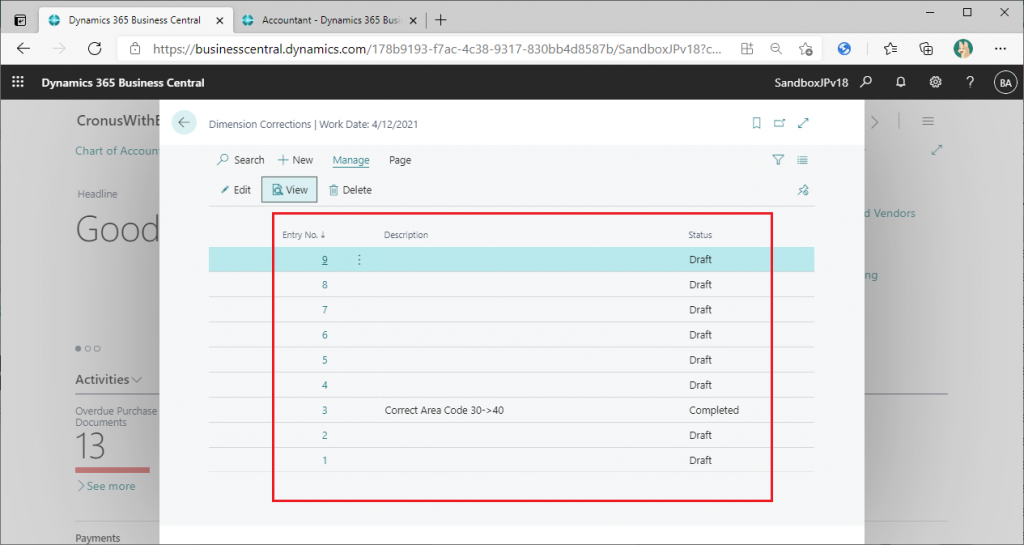
In fact, the way to make corrections from the GL Entries list page is very easy, but not the best way I think. The reason is that you may create unnecessary “Draft” records like this. In the next blog article, I will explain in detail how to change multiple records that match the conditions in a batch.