
This is a sub contents of How to Setup Workflow of D365BC
In this article, I will explain the trick for Demo 2 (https://youtu.be/0V1_OeqPfhU).
Demo 2 is a long scenario, but there is only one trick that needs to be explained in detail. That is, when a new BC client is created, the BC approval workflow is automatically triggered. To sum up, the mechanism is as follows: “Power Automate detects that a new BC client has been created, and the Power Automate flow triggers the BC flow.
The rest steps of the trick above will also be explained along with the flow of the demo scenario.
1. Sales person qualified a lead.
A sales person in D365 Sales has determined that a lead is a “qualified”.
2. Then a new account is created.
If you determine that you have a prospect, an Account record will be created in D365 Sales using the standard functions of D365 Sales. In D365 Sales, Account include not only customers but also suppliers and banks etc.
3. New account record can be found in Account table data on Dataverse
Accounts which were created in D365 Sales can be viewed from the Data tab of the Account table in Dataverse.
4. Synchronize Datavese to BC. Then new customer is created on BC.
BC and D365 Sales are synchronizing their data. Please refer to this article for more information on setting up the integration between Sales and BC. (This is a series of six articles on everything from setting up the environment to setting up the integration)
5. Power Automate trigger BC workflow for the new customer.
This is the key point of this article. Power Automate detects that a BC client has been created by synchronization, and activates the BC approval workflow.
I have created the following flow in Power Automate, which consists of three steps, all three of which are BC connectors. The first step is detecting that a BC customer has been created.
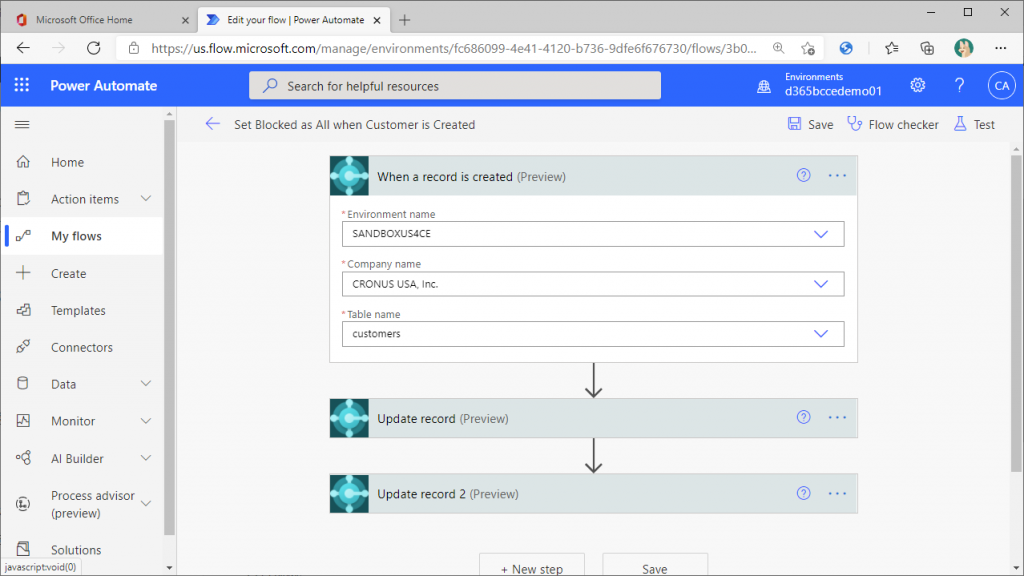
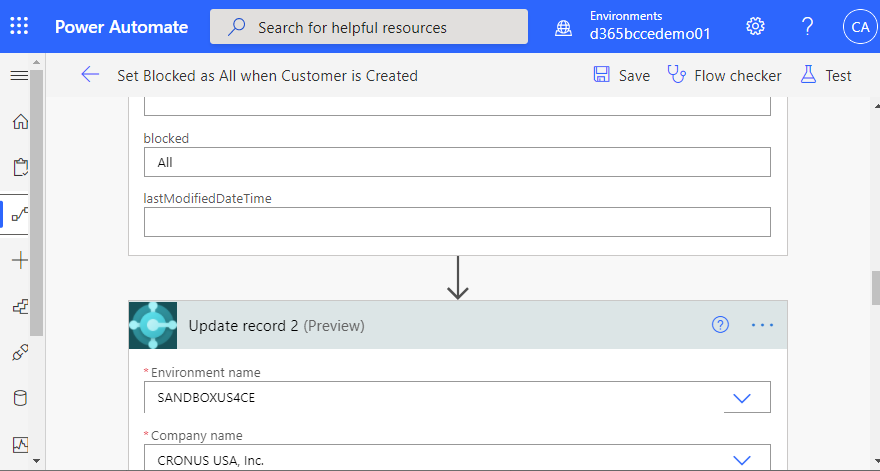
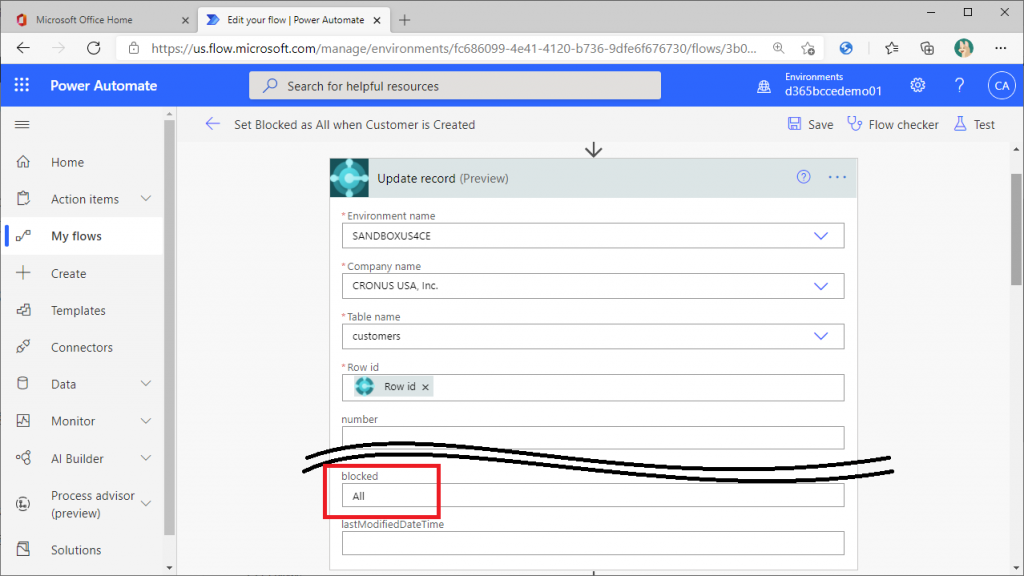
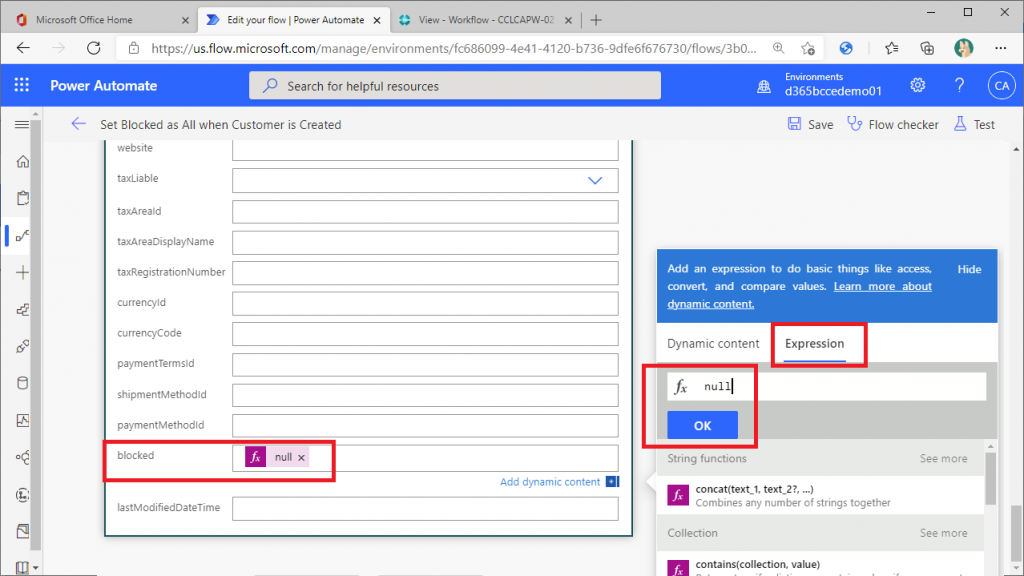
The second step is to set “All” in the “Blocked” field of the newly created BC customer, which means that neither shipping nor billing can be posted for this customer.
The third step is to clear the blank “All” set in the second step.
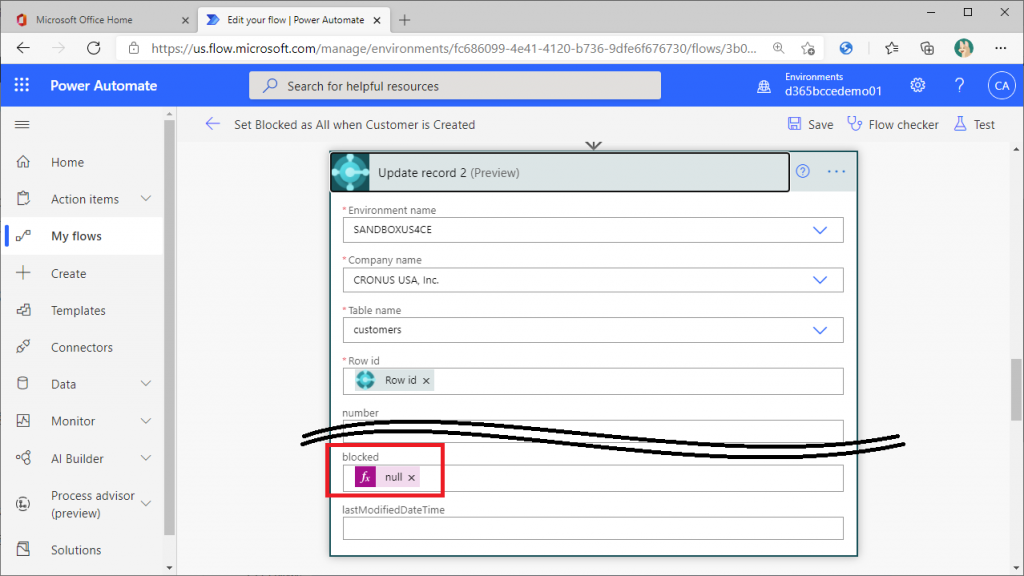
By the way, when setting Null, instead of describing the string ‘Null’ directly, you need to set Null in the function as follows
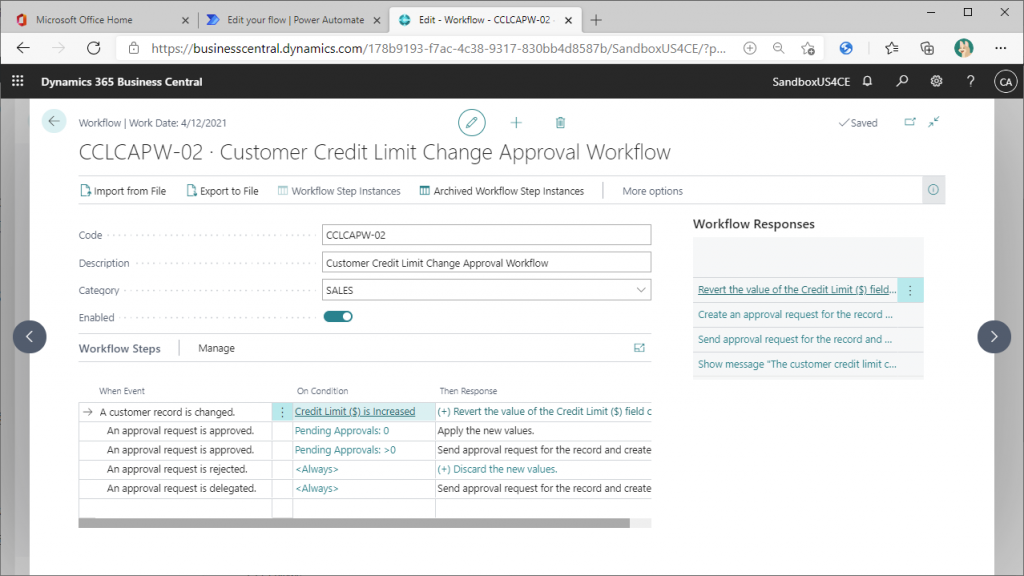
By changing the “Blocked” field from “All” to “Null”, the following BC workflow will be triggered.

This is because the trigger condition is when the value of “Blocked” is decreased. Then, the value is set back to “All” once the workflow is triggered. Then, when the workflow is approved, “Null” will be reflected. This is an application of the article (Creating a Workflow that Starts Automatically when the Credit Limit is Increased), where the value is set to “All” in the second step, but the point is that this BC workflow will not start.

6. Sales manager approve it then “Blocked” is set as blank. And Sales manager apply for a credit limit.
After the sales manager approves and unblocks it, he changes the credit limit. The default value is 0, so change it to 10,000,000 for example. This will trigger the following workflow. Therefore, once the value of the credit limit is set back to 0.
7. Accounting manager approve it and new credit limit is applied for the customer.
This time, the accounting manager approves it. This will reflect the credit limit applied by the sales manager.
8. Accounting manager set posting group and payment method using template.
Although not directly related to the workflow, this is where the accounting manager would set up the accounts receivable and payment terms. Both of these items can be set easily and correctly using the customer template.
This is the end of the demo explanation.
It turned out to be a longer and bigger story than I originally planned, lol.
Thank you for reading to the end!
2件のコメント